background image

12

RD-8 MKII User Manual

Note:

 When you erase a pattern from the chain it doesn’t remove/update the 

number of repeats in that place,  so if Pattern 3 repeated 6 times and that pattern 

is deleted from the chain, Pattern 4 would move to that position and will be 

repeated 6 times.

Live Data Vs Stored Data.

In Song mode there are two forms of data stored:
Live Data: Any changes to songs or patterns that have been made and not stored 

are held in live memory
Stored Data: When a song has been stored.
Use the TAP/HOLD button while editing in COPY/ERASE/DUMP to select either the 

Live or Stored data.
To erase the live or stored song data:
1.  Enter SONG mode.
2.  Press ERASE.
3.  Select SONG.
4.  Use TAP/HOLD to select Live or Stored data.
5.  Press ERASE to complete the operation.

Changing the current song while in playback.

It is possible to change the current song while in playback. This allows songs to be 

changed on the fly when needed without having to stop playback.
1.  Enter SONG MODE.
2.  Hold TAP/HOLD button.
3.  Select the next song with step button (1-16) to go to after the current 

pattern has finished.

4.  The song step button you have selected will flash white while the others will 

flash red, now select the pattern from the new song.

5.  When pattern is selected, the button will fast flash red until the selected 

song and pattern starts.

Note:

 this will break the song chain playing.

8.  Creating a Song Chain  

(Song Mode)

Songs are a collection of up to 16 patterns which can be played and interacted 

with in a live playing format. Pattern Record mode is used to arrange the patterns 

into the structure of a song (described in section 7). Songs must be stored with 

Auto Scroll on in order to chain songs together.
A total of 16 songs can be created with up to 16 patterns in each. That makes 256 

possible patterns in the unit at any one time.
Please note a song has to play to the end before it will advance to the next song. 

This is how seamless playback is created for extended performances. You cannot 

switch songs halfway through playback. This can only be done by stopping 

playback and selecting a different song.
To chain songs:
1.  Press the SONG button to enter Song Mode, make sure RECORD is disabled, 

USE the STEP BUTTONS 1-16 to choose a song (white LED on).

2.  Press the RECORD button.
3.  You can now select the next song in the chain, this will be shown 

by a red LED.

4.  If no Song is selected the chain will go back to Song 1.
5.  Save song.
Example:
After you have programmed and saved 3 songs that are song 1, song 2 and 

song 3, follow the above instructions, you can chain song 1 to song 2 as below:
1.  Press the SONG button to enter Song Mode, make sure the RECORD is 

disabled, press STEP 1 to choose song 1.

2.  Press the RECORD button.
3.  Press STEP 2 to chain song 2 to song 1, the red LED of STEP 2 will light.
4.  Save song 1
Now to chain song 2 to song 3:
1.  Press the SONG button to enter Song Mode, make sure the RECORD is 

disabled, press STEP 2 to choose song 2.

2.  Press the RECORD button.
3.  Press STEP 3 to chain song 3 to song 2, the red LED of STEP 3 will light.
4.  Save song 2
As song 3 has not been selected in to a chain song, it has the default chain song 

which is song 1.
After finishing the above steps, press RECORD to disable it, press STEP 1 to select 

song 1, make sure both AUTO SCROLL in Song and Pattern Mode are set to on, 

then press play, the sequencer will play from song 1 to song 2 then to song 3. If 

the song chain PREFS is set to loop, after song 3 plays to the end it will go back to 

song 1 again.
Please note that this feature over-rides the Chain Songs function in Settings. 

Deselecting the AUTO SCROLL button while a song is playing reverts to the 

original Chain Songs setting.

NOTE: 

When Auto Scroll is active for Songs it will affect how patterns are played 

back so turn Auto Scroll off for normal pattern playback.

TIP:

 In the SYNTHTRIBE app patterns and songs can be created and saved to and 

from the RD-8 MKII.

Auto save the chain song:

In SONG mode with record enabled, press any step button to select that song as a 

chained song for current song, the chained song will be auto saved.

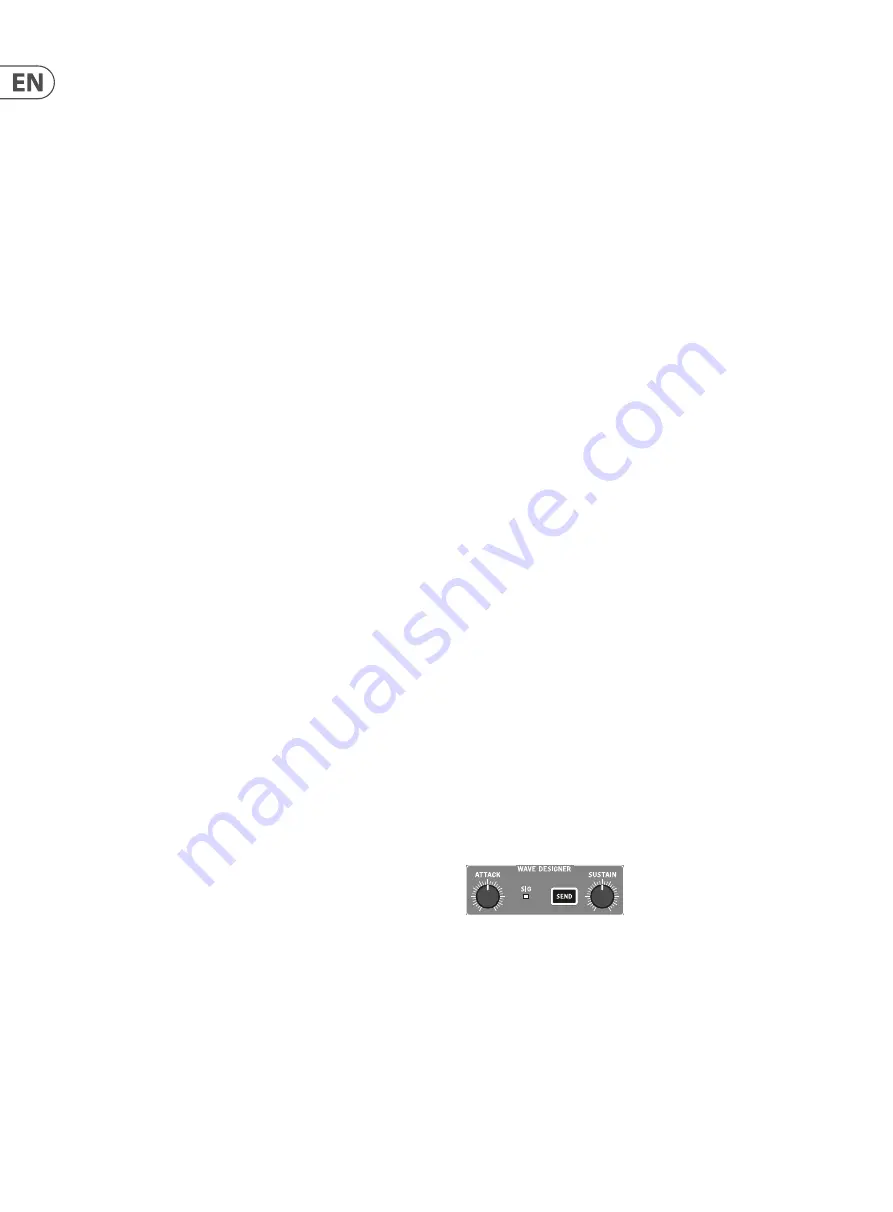
9.  Wave Designer

Wave Designer is a powerful tool for adjusting signal transients and dynamics, 

such as attack and sustain. Use the Wave Designer to make a snare drum really 

crack in the mix, or to expand the bass drum to be even more devastating. 

With both ATTACK and SUSTAIN controls set to 12 o’clock the Wave Designer 

is essentially in bypass and will not affect any voices being sent to the Wave 

Designer via the bus.
Adjusting the ATTACK knob will make the opening transient of the voice sound 

punchier. Increasing the SUSTAIN control acts in a similar way as a compressor, 

allowing the peaks to carry on longer before decay. The effect can also be used to 

reduce the sustain for a more staccato sound.

NOTE:

 Using a long sustain on naturally staccato sounds (e.g. Rim Shot) 

may cause noise. Dial this noise out by reducing the sustain amount.
All voices sent to the Wave Designer as described will then pass into the Analog 

Содержание RD-8 MKII

Страница 1: ...V 1 0 User Manual RD 8 MKII Classic Analog Drum Machine with 16 Drum Sounds 64 Step Sequencer Wave Designer and Dual Mode Filter...

Страница 2: ...nt 4 character LED display for tempo Table of Contents Thank you 2 Important Safety Instructions 3 Legal Disclaimer 3 Limited warranty 3 1 Introduction 4 2 Features 5 3 Front and Rear Panel Control La...

Страница 3: ...void injuryfromtip over 13 Unplugthisapparatusduringlightningstormsor whenunusedforlongperiodsoftime 14 Referallservicingtoqualifiedservicepersonnel Servicingisrequiredwhentheapparatushasbeen damagedi...

Страница 4: ...og drum beats the Behringer RD 8 MKII gives you the power to create fascinating rhythms with incredible power and ease The RD 8 MKII s pure analog signal uses legendary analog circuits with some addit...

Страница 5: ...Set separate chain preferences for each of your parameters allowing them to persist globally or to switch on song or pattern changes Parameters include Tempo Swing Flam Probability independent track...

Страница 6: ...ack Controls 23 TAP HOLD Set the tempo of the unit with 5 taps Hold for quick macro control 24 DISPLAY Multi function 4 character display 25 RECORD Enable disable record mode 26 STOP Stops the current...

Страница 7: ...m tasks when used in conjunction with the 50 SETTINGS button or for deeper editing 50 SETTINGS Used in combination with the 49 STEP BUTTONS to select different operational modes 51 AUTOFILL Select and...

Страница 8: ...art stop signal on ring and clock on tip 83 SYNC OUT SYNC external devices to the Rhythm Designer using an unbalanced 1 8 3 5 mm jack 84 BOOT Enter DFU boot mode for software updates 4 Overview This o...

Страница 9: ...ame functions as 4 LOW TOM LOW CONGA 6 HI TOM HI CONGA Same functions as 4 LOW TOM LOW CONGA 7 RIM SHOT CLAVES The switch determines which sound is in use The LEVEL control adjusts the level compared...

Страница 10: ...tern The DUMP control works in the same way as the SAVE control Instead of saving the DUMP control will output the selection as a SysEx message This action sends the pattern song data as SysEx This in...

Страница 11: ...Step 3 hold STEP number button then press TRIGGER Note repeat can be added with or without step record on with this method Track Mute This function lets you mute any voice s within a pattern song or g...

Страница 12: ...Song 1 5 Save song Example After you have programmed and saved 3 songs that are song 1 song 2 and song 3 follow the above instructions you can chain song 1 to song 2 as below 1 Press the SONG button...

Страница 13: ...ilter ON button Filter plays stored automation data Solid filter ON button Filter in live control mode At any time you can drop into Record Mode and adjust the filter settings that will be stored with...

Страница 14: ...in a pattern or song 2 Song where all patterns within in a song will follow the tempo set within that song even if a different tempo is stored within a pattern 3 Pattern where all patterns will play a...

Страница 15: ...bally by Song or by Pattern Mute Preference Set the mute control preference Globally by Song or by Pattern Solo Preference Set the solo control preference Globally by Song or by Pattern 11 6 FILTER Th...

Страница 16: ...by the FLAM setting Flam can be turned on and off per step as described below 1 Press SETTINGS 2 Press FLAM STEP BUTTON 10 3 Select the voice you wish to add flam on 4 Use the step keys 1 64 via leng...

Страница 17: ...th of the flam Flam is the simulated effect of a drummer hitting a note with 2 sticks The amount of flam dictates the length of time between the next hit after the first and can be programmed per step...

Страница 18: ...ollow which voice Same with Trigger Out Assign1 Preferences In addition to the Settings described above there are a number of Preferences that can be used to specify whether certain sequencer paramete...

Страница 19: ...is called the Live Song Changes the user makes to the Live Song Data file do not persist the file must be saved back to the Storage Memory before another Song Data file is loaded Song Arrangement All...

Страница 20: ...Values Closed Hat Step Values 1 64 The sequencer events triggered on the 64 steps of the Closed Hat track Events include Step On Off Step Prob on off step flam on off Step Repeat on off and Step repe...

Страница 21: ...ce is set to Pattern selecting a new pattern for playback will trigger the corresponding change in the sequencer A change to the Step Size is one such example Parameter Name Description Values Tempo T...

Страница 22: ...r SONG MODE 2 Hold TAP HOLD button 3 Select Song with step button 1 16 to go to after current pattern has finished 4 The song step button you selected will flash white and the others will flash red no...

Страница 23: ...23 RD 8 MKII User Manual...

Страница 24: ...l 15 RD 8 MKII Set up Example Connect a MIDI Device MIDI OUT Studio Monitors Mixer Audio Input USB Out USB In Mono Audio Output BD Audio Output Trigger Output Trigger Input Power Adaptor Audio Output...

Страница 25: ...25 RD 8 MKII User Manual Studio Monitors Mixer Audio Input Mono Output To Return Input Audio Output Audio Input Individual Voice Output Power Adaptor...

Страница 26: ...off switchable Sig LED Red Analog Filter Type State variable 12 dB slope Cutoff 10 Hz 15 kHz adjustable Resonance 0 10 adjustable HPF button LPF HPF mode switchable On button On off switchable Sync Se...

Страница 27: ...are not directly associated with the voice engines Harmonics A series of integer related sine waves at varying levels creating different timbres Waveforms other than a pure sinusoidal generate various...

Страница 28: ...ammable device or module used to arrange sequence timed events into musical patterns and songs Sig Signal Shows presence of audio Step A step is one stage in a sequence or pattern Solo To isolate a ch...

Страница 29: ...nstallation If this equipment does cause harmful interference to radio or television reception which can be determined by turning the equipment off and on the user is encouraged to try to correct the...

Страница 30: ...We Hear You...

Отзывы: