

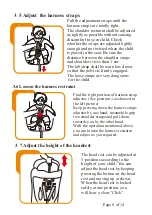


1.Put both side of
together.
the buckle clip
2.Put the metal plates into the button as the picture shows. when hear
a click, it shows it
fi
ts well. pull the metal to check whether the buckle is
fi
tting correct.
3.If need to release the straps, press the red button, The clip will
be released.
Page 7 of 14
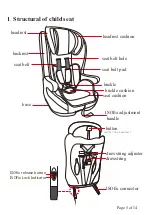
3
.
4
Operation of buckle
First step
Second step
Third step
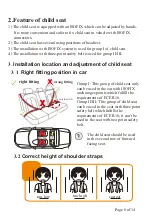
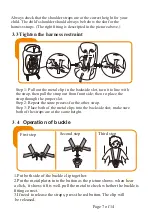
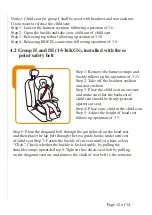
3.3 Tighten the harness restraint
Step 1: Pull out the metal clip in the backside slot, turn it to line with
the strap, then pull the strap out from front side; then re-place the
strap through the proper slot.
Step 2: Repeat the same process for the other strap.
Step 3: Place both of the metal clips into the backside slot; make sure
both of the straps are at the same height.
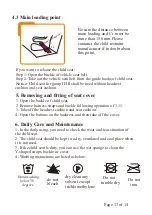
Always check that the shoulder straps are at the correct height for your
child. The child's shoulder should always be below the slot for the
harness straps. (The right
fi
tting is descripted in the picture above.)