12 / EN
Cooker Hood / User Manual
5
Installation Of Appliance
4x
Ø10mm
F
A
CAUTION
Before drilling, ensure that there
are no power, gas or water pipes
in the close proximity of the
drilling locations.
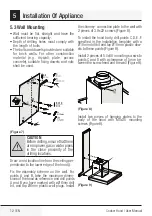
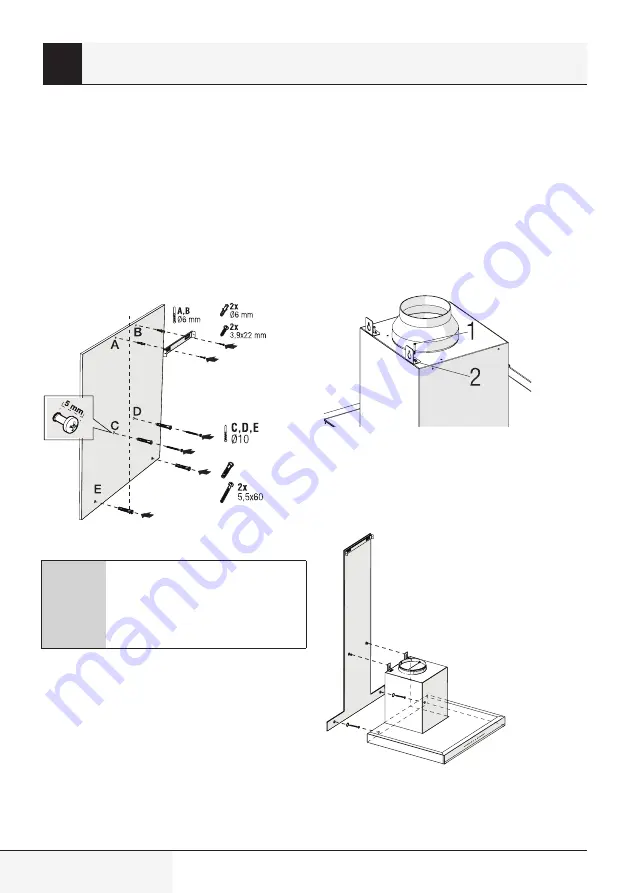
Draw a mid location line from the ceiling per-
pendicular to the lower edge of the hood ().
Fix the assembly scheme on the wall. For
points A and B, take the maximum dimen-
sions of the hood as reference, and drill points
A and B you have marked with a Ø6mm drill
bit, and tap Ø6mm plastic wall plugs. Install
the chimney connection plate to the wall with
2 pieces of 3.9x22 screws (Figure 8).
To install the hood body, drill points C,D,E ,F
specified in the installation template with a
Ø10mm drill bit and tap Ø10mm plastic dow-
els to these points (Figure 8).
Install 2 pieces of 5.5x60 mounting screws to
points C and D with a clearance of 5 mm be-
tween the screw head and the wall (Figure 8).
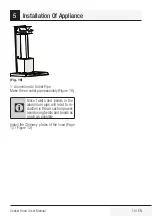
(Figure 7)
(Figure 8)
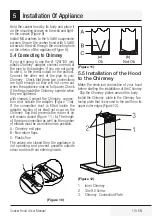
(Figure 9)
5.3 Wall Mounting
• Wall must be flat, straight and have the
sufficient bearing capacity.
• Depth of drilling holes must comply with
the length of bolts.
• The bolts and dowels provided are suitable
for brick walls. For other construction
material (e.g. drywall, plate, porous
concrete), suitable fixing dowels and nuts
shall be used.
Install two pieces of hanging plates to the
body of the hood with M5x35 mounting
screws (Figure 8).
Содержание BHCB 93640 B
Страница 1: ...Hood User Manual BHCB 93640 B BHCB 93640 BH EN DE FR ES BG BS KA NL PL PT RO SK SQ CZ ...
Страница 194: ......
Страница 195: ......
Страница 242: ...www beko com Arçelik A Ş Karaağaç Caddesi No 2 6 34445 Sütlüce İSTANBUL ...


