background image

Operating Instructions 


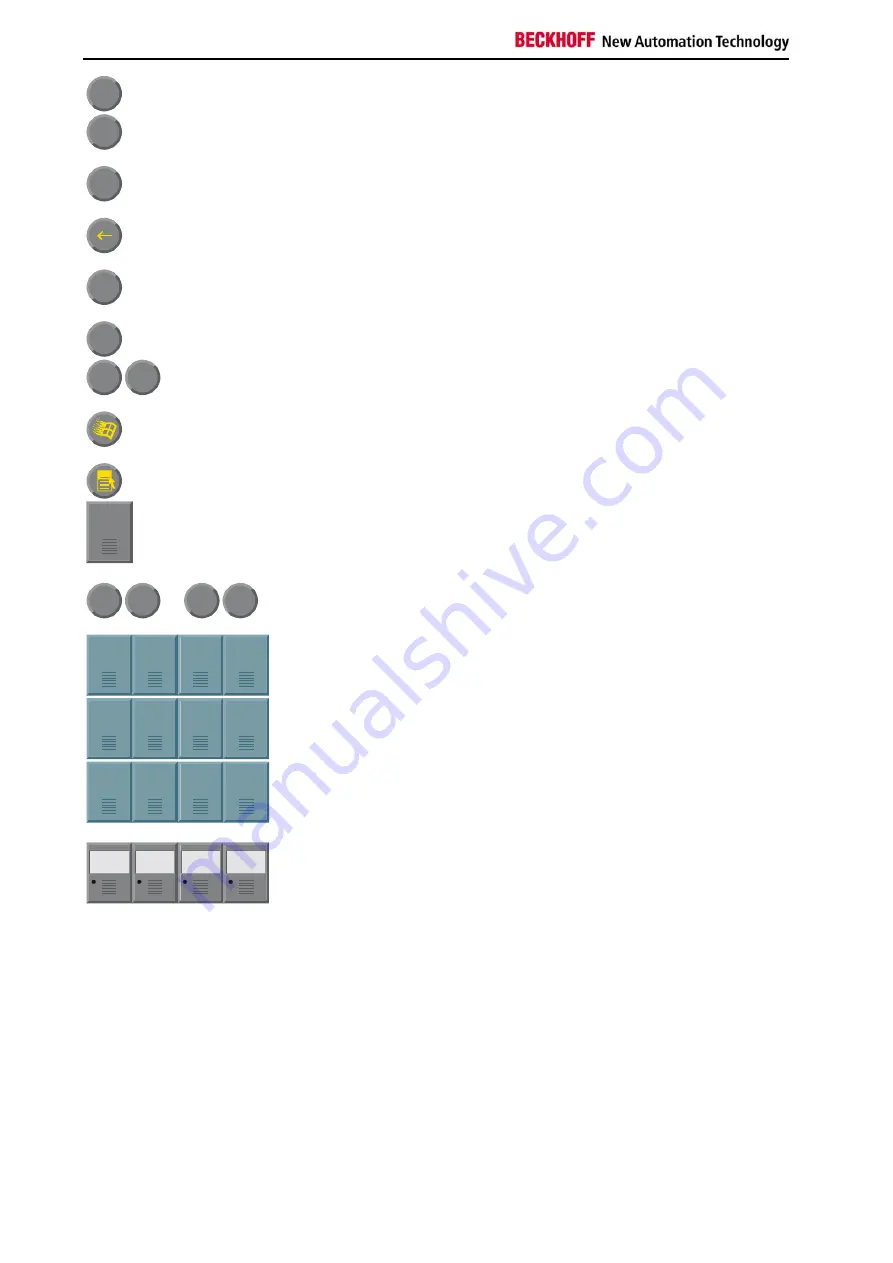
Print


Print-Screen 

prints a hard copy of a text screen on the printer. 


Pause


The Pause key stops the computer until another key is pressed (only under 
MS-DOS). 
 

Enter


Your input is confirmed with the Enter key. 


Backspace deletes the character to the left of the cursor. 


Shift


If the Shift key is pressed at the same time as another key, then instead of 
the numbers you obtain the character printed above the number, and you 
obtain upper case letters instead of lower case letters. 

Caps

Lock


Pressing the 

Caps Lock

 key once activates and locks the 

Shift

 key. 

Pressing the 

Shift 

key cancels this function. 

Ctrl

Alt


Rather like the effect of the 

Shift

 key, 

Ctrl 

and 

Alt

 also change the meaning 

of another key that is pressed at the same time. 


This key brings up the Start menu of the operating system in use (Windows 
95, 98, ME, NT, 2000, XP). 


Pressing this key opens the property sheet of the active (or marked) object.
 

Esc


The 

Esc

 key has the effect of closing dialog windows and of interrupting 

some of the computer’s working operations. 


Q

W

 ... 

1

!

2

@


All other keys bring the character printed on them onto the display at the 
position of the cursor. 
 

F1

F2

F3

F4

F5

F6

F7

F8

F9

F10

F11

F12


The meaning of the function keys, 

F1

 to 

F10

, is determined by the software 

and is displayed at the bottom edge of the display. 

Einschub

Streifen

Einschub

Streifen

Einschub

Streifen

Einschub

Streifen


The function of the special keys above the display is also determined by 
the software. The function is displayed at the top edge of the display. 
The special keys each have an orange LED controlled by the software. 


12


 CP60xx 

Содержание CP60 Series

Страница 1: ...Installation and Operating instructions for Built in Control Panel CP60xx Version 1 4 Date 2007 10 19...

Страница 2: ......

Страница 3: ...ons 8 Mounting of the Control Panel 9 Connecting the Control Panel 10 Connecting cables 10 Protective Earthing 10 Operating Instructions 11 Functional description 11 Keyboard codes 11 Servicing and ma...

Страница 4: ...et out in 443 of the German Civil Code or a statement about the assumed use according to the contract as set out in 434 para 1 clause 1 no 1 of the German Civil Code In the event that it contains tech...

Страница 5: ...rol Panel side Items of equipment that have been switched off must be secured against being switched on again Danger Displays used for the control panel s LC display are operated with a voltage of up...

Страница 6: ...warning notes attached to the Control Panel are removed and all notes remain legible National regulations depending on the machine type Depending on the type of machine and plant in which the Control...

Страница 7: ...CP Link Pin Signal 1 TXD Power supply 2 GND CP Link B Data Power supply BNC connector Connector description CP Link connection CP Link The CP Link connection allows data transmission between Control P...

Страница 8: ...C9900 K121 Length 50 m cable type H2000FLEX bend radius 50 mm C9900 K122 Length 65 m cable type H2000FLEX bend radius 50 mm C9900 K123 Length 70 m for easy installation at the PC and the mounting arm...

Страница 9: ...n temperature make sure that moisture condensation does not form on or inside the device Prior to operation the unit must be allowed to slowly adjust to room temperature Should condensation occur a de...

Страница 10: ...019 6 5 Display 272 3 221 42 258 3 207 CP6010 10 Display 370 336 32 356 322 CP6011 12 Display 372 2 342 2 32 358 2 328 2 CP6012 15 Display 430 4 403 32 416 4 389 Control Panel CP602x Dimensions a b t...

Страница 11: ...ol Panel cutout dimensions Mounting of the Control Panel Release clamping levers Insert the Control Panel into the cutout Release the clamping levers with a No 2 5 Allen key Folding them out Turn the...

Страница 12: ...plug Do not pull the cable Connecting cables The connections are located at the rear of the Control Panel and are documented in the Product Description section When connecting cables to the Control Pa...

Страница 13: ...be operated with a touch screen pen The touch screen may only be actuated by finger tips or with the touch screen pen The operator may wear gloves but there must be no hard particles such as metal sha...

Страница 14: ...ng of another key that is pressed at the same time This key brings up the Start menu of the operating system in use Windows 95 98 ME NT 2000 XP Pressing this key opens the property sheet of the active...

Страница 15: ...t be replaced after a few years depending on the number of operating hours The fluorescent lamps of the 6 5 inch 12 inch and 15 inch displays can be replaced by a technically competent person i Note R...

Страница 16: ...5 inch TFT display NL6448BC20 08 C9900 L364 12 inch TFT display LTD121C30S C9900 L366 15 inch TFT display LQ150X1LW71N Emergency procedures In case of fire the control panel should be extinguished wi...

Страница 17: ...e running Setup settings are incorrect Other cause Remove floppy disk and press any key 1 Boot with boot diskette 2 Start SCANDISK Check the setup settings Call Beckhoff Service Computer boots softwar...

Страница 18: ...e 5 D 33415 Verl Germany Phone 49 0 5246 963 0 Fax 49 0 5246 963 198 e mail info beckhoff com Beckhoff Support Support offers you comprehensive technical assistance helping you no only with the appli...

Страница 19: ...resistance to impact during transport The ambient temperature during storage and transport must be between 20 C and 65 C i Note Pixel errors in the TFT display are production caused and represent no c...

Отзывы: