Part I - Software Installation
Do not connect Bearifi Outdoor AC to your computer yet. Insert CD into CD drive. It may take up to 30 seconds for the auto menu
to appear on your screen. When the menu appears, click on the version of Windows you have (if you have downloaded the
software, run the Setup program inside the download). If the CD menu does not appear, go to your CD drive icon to open it.
Follow the on- screen instructions to complete installation.
When setup is complete, connect the USB cable coming from Bearifi Outdoor AC to a USB port on your computer.
Part II – Connecting to a Network
Bearifi Outdoor AC uses the Windows 8/8.1 Connection Manager
to connect to networks.
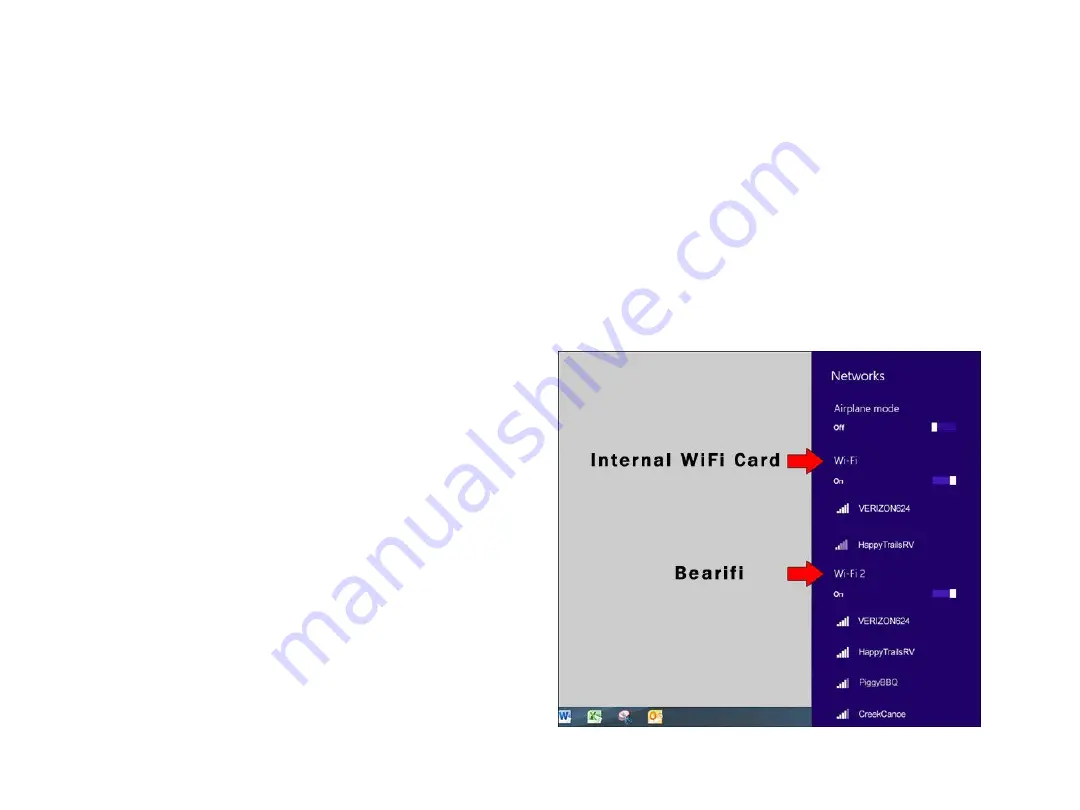
If your PC has an internal Wi-Fi card it will usually be referred
to as ‘WiFi’, and Bearifi Outdoor AC will be referred to as
“WiFi 2”. Follow these steps to connect to a network:
1. Click the Wi-Fi icon on the bottom right corner of your screen.
2. When the Wi-Fi panel appears per this image, choose a network
under “WiFi 2”, which represents networks Bearifi Outdoor AC
can see.
3. Click on your Network, and click the Connect button to join.
If the network is password protected, you will be asked for the
password.
Содержание Outdoor AC
Страница 1: ...Windows 8 Installation guide...


