background image

EN

27

4e.

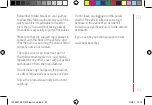
 It should be placed in the right position, this means 

that the harness should come out approximately 1 cm 

above the child’s shoulders 

4f.


Close the compartment 

again.

4g.


Once the child is positioned correctly, tighten the 

harness by pulling the strap making sure that it fits 

snugly.

The correct tension means that between the harness 

strap and the baby’s chest there should be a gap of 

no more than 1 cm. (just enough to slide one finger 

between the baby and the harness).

Getting the child out of the safety seat.

4h.

 Loosen the harness straps by pressing the tension 

button. Then unfasten the buckle and lift the child 

out  

4a.

WARNING! The straps must not be twisted. The harness 

must be correctly fastened and the straps should fit 

the child snugly.

5. FITTING THE SEAT ONTO THE PRAM

5a.

 With the handle set to position 4 (diagram 

2e

), slot 

the baby carrier onto the pram anchors until you hear 

it click into place.

5b.

 To detach the baby carrier from the pram, press the 

profix button (10) and pull the baby carrier upwards.

MAINTENANCE

Removing / Fitting the cove

The cover of the NADÓ seat is very easy to take off. On 

the front part there are 2 fastening points for the cover. 

Unfasten these two points and gently pull the front part 

of the cover.

On the sides of the seat there are some plastic parts 

designed to hold the cover in place. Simply pull the 

cover over them gently to take it off.

To fit the cover back on again, follow the same steps in 

reverse. Place the parts in the slot for the sides.

IM 2041,02 ONE instruc ok.indd   27

3/5/21   14:10

Содержание 9006 Y10

Страница 1: ...IM 2041 02 ONE instruc ok indd 1 3 5 21 14 10...

Страница 2: ...IM 2041 02 ONE instruc ok indd 2 3 5 21 14 10...

Страница 3: ...03 LANGUAGES ESPA OL 13 ENGLISH 21 FRAN AIS 29 PORTUGU S 37 ITALIANO 45 IM 2041 02 ONE instruc ok indd 3 3 5 21 14 10...

Страница 4: ...04 PARTLIST 1 2 8 13 9 14 IM 2041 02 ONE instruc ok indd 4 3 5 21 14 10...

Страница 5: ...PARTLIST 05 3 6 10 15 14 12 11 7 5 4 IM 2041 02 ONE instruc ok indd 5 3 5 21 14 10...

Страница 6: ...INSTRUCTIONS 06 1a 1b 1c 1d IM 2041 02 ONE instruc ok indd 6 3 5 21 14 10...

Страница 7: ...INSTRUCTIONS 07 1e 1f 1g 2a IM 2041 02 ONE instruc ok indd 7 3 5 21 14 10...

Страница 8: ...INSTRUCTIONS 08 1 2 3 4 5 2b 2c 2d 2e IM 2041 02 ONE instruc ok indd 8 3 5 21 14 10...

Страница 9: ...INSTRUCTIONS 09 3a 3b 3c IM 2041 02 ONE instruc ok indd 9 3 5 21 14 10...

Страница 10: ...INSTRUCTIONS 10 4a 4b 4c 4d IM 2041 02 ONE instruc ok indd 10 3 5 21 14 10...

Страница 11: ...INSTRUCTIONS 11 4e 4f 4g 4h IM 2041 02 ONE instruc ok indd 11 3 5 21 14 10...

Страница 12: ...INSTRUCTIONS 12 5a 5b IM 2041 02 ONE instruc ok indd 12 3 5 21 14 10...

Страница 13: ...ASE 17 2 INSTALACI N DE LA SILLA EN LA BASE 17 3 INSTALACI N DE LA SILLA CON CINTUR N 18 4 ASEGURAR EL NI O EN LA SILLA 18 5 COLOCAR LA SILLA EN EL COCHECITO 19 MANTENIMIENTO 19 INFORMACI N SOBRE LA G...

Страница 14: ...egor a isize definida en el Reglamento 129 01 de Naciones Unidas y puede ser instalados en todos los veh culos isize homologados seg n el Reglamento 16 No utilice la silla de seguridad sin la funda y...

Страница 15: ...ectamente ajustado y no tiene ninguna vuelta La funda textil es parte integral del sistema de retenci n infantil No puede ser substituido por ning n otro sin la autorizaci n expresa del fabricante No...

Страница 16: ...s 7 Bot n de desbloqueo del asa 8 Sistema Profix 9 Indicador de instalaci n correcta de portabebes 10 Bot n de desbloqueo del sistema Profix 11 Palanca de desbloqueo del portabeb s 12 Bot n de desbloq...

Страница 17: ...2 para ajustar la altura de la pata de apoyo 13 hasta asegurar que est en contacto con el suelo No debe quedar encima de ning n comparti mento En este punto aseg rese que la posici n de la pata de apo...

Страница 18: ...rior del portabebes pasando la cinta por la guia de cintur n 2 Tense el cintur n del automovil Saque las holguras de la cinta del cintur n de seguridad del veh culo tirando de la parte diagonal de est...

Страница 19: ...rre del arn s debe quedar correctamente cerrado y los cinturones deben quedar bien ajustados al ni o 5 COLOCAR LA SILLA EN EL COCHECITO 5a Con el asa en posici n 4 figura 2e encajar el por tabeb con e...

Страница 20: ...e est n debidamente fijados o resguardados INFORMACI N SOBRE LA GARANT A Este art culo dispone de garant a contra defectos de fabricaci n seg n lo estipulado en las Directivas y o Normativas legales v...

Страница 21: ...BASE 25 2 INSTALLING THE SEAT ON THE BASE 25 3 INSTALLING THE SEAT WITH THE SEAT BELT 26 4 FASTENING THE CHILD IN THE SEAT 26 5 FITTING THE SEAT ONTO THE PRAM 27 MAINTENANCE 27 GUARANTEE INFORMATION...

Страница 22: ...129 01 of the United Nations and it can be installed in all i Size vehicles approved under Regulation 16 Check the instruction manual for your vehicle to see if i Size restraint systems can be install...

Страница 23: ...isted The fabric cover is an important part of the child restraint system It must not be replaced by any other cover without explicit authorisation from the manufacturer Do not make any changes to the...

Страница 24: ...n button 7 Handle unlock button 8 Profix system 9 Baby carrier correct installation indicator 10 Profix system unlock button 11 Baby carrier unlock lever 12 Profix system unlock button 13 Support leg...

Страница 25: ...pport leg 13 to ensure that it is touching the floor It should not be placed on top of any type of compart ment At this point make sure that the position of the support leg is at an angle of 90o from...

Страница 26: ...ighten the vehicle seat belt appropriately Get rid of any loose sections of the seat belt by pulling the diagonal part until the seat is firmly anchored in place 4 FASTENING THE CHILD IN THE SEAT Usin...

Страница 27: ...The harness must be correctly fastened and the straps should fit the child snugly 5 FITTING THE SEAT ONTO THE PRAM 5a With the handle set to position 4 diagram 2e slot the baby carrier onto the pram...

Страница 28: ...ent are securely fastened or stored GUARANTEE INFORMATION This item is guaranteed against manufacturing defects as stipulated in the legal Directives and or regulations in force on guarantees for cons...

Страница 29: ...INSTALLATION DU SI GE COQUE SUR LA BASE 33 3 INSTALLATION DU SI GE COQUE AVEC LA CEINTURE 34 4 ATTACHER L ENFANT DANS LE SI GE COQUE 34 5 POSER LE SI GE COQUE SUR LA POUSSETTE 35 ENTRETIEN 35 INFORMAT...

Страница 30: ...pourra tre engag e Ce si ge coque correspond la cat gorie i Size d finie dans le r glement 129 01 des Nations Unies et il peut tre install dans tous les v hicules i Size homologu s conform ment au r...

Страница 31: ...a jambe de force reste en contact avec le plancher du v hicule et si le harnais de s curit de l enfant est bien ajust et n est pas tordu La housse en tissu fait partie du syst me de retenue pour enfan...

Страница 32: ...Bouton de d blocage de l anse 8 Syst me Profix 9 T moin de bonne installation du si ge coque 10 Bouton de d blocage du syst me Profix 11 Levier de d blocage du si ge coque 12 Bouton de d blocage du sy...

Страница 33: ...ix E 1f Appuyez sur le bouton 12 pour r gler la hauteur de la jambe de force 13 qui doit reposer sur le plancher du v hicule Elle ne doit pas se trouver sur un compar timent Vous devez alors vous assu...

Страница 34: ...ceinture de s curit du v hicule dans les rainures de l anse 5 3c La partie diagonale de la ceinture de s curit du v hicule doit passer sur la partie post rieure du si ge coque en passant la sangle da...

Страница 35: ...es du harnais en appuyant sur le bouton de r glage Ouvrez la boucle et sortez l enfant 4a ATTENTION Les ceintures de s curit ne doivent pas tre tordues La boucle du harnais doit tre bien fer m e et le...

Страница 36: ...u tout autre objet susceptibles de provoquer des blessures en cas d accident soient bien attach s ou rang s l int rieur du v hicule INFORMATION SUR LA GARANTIE Cet article est garanti contre tous d fa...

Страница 37: ...LA O DA BASE 41 2 INSTALA O DA CADEIRA NA BASE 41 3 INSTALA O DA CADEIRA COM CINTO 42 4 SEGURAR A CRIAN A NA CADEIRA 42 5 COLOCAR A CADEIRA NO CARRINHO 43 MANUTEN O 43 INFORMA O SOBRE A GARANTIA 44 IM...

Страница 38: ...cadeira corresponde categoria isize definida no Regulamento 129 01 das Na es Unidas e pode ser instalada em todos os ve culos isize homologados segundo o Regulamento 16 Consulte o manual de instru es...

Страница 39: ...re em contacto com o solo do ve culo assim como se o arn s de fixa o da crian a est corretamente ajustado e n o tem nenhuma volta A fronha t xtil parte integral do sistema de reten o infantil N o pode...

Страница 40: ...s 7 Bot o de desbloqueio da asa 8 Sistema Profix 9 Indicador de instala o correta do porta beb s 10 Bot o de desbloqueio do sistema Profix 11 Alavanca de desbloqueio do porta beb s 12 Bot o de desblo...

Страница 41: ...sione o bot o 12 para ajustar a altura do p de apoio 13 at assegurar se de que est em contacto com o solo N o deve ficar em cima de nenhum com partimento Neste ponto assegure se que a posi o do p de a...

Страница 42: ...rta beb s passando a fita pela guia do cinto 2 Tense o cinto do autom vel Retire as folgas da fita do cinto de seguran a do ve culo puxando a parte diagonal deste at que a cadeira fique fortemente fix...

Страница 43: ...LOCAR A CADEIRA NO CARRINHO 5a Com a asa na posi o 4 figura 2e encaixe o porta beb s com a fixa o do carrinho at escutar um clique 5b Para retirar o porta beb s do carrinho aperte o bot o do profix 10...

Страница 44: ...sui garantia contra defeitos de fabrico conforme o estipulado nas Diretivas e ou Regulamentos legais em vigor sobre garantias de bens de consumo aplic veis na Uni o Europeia e espec ficas do pa s de c...

Страница 45: ...INSTALLAZIONE DEL SEGGIOLINO SULLA BASE 49 3 INSTALLAZIONE DEL SEGGIOLINO CON CINTURA 50 4 FISSARE IL BAMBINO SUL SEGGIOLINO 50 5 POSIZIONARE IL SEGGIOLINO SUL PASSEGGINO 51 MANUTENZIONE 51 INFORMAZIO...

Страница 46: ...e goria Isize definita nel Regolamento 129 01 delle Nazioni Unite e pu essere installata in tutti i veicoli Isize omologati secondo il Regolamento 16 Consultare il manuale di istruzioni del vei colo p...

Страница 47: ...ia sempre a contatto con il fondo del veicolo e che l imbragatura del bambino sia corretta mente tesa e non sia attorcigliata Il rivestimento in tessuto parte integrante del sistema di trattenuta per...

Страница 48: ...Pulsante per sbloccare la maniglia 8 Sistema Profix 9 Indicatore di installazione corretta del seggiolino 10 Pulsante di sblocco del sistema Profix 11 Leva di sblocco del seggiolino 12 Pulsante di sb...

Страница 49: ...si che sia correttamente fissato 1 INSTALACI N DE LA BASE 1f Premere il pulsante 12 per regolare l altezza della barra di appoggio 13 e assicurarsi che sia a contatto con il fondo del vicolo Non deve...

Страница 50: ...e sopra la maniglia per il trasporto 3b Introdurre la parte addominale della cintura dell au to nelle fessure della maniglia 5 3c La parte diagonale della cintura di sicurezza del vei colo deve passar...

Страница 51: ...emendo l apposito pulsante Poi aprire la fibbia e togliere il bambino 4a ATTENZIONE Le cinture non devono essere attorci gliate La fibbia dell imbragatura deve essere chiusa correttamente e le cinture...

Страница 52: ...i che dentro l auto sia i bagagli che qualunque altro oggetto suscettibile di provocare danni in caso di incidente siano correttamente fissati e protetti INFORMAZIONI SULLA GARANZIA Questo articolo di...

Страница 53: ...IT 53 IM 2041 02 ONE instruc ok indd 53 3 5 21 14 10...

Страница 54: ...IM 2041 02 ONE instruc ok indd 54 3 5 21 14 10...

Страница 55: ...IM 2041 02 ONE instruc ok indd 55 3 5 21 14 10...

Страница 56: ...2041 02 Pol Ind Riera de Caldes C Mercaders 34 08184 PALAU SOLIT I PLEGAMANS Barcelona SPAIN JAN S A NIF ES A08234999 info groupjane com www babybecool es IM 2041 02 ONE instruc ok indd 56 3 5 21 14...

Отзывы: