6
1 Operating instructions
1.1 Preliminary switch on
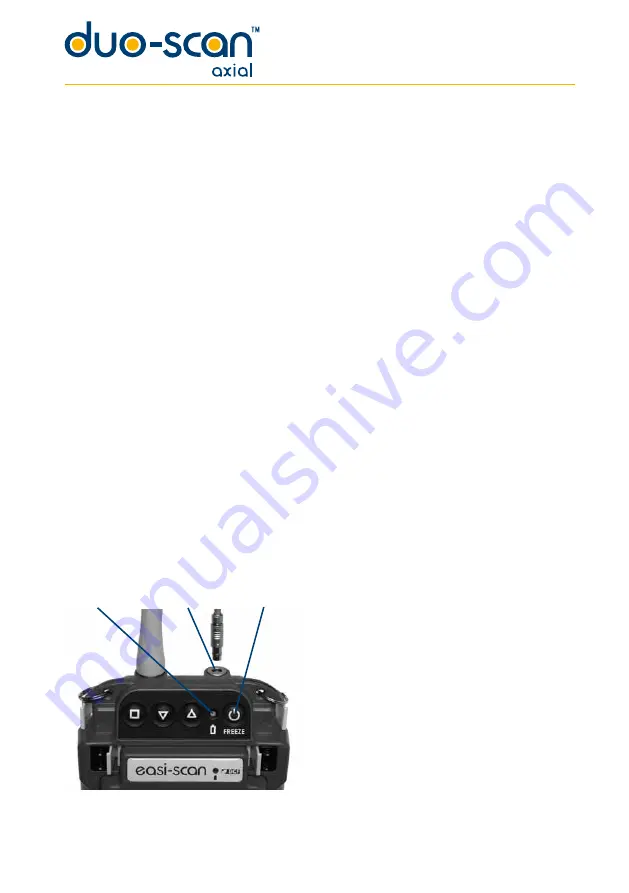
Ensure that the external battery is securely latched to the top of the scanner.
Switch on the remote video monitor (if used), ensuring correct receive channel selected. Attach the
goggles to the user connector port on top of the scanner (fig 1). Check the plug and socket are free
from debris. Align the dots on the plug and socket and push to click in place.
1.2 Power
To turn the scanner on, press and hold the power button (fig 2) until the scanner beeps. The control
panel LED (fig 3) will illuminate green.
The probe will start to rotate.
If the imaging display device is connected, its screen will be illuminated.
The sector scan and settings will be displayed on the screen.
The buzzer will sound twice; the second indicates that the system initialisation is complete and the
system is ready to function.
If the supply voltage is too low (flat battery) the system will power down.
To switch the scanner off, press and hold the power button until the scanner shuts down.
(fig 2)
Fig 3 Fig 1 Fig 2


