


8.
9.
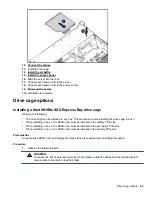
Install drives or drive blanks
.
.
11.
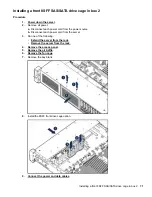
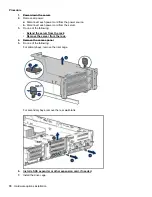
Slide the server into the rack.
12.
Connect each power cord to the server.
13.
Connect each power cord to the power source.
The installation is complete.
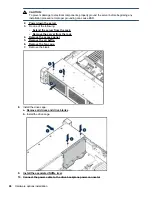
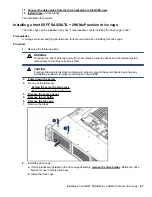
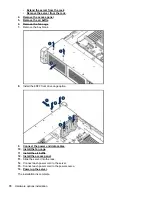
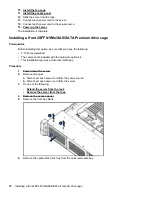
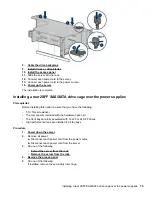
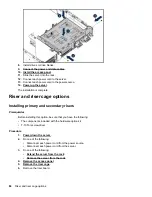
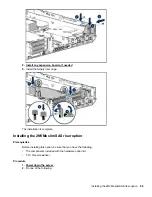
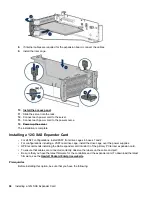
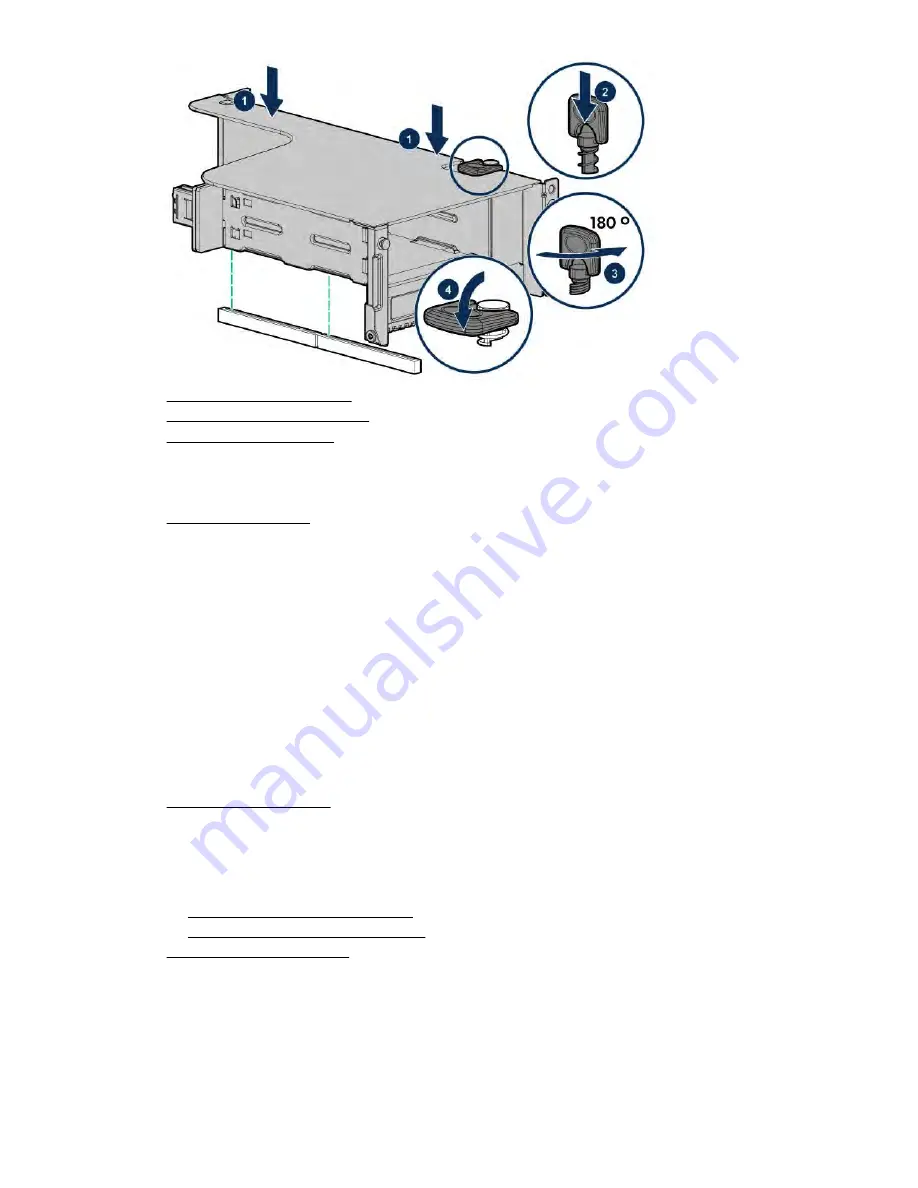
Installing a rear 2SFF SAS/SATA drive cage over the power supplies
Prerequisites
Before installing this option, be sure that you have the following:
• T-10 Torx screwdriver
• The components included with the hardware option kit
• The front bays are fully populated with 12 LFF or 24 SFF drives
• High performance fans are installed in all fan bays
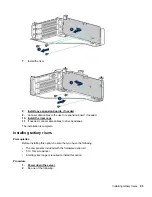
Procedure
1.
2.
Remove all power:
a.
Disconnect each power cord from the power source.
b.
Disconnect each power cord from the server.
3.
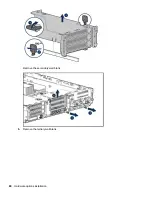
Do one of the following:
•
Extend the server from the rack
•
Remove the server from the rack
.
4.
.
5.
Do one of the following:
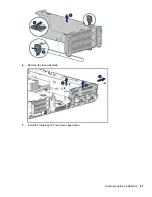
If installed, remove the secondary riser cage.
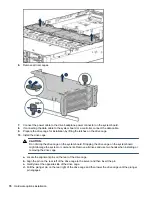
Installing a rear 2SFF SAS/SATA drive cage over the power supplies
79
Содержание BCD221
Страница 7: ...Documentation feedback 157 Contents 7 ...
Страница 27: ...Component identification 27 ...
Страница 43: ...Operations 43 ...
Страница 74: ...9 Install the optical disk drive tray 10 Install the universal media bay 74 Hardware options installation ...
Страница 80: ...Remove the secondary wall blank 6 Remove the tertiary wall blank 80 Hardware options installation ...
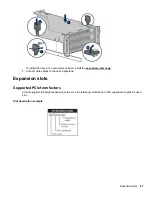
Страница 81: ...7 Install the drive cage compatible rear wall 8 Install the drive cage Hardware options installation 81 ...
Страница 123: ...LFF models Cable routing Front 8SFF drive options Box 1 to SAS Expander Cable routing Front 8SFF drive options 123 ...
Страница 124: ...Box 2 to SAS Expander All boxes 124 Cabling ...
Страница 126: ...Box 2 Box 3 126 Cabling ...
Страница 127: ...Cable routing Front 2SFF NVMe drive option for SFF Cable routing Front 2SFF NVMe drive option for SFF 127 ...