


11
Digital Audio Baby Monitor
EN
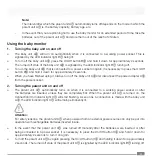
Note:
The interval after which the parent unit A
1
automatically turns off depends on the mode in which the
parent unit A
1
is, the battery capacity, battery age, etc.
–
In the event that you are planning not to use the baby monitor for an extended period of time, take the
batteries out of the parent unit A
1
and store them out of the reach of children.
Using the baby monitor
1.
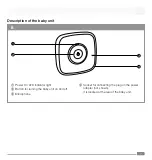
Turning the baby unit on and off
■
The baby unit A
2
will turn on automatically when it is connected to a working power socket. This is
signalled by the LED indicator light B
1
being lit.
■
To turn off the baby unit A
2
, press the On/Off button B
2
and hold it down for approximately 2 seconds.
The turned off state of the baby unit A
2
is signalled by the LED indicator light B
1
turning off.
■
To turn the baby unit A
2
that is connected to a power socket on again, it is necessary to press the On/Off
button B
2
and hold it down for approximately 2 seconds.
■
When you have finished using it, always turn off the baby unit A
2
and disconnect the power adapter A
3
from the power socket.
2.
Turning the parent unit on and off
■
The parent unit A
1
automatically turns on when it is connected to a working power socket or after
the batteries are inserted, unless they are completely flat. When the parent unit A
1
is turned on, the
Connection/On indicator light C
1
will start flashing. As soon as a connection is made with the baby unit
A
2
, the LED indicator light C
1
will remain permanently lit.
Attention:
For safety reasons, the parent unit A
1
when powered from an external power source can only be put into
operation with rechargeable batteries inserted inside.
■
In the event that the parent unit A
1
was turned off manually after the batteries were inserted or after
being connected to a power socket, it is necessary to press the On/Off button C
4
and hold it down for
approximately 2 seconds to turn it on again.
■
Turn off the parent unit A
1
by again pressing the On/Off button C
4
and holding it down for approximately
2 seconds. The turned off state of the parent unit A
1
is signalled by the LED indicator light B
1
turning off.
Содержание BBM 7000
Страница 2: ...EN 3 CZ 19 SK 35 HU 51...


