ASSEMBLY INSTRUCTIONS
2 OF 4
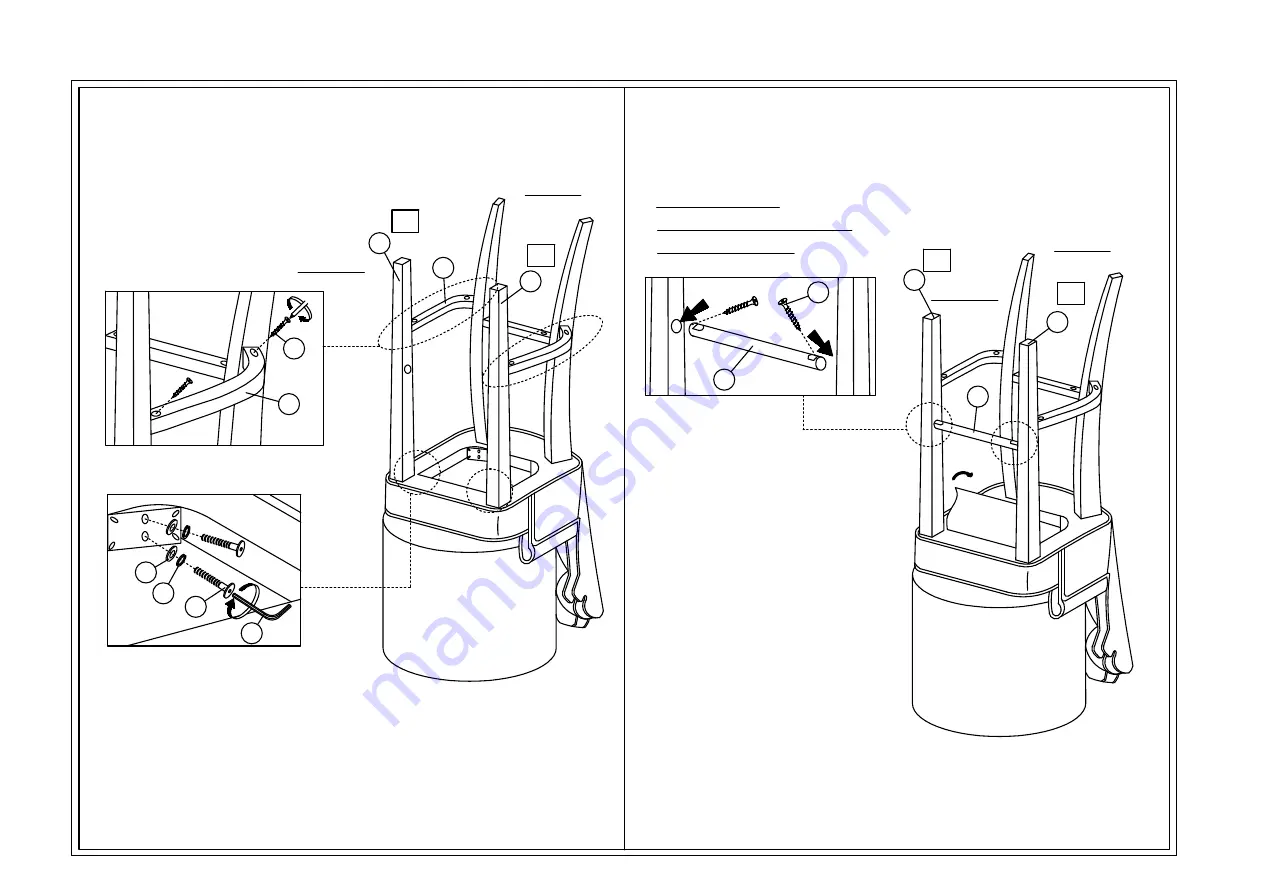
STEP 3
STEP 4
C
B
6
7
1
8
STEP 3.2
STEP 3.1
F
3
Don't screw tied
2
**Finish step 4, Please screw tied the step 2 & 3 bolt.
R
L
BACK
FRONT
Страница 1: ...and flat soft surface to prevent from being scratched Follow the figure to start assembling CAUTIONS 1 Do not FULLY TIGHTEN the nut or nut bolt until all nut or bolt is ready assembed 2 Do not OVER T...
Страница 2: ...ASSEMBLY INSTRUCTIONS 2 OF 4 STEP 3 STEP 4 C B B C 6 7 1 8 STEP 3 2 STEP 3 1 F 3 Don t screw tied B B 2 F Finish step 4 Please screw tied the step 2 3 bolt R L L R BACK FRONT BACK FRONT...
Страница 3: ...ASSEMBLY INSTRUCTIONS 3 OF 4 STEP 5 STEP 6 B B D D 10 5 4 E E 4 9 10 F F STEP 6 1 STEP 6 2 L L R R BACK FRONT BACK FRONT...
Страница 4: ...ASSEMBLY INSTRUCTIONS 4 OF 4 STEP 7...