KNOW YOUR PRODUCT
CHARGING PROCEDURES
v
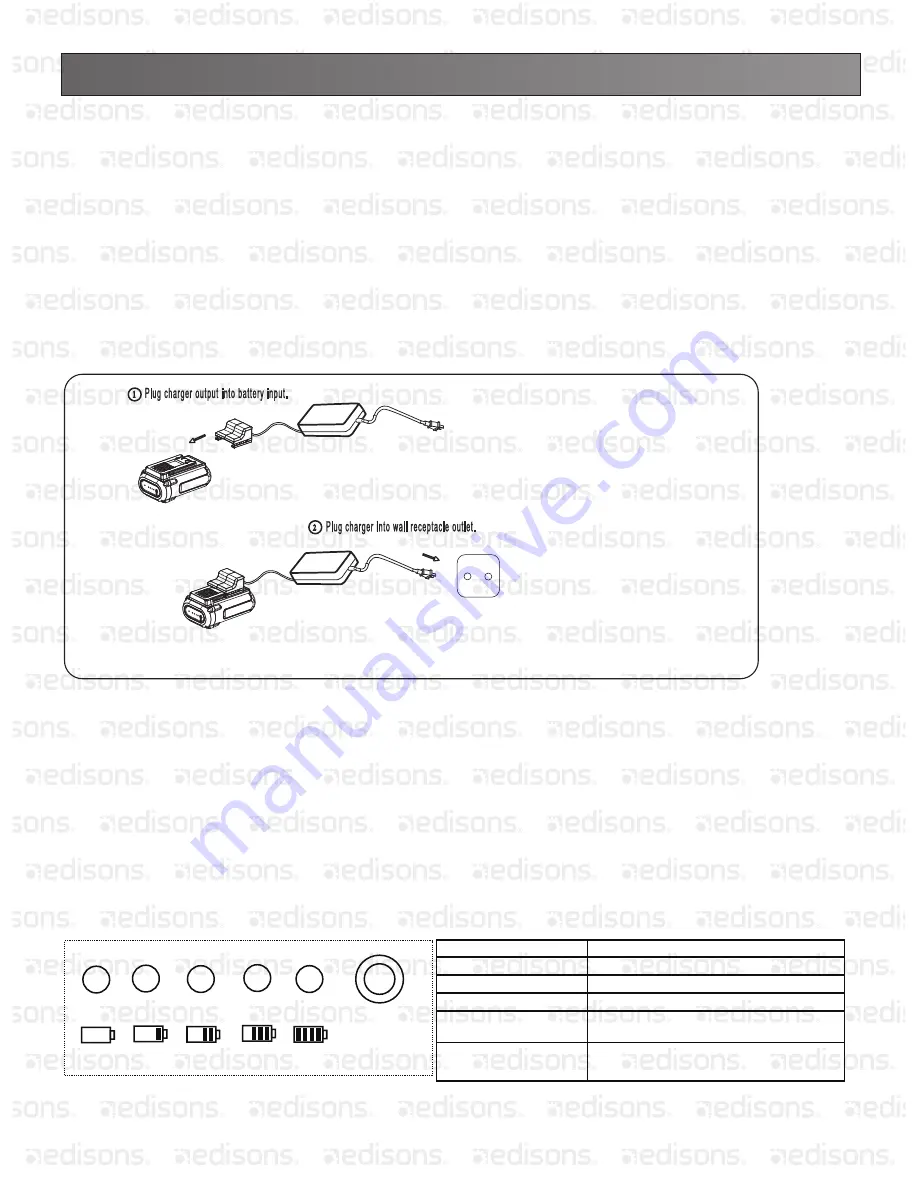
Note: The battery can be charged in the mower. The charger that is supplied with this mower is a specially
designed 2-stage charger.
Step 1: The red light will light up during the recharge cycle.
Step 2: The green light will light up when the battery is fully charged.
1. Plug the charger connector into the jack on the battery.
2. Insert the 100-240 V plug from the charger into the electrical outlet.
3. The red light on the charger should come on, which indicates that the charger is working and the battery is being
charged. The red light will go out and the green light will come on when the battery is completely charged (it takes
approximately 2.5 hours to charge a fully discharged battery).
WARNING:
BATTERY USE
Push the Battery Capacity Indicator (BCI) switch.
The lights will indicate the battery's capacity according to the following chart:
Lights
3 Green Lights
2 Green Lights
1 Green Light
Red Light
The battery is at full capacity
The battery is at 60% capacity
The battery is at 50% capacity
The battery is at 40% capacity and
requires charging soon
The battery is at 20% capacity and
requires charging
Capacity
Green
Green
Green
Green
Red
BCI switch
4 Green Lights
100-240V 50/60Hz
Fig. 9
OPERATING YOUR MOWER
Do not store the battery in temperatures lower than 32°F (0°C).
Charge the battery first before storing it.
29
Содержание E force 360
Страница 2: ...E FORCE E FORCE i ...
Страница 4: ...1 Assembly 2 ...
Страница 8: ...3 Operation 6 ...
Страница 9: ...4 Mow collect 7 ...


