


15
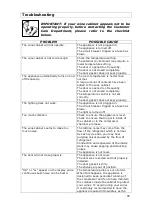
Wine storage problems
Corking-
a tiny percentage of bottled wine (about 1%) will suffer from
this. The cork reacts with the wine and gives it a musty, unpleasant
taste. It is the most common wine storage problem and is caused by
harmless bacteria growing on the cork. As unfortunate as this is, there
is nothing to do but to discard all of the wine in the affected bottle.
This is not to be confused with small fragments of cork floating in the
wine itself, which will not impair the flavour.
Oxidisation-
when wine has been opened and left for longer than a
day; it tends to lose its aroma and colour, giving an overall flat taste.
The only way to avoid this, it to either drink the wine on the same day
it was opened or to use a vacuum device specially designed for
removing oxygen from opened wine bottles. If you use such a device,
the wine should still be consumed shortly afterwards.
Ullage-
this is loss of wine from the bottle by evaporation or leakage.
Signs of ullage include wine seeping around the cork, a protruding cork
or a stained label. It can happen if the bottle has been allowed to get
too warm. The wine may still be drinkable, if the leakage was recent;
however, you should be aware that if the wine cools down again,
contraction can cause more air to be sucked into the bottle and result
in further deterioration.
Slight effervescence in still wine-
this isn’t really a problem with
the way the wine has been stored, but as a result of incomplete
malolactic fermentation before the wine was bottled. A good way to
get rid of the effervescence is to let the wine breathe. Alternatively
you can use a bottle vacuum device, after about five minutes the
effervescence will vanish.
Sediment-
this is not normally a problem, however both red and
white wines can produce sediment after a number of months in a
bottle. The sediment consists of tartrate crystals and is totally
harmless. If anything the building of sediment can be considered a
good sign because it means that the wine was not subjected to much
(if any) filtering, meaning that the flavours and aromas should be
preserved better.
A good way to get around sediment (if it is a problem) is to stand the
bottle upright, the day before opening, so that the sediment can settle
to the bottom of the bottle.
You can also decant your wine; decanting will “open up” the flavour of
both young and old wines, but younger wines in particular. To decant,
pour the wine slowly and evenly into your decanter.
Содержание BWC455BGL
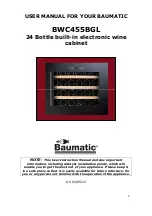
Страница 1: ...BWC455BGL Built in wine cabinet...
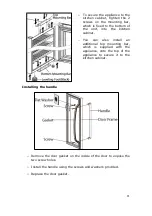
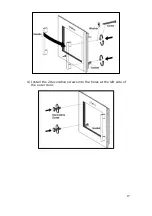
Страница 27: ...27 4 Install the 2 decorative screws into the holes at the left side of the outer door...
Страница 33: ...33...
Страница 34: ...34...
Страница 35: ...35...
Страница 36: ......


