5019 418 33043
DDEI 5790
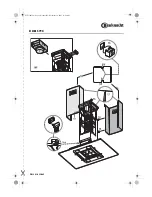
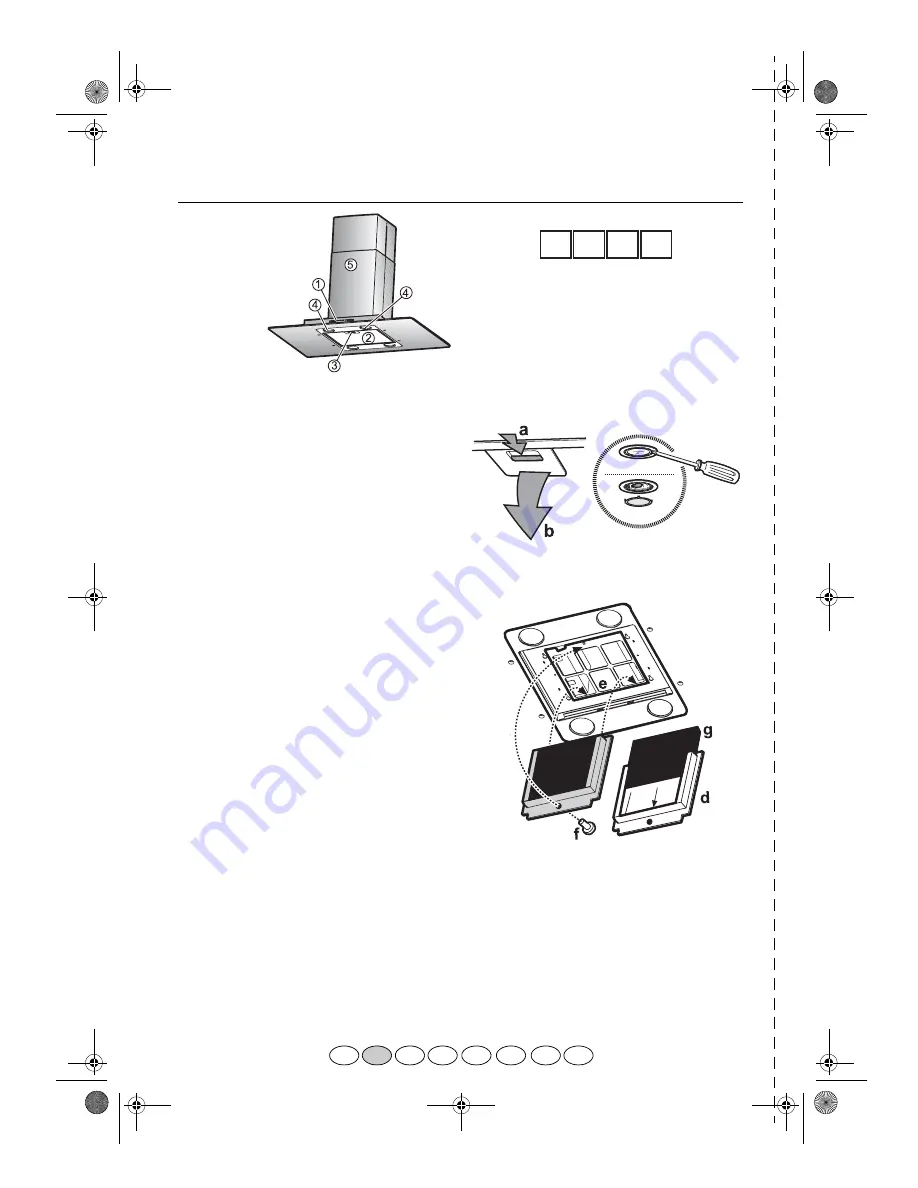
Cleaning the grease filter - Fig. 1
Wash the grease filter at least once a month, or
whenever the grease filter saturation indicator flashes
(Extraction speed indicator 2).
1. Disconnect the electrical power supply.
2. Remove the grease filters: push the handles back
(a), and then downwards (b).
3. After cleaning the grease filter refit in reverse
order, making sure the entire extraction surface is
covered.
Replacing bulbs - Fig. 2
1. Disconnect the electrical power supply.
2. Use a small screwdriver or any other suitable tool
to prise off the lamp cover.
3. Remove the burnt-out bulb.
Replace using 20 W max halogen bulbs only,
making sure not to touch them with your hands.
4. Close the lighting unit (snap-close).
Carbon filter Fitting and Maintenance
Fitting the carbon filter - Fig. 3:
1. Disconnect the electrical power supply.
2. Remove the grease filters (a, b).
3. Undo the fixing screw then remove the filter
holder (f).
4. Fit the carbon filter (g) inside the filter holder (d).
5. Place the filter holder on the back tongue (e), then
fix it to the hood with the screw provided (f).
6. Refit the grease filters.
Carbon filter maintenance:
Unlike traditional carbon filters, this carbon filter can
be washed and reactivated.
With normal hood use, the filter should be cleaned
once a month. The best way to clean the filter is in a
dishwasher at the highest temperature possible, using
a normal dishwasher detergent. To avoid particles of
food or dirt settling on the filter during washing and
giving rise to unpleasant smells, it is advisable to wash
the filter on its own. To reactivate the filter after
washing it must be oven dried at 100° C for
10 minutes.
The filter will retain its odour-absorbing capacity for
three years, after which it must be replaced.
CONTROL PANEL
A.
Light ON/OFF switch.
B.
ON/OFF and speed 1 selector switch
(small amount of steam and fumes).
B+C.Speed 2 selector switch (medium amount of
steam and fumes).
B+D.Speed 3 selector switch
(large amount of steam and fumes).
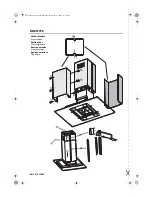
1. Control panel
2. Grease filters
3. Grease filter handles
4. Bottom halogen bulbs
5. Telescopic flue
A B C D
FIG. 1
FIG. 2
FIG. 3
PRODUCT SHEET
I
F
NL
E
P
GB
D
GR
41833043.fm Page 8 Wednesday, November 19, 2003 11:26 AM

