Bauhn ATV32HD-1121 Скачать руководство пользователя страница 36

36 | RECORDING AND USB MODE
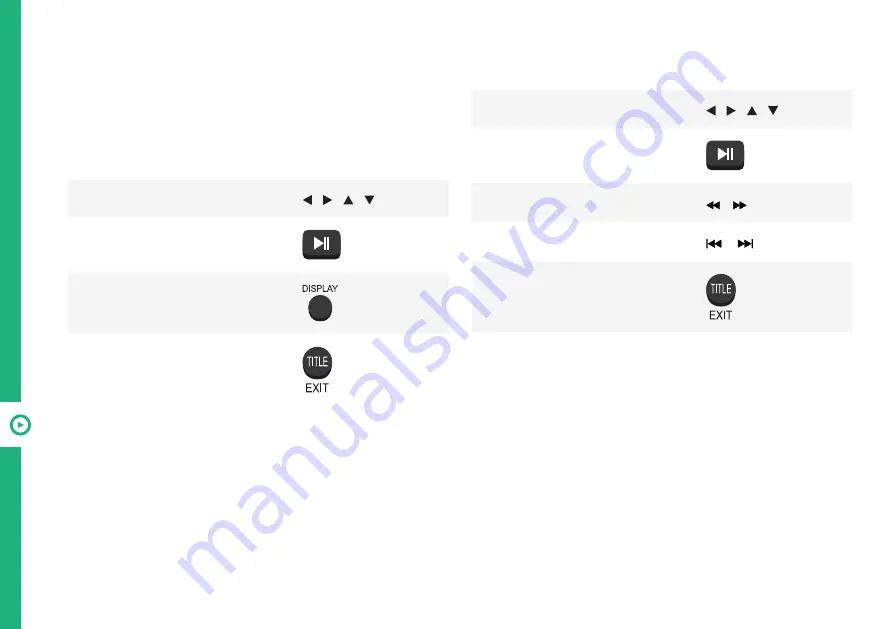
Playback Functions

Playback of different media types have different 

controls. 

Photo

Music

Function

Remote Button

Navigate to a folder or file

 /   /   / 

Display a photo

Display the on-screen toolbar

Return to file list

Function

Remote Button

Navigate to a folder or file

 /   /   / 

Play a track

Fast forward or rewind the track


Skip or restart the current track


Return to the file list

Содержание ATV32HD-1121

Страница 1: ...32 User Manual MODEL ATV32HD 1121 AFTER SALES SUPPORT 1300 002 534 tempo org support MODEL ATV32HD 1121 PRODUCT CODE 707729 11 2021 AUS...

Страница 2: ...the highest standards of performance and safety and as part of our philosophy of customer service and satisfaction are backed by our comprehensive 1 Year Warranty Domestic use only This product is in...

Страница 3: ...s in the Box 4 Important Tips 5 Attaching the Stand 6 Wall Mounting the TV 7 Connect to Power 8 Connect your Antenna 8 Controls and Connections 9 Get to know your TV 9 Buttons on the TV 9 Ports on th...

Страница 4: ...teries 2 D TV Stands 2 E Screws for TV Stands 4 F Warning Sheet G TV Toppling Safety Message H Quick Start Guide I Warranty Certificate J General Safety Warnings K User Manual You will need Phillips h...

Страница 5: ...enough space around vents for airflow The remote control works up to 6 metres away from the TV Unplug the TV before cleaning it Clean using a dry cloth only do not use water or chemicals Use only the...

Страница 6: ...of the TV 3 Attach the stands to the TV at the installation points using the screws provided Grab a screwdriver for this bit Make sure the legs are facing away from each other not leaning inwards Atta...

Страница 7: ...mounting bracket to wall mount this TV screws are not included Unplug the TV from the power outlet before wall mounting Contact a professional for assistance with wall mounting the TV Required VESA M...

Страница 8: ...Antenna Antenna cable not included ABC HD SBS ONE HD 7HD 9HD 10 HD PRIME7 HD WIN HD Example HD Channels Connect to Power Make sure the TV is switched off at the power outlet until you have finished c...

Страница 9: ...ONTROLS AND CONNECTIONS 9 See next page for more info on the connections Switch the TV on or to standby Controls and Connections Buttons on the TV Get to know your TV On Standby light and Remote senso...

Страница 10: ...E COMPUTER All digital connection between the TV and any HDMI device Requires a HDMI cable not included 3 CVBS PICTURE You can use this to connect your DVD player Supports Standard Definition SD resol...

Страница 11: ...le not included to connect the unit with an amplifier soundbar or other audio decoding device for digital audio signal output 7 USB STORAGE PVR record and pause live TV Play your stored media files su...

Страница 12: ...together Do not use different types of batteries e g Manganese and Alkaline batteries together Remove the batteries from the remote if you do not intend to use it for a long time When discarding used...

Страница 13: ...gle of up to 30 degrees to either side of the sensor as illustrated below Image is an example only Remote sensor location on TV may vary 6m Remote Hints and Tips Do not drop step on or otherwise impac...

Страница 14: ...main TV menu Press the UP DOWN LEFT RIGHT buttons to navigate the on screen menus and adjust the system settings OK Display the channels list DTV Buttons and Functions TV RADIO EJECT Switch between TV...

Страница 15: ...l directly when watching TV Switch the digits AUDIO LANG Switch the available sound track language DTV DVD P MODE Cycle through the different picture modes D MENU GUIDE Launch the TV Guide DTV Display...

Страница 16: ...ergy Mode Tune Type Country If you make an error you can update your preferences in the settings menu later On Screen Set Up Make sure equipment is properly connected as shown on pages 10 11 before co...

Страница 17: ...ttings Once you have program any settings the unit will retain them in its memory until you change them even after turning the TV off Function Remote Button Display the main menu Select different sub...

Страница 18: ...nd S PDIF Mode AD Auto Description Switch Audio Delay Time 25 Clock Time Zone Off Time On Time Sleep Timer Auto Standby OSD Timer Lock 26 System Lock Set Password Channel Lock Parental Guidance Key Lo...

Страница 19: ...ur system PAL in Australia Sound System Select the sound system BG in Australia Fine Tune View the file tune setting Search Press the OK button to start tuning DTV Manual Tuning Manually select and tu...

Страница 20: ...annel Option Description Move Move the channel location on the list Press REPEAT to enter Move Mode Use the buttons to select a position and press REPEAT to confirm it Delete Press GOTO to delete the...

Страница 21: ...er the image Tint Adjust the saturation The closer to 100 the deeper the colour Picture Picture Mode Home default Default picture settings for home use Bright Room Brighter and clearer picture setting...

Страница 22: ...Noise Reduction Reduces noise to improve picture quality Dynamic Contrast Adjusts the difference between the bright and dark sides of the screen according to the brightness of the image Aspect Ratio A...

Страница 23: ...iption Sound Mode Standard Music Sports Personal Movie Sound Option Description Treble Adjust the levels of higher pitched sounds Bass Adjust the levels of lower pitched sounds These options are avail...

Страница 24: ...lume level consistent Surround Sound Turn ON OFF surround sound effect from your TV speakers S PDIF Mode Set the digital sound output setting AD Audio Description Switch Audio Description AD provides...

Страница 25: ...ne Off Time Set time and day to turn off the TV On Time Set the time and day to turn on the TV Sleep Timer Select the desired Auto Sleep Standby duration Auto Standby Sets the time when the TV will en...

Страница 26: ...ock Enable disable the lock on the system Set Password Input a new password using the number buttons on the remote and confirm to set the new password Channel Lock Lock selected channels Press the but...

Страница 27: ...lt Source Set a default input source Default Program Set the default digital program Default Volume Set the default volume level Max Volume Set a limit to the maximum volume level Import Database Impo...

Страница 28: ...s Aspect Ratio Adjust the video size The available video size may be different for different input sources PVR File System See page 30 for more information Blue Screen When there is no signal or a poo...

Страница 29: ...nput source Option Description HDMI CEC Consumer Electronics Control Turn HDMI CEC On Off ARC Audio Return Channel If this function is enabled sound from the TV can be sent to an HDMI ARC supported ex...

Страница 30: ...iption Select Disk Select a disk used for PVR Check PVR File System Check the health of the USB drive file system USB Disk Check if the USB disk format is supported Format Format the connected USB dis...

Страница 31: ...ing for the selected program GOTO View TV Guide for the previous day REPEAT View TV Guide for the next day A B Display full program information Exit TV Guide menu TV Guide Free to air TV To access the...

Страница 32: ...e signal is interrupted while in recording mode the recording will stop until the signal is established Do not turn the TV off while it is in time shift mode The file recorded can only be used on this...

Страница 33: ...ert your USB storage device into the USB port When a program is being recorded in the background while the TV is in standby mode the Standby ON light will flash white Scheduled Recording See TV Guide...

Страница 34: ...the or OK buttons to resume playing the program Stop Time shift Press the button to exit time shift The USB storage device won t retain recorded data after you exit the time shift function Before you...

Страница 35: ...ategory and so on Make sure you select the correct category for the file you wish to play Insert your USB into a USB port on the TV Press the SOURCE button to select Media mode Set up Function Remote...

Страница 36: ...controls Photo Music Function Remote Button Navigate to a folder or file Display a photo Display the on screen toolbar Return to file list Function Remote Button Navigate to a folder or file Play a tr...

Страница 37: ...y supported file types will be displayed See the specifications table for supported file types Text Function Remote Button Navigate to a folder or file Open the text file Navigate to the next previous...

Страница 38: ...wall outlet is turned on and the power indicator at the bottom of the TV is lit If using a multi outlet check if it is working properly To check whether a power strip is working properly plug the TV s...

Страница 39: ...utton to restore the sound If earphones are connected unplug them Check the volume level of the external device Ensure that connection to the external audio device is correct and that all cables are f...

Страница 40: ...em provided with the Windows operating system If it is formatted by a different utility program that is not supported by Windows it may not be recognised The TV may not be able to recognise a USB devi...

Страница 41: ...MPEG 2 TS Music MP3 Photo JPEG USB output DC 5V 500mA Power source AC 100 240V 50 60Hz Power consumption 55W Max Specifications Dimensions W x D x H With stand 730 3 x 188 7 x 472 9 mm Without stand...

Страница 42: ...t with your household rubbish An environmentally friendly method of disposal will ensure that valuable raw materials can be recycled Electrical and electronic items contain materials and substances wh...

Страница 43: ...s warranty are in addition to all rights and remedies in respect of the product that the consumer has under the Competition and Consumer Act 2010 and similar state and territory laws Our goods come wi...

Страница 44: ...his data elsewhere prior to sending the product for repair You should also be aware that rather than repairing goods we may replace them with refurbished goods of the same type or use refurbished part...

Страница 45: ...45 Notes...

Страница 46: ...46 Notes...

Страница 47: ...47 Notes...

Страница 48: ...f it fails to perform to your expectations please contact our After Sales Support Centre on 1300 002 534 ALDI guarantees that our products are developed to our stringent quality specifications If you...

Отзывы: