background image


11

STEP 3 


Powerline WLAN ADSL2+ Router Configuration 

   
1. 

Please insert the supplied CD into your CD-ROM drive. 

2. 

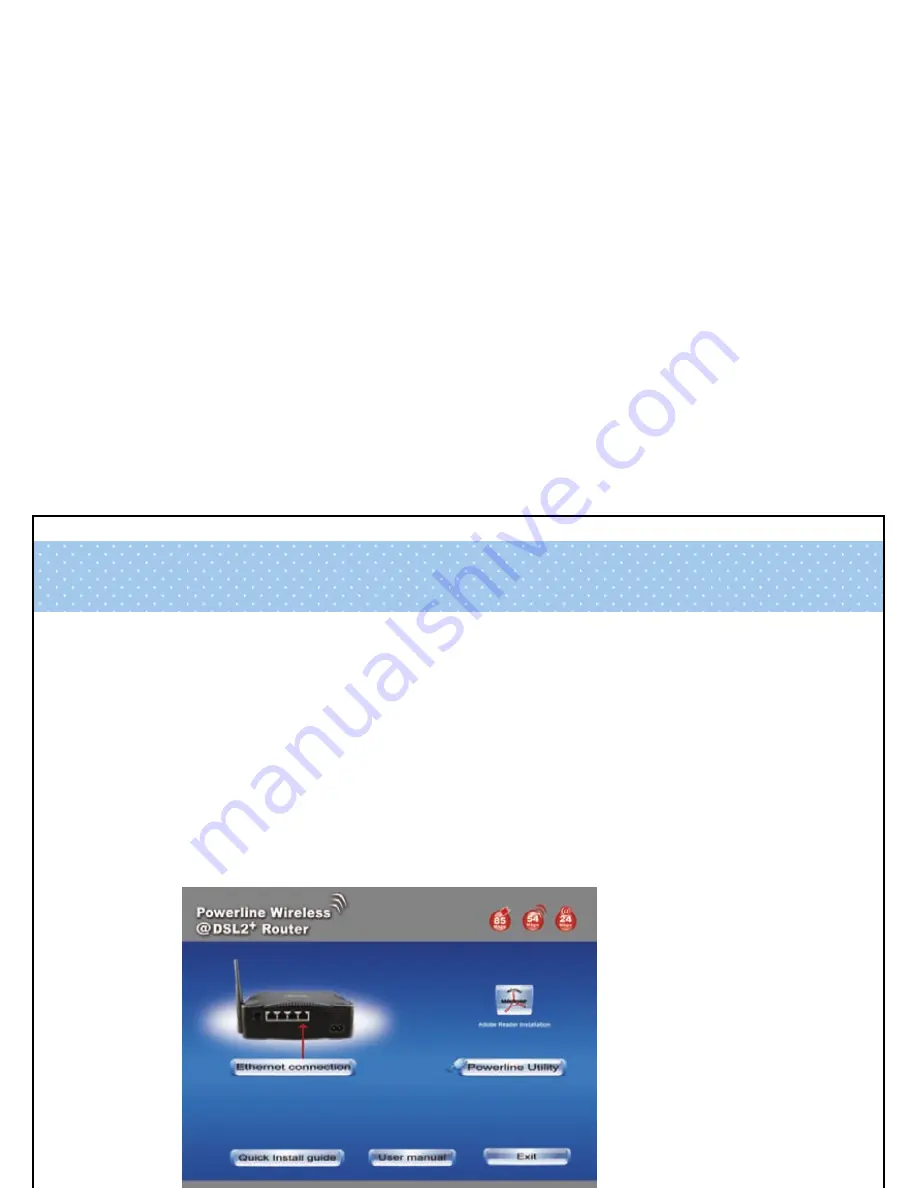
The CD should auto-start, displaying the window shown in 3. below. If 
your CD does not start automatically go to Windows Explorer, Select 
your CD drive and double click “

setup.exe

” 

3. Please 

click 

Ethernet connection

” button to continue. 


4. 

Enter the VPI ,VCI, Username and Password your ISP(Internet 
Services Provider) provided, and choose your required configuration. 
Then press “

Save Configuration

”. Please wait for about 30 seconds. 


Содержание TW263HR4

Страница 1: ......

Страница 2: ...Powerline Wireless ADSL2 Router...

Страница 3: ...P and Windows Vista 3 64MB RAM or above 4 25MB free disk space Package Contents For Annex B Powerline WLAN ADSL2 Router 1 Powerline WLAN ADSL2 Router 2 CD ROM Software Manual 3 Quick Installation Guid...

Страница 4: ...h STEP carefully and only go to the next step once you have complete the previous STEP STEP 1 Connection of Powerline WLAN ADSL2 Router If you have an ISDN telephone line connect to the Powerline WLAN...

Страница 5: ...shown below 1 Connect the supplied RJ45 Ethernet cable from your PC s Ethernet port to any of the 4 Powerline WLAN ADSL2 Router s LAN Ports 2 Connect the supplied RJ11 telephone cable from your home...

Страница 6: ...hts on the front side Please see below for an explanation of the function of each indicator light PWR Power indicator ACT ADSL Active indicator LINK ADSL Link indicator 10 100Mbps 1 4 Ethernet active...

Страница 7: ...Rear panel connection ADSL to connect the ADSL ADSL2 line input LAN 1 4 to connect the Ethernet cable Reset Reset button to return the factory default settings if...

Страница 8: ...LAN ADSL2 Router configuration please kindly configure the PC computer as below to have automatic IP address DNS Server For Windows 98SE ME 2000 XP 1 Click on Start Control Panel in Classic View In th...

Страница 9: ...3 Double click on Internet Protocol TCP IP 4 Check Obtain an IP address automatically and Obtain DNS server address automatically then click on OK to continue...

Страница 10: ...lick on Start Control Panel in Classic View Network and Sharing Center In the Manage network connections double click on Manage network connections to continue 2 Single right click on Local Area conne...

Страница 11: ...4 Double click on Internet Protocol Version 4 TCP IPv4 5 Check Obtain an IP address automatically and Obtain DNS server address automatically then click on OK to continue...

Страница 12: ...e supplied CD into your CD ROM drive 2 The CD should auto start displaying the window shown in 3 below If your CD does not start automatically go to Windows Explorer Select your CD drive and double cl...

Страница 13: ...button to configure the WLAN setting or click EXIT button to exit program 6 Please enter the SSID and wireless channel if you want to change the default setting SSID RT2561_6 Channel 6 Choose the Aut...

Страница 14: ...7 Please click on Save configuration button When the procedure is completed the program will exit...

Страница 15: ...change the wireless settings via the wireless configuration menu see user manual on the CD Chapter 10 and other 1 Double click on the wireless icon on your computer and search for the wireless networ...

Страница 16: ...network key that belongs to your authentication type and key You can later change this network key via the wireless configuration menu see user manual on the CD Chapter 10 and other 4 Click on Connec...

Страница 17: ...t Utilities are installed prior to the installation of this utility Other utilities should be uninstalled before installing this utility Note The Utility Software doesn t support Windows Vista 32 64 O...

Страница 18: ...4 If you click the Powerline Utility button the screen will appear as shown in below Click the Next button to continue 5 Click the Next button...

Страница 19: ...6 Click the Next button 7 Please click the Install button to continue...

Страница 20: ...8 Click the OK button 9 Click the Finish button...

Страница 21: ...ou can see your device working well via the Utility The top panel of the screen shot shows a Turbo device connected locally to your computer The bottom panel shows four devices connected remotely to t...

Страница 22: ......

Страница 23: ......

Страница 24: ......

Отзывы: