background image

3

Identification

Please write down the model number, serial number and date of purchase of the dehumidifier for 

future reference. If you need to ask for help in the future. This is very useful. The data label on the side 
of the unit has the key features of the particular machine.

Model

 Number:   AirWerx 35P


Serial Number: 

Date of Purchase:

For additional questions about your dehumidifier, email [email protected].

Electrical Supply

Power supply:


115V, 60Hz AC, single phase

Outlet requirements:


3 holes, GFCI

Circuit protector:

   15 amps

To reduce the risk of injury

:

Warning:


 240 volts AC power may cause serious injury due to electric shock.

1   Disconnect the power supply before servicing.
2   Only plug the device into a grounded circuit.
3   Do not use extension cords.
3   Do not use plug adapters.

Principle of Operation

The AirWerx 35P dehumidifier reads the relative humidity in the room. When the detected relative 
humidity exceeds the humidity setpoint, the dehumidifier will automatically turn on. 
The air passes through the evaporator coil, which is cooler than the dew point of the air. 
This means that moisture condenses out of the air. The air is then reheated through the condenser coil 
and distributed back into the room.

Содержание AirWerx 35P

Страница 1: ...AirWerx35P Installation OperationsManual Web www baseaire com E mail sales baseaire com Specificationssubjecttochangewithoutnotice Tel 1 888 641 8862...

Страница 2: ...Operation 4 Installation 4 Key Functions 6 Indicator lights 6 Remote Control 8 Diagram 8 Maintenance 8 Dehumidifier Storage 9 Troubleshooting 10 Maintenance and application of water pumps 13 Spare Pa...

Страница 3: ...ier should be maintained and repaired by a qualified technician The AirWerx 35P dehumidifier is intended for operation when the unit is standing and horizontal only Operating the unit in any other dir...

Страница 4: ...it protector 15 amps To reduce the risk of injury Warning 240 volts AC power may cause serious injury due to electric shock 1 Disconnect the power supply before servicing 2 Only plug the device into a...

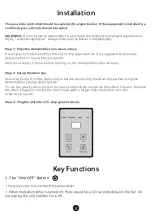
Страница 5: ...ifier on a level block or paver Wait for at least 12 hours before turning on the dehumidifier after delivery Step 2 Set up the drain line Remove the nut from the drain nozzle before connecting the dra...

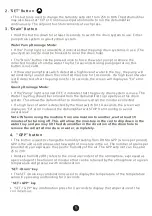
Страница 6: ...dehumidifier to properly use this drain system This allows the dehumidifier to continuously drain the moisture collected If a high level of water is detected by the float switch for 14 seconds the scr...

Страница 7: ...r is set to continuous operation mode In continuous mode of operation this light is always on other states this light is off 4 Water Pump Drainage Water pump mode this light is on gravity drainage mod...

Страница 8: ...nuous mode cont will appear on the display to indicate continuous mode 6 Drain Pump P Press this button to drain or pump the collected moisture or water out of the dehumidifier NOTE The above symbol w...

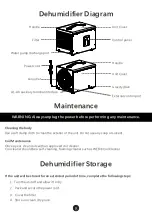
Страница 9: ...ol port A1 A6 auxiliary terminal interface Maintenance Cleaning the body Use a soft damp cloth to clean the exterior of the unit Do not use any soap or solvent Coil Maintenance Once a year clean coils...

Страница 10: ...al Trouble code E 1 E1 Humidity sensor lssues Checkthewireconnectionsatbothends Iftherearenovisibleproblems the sensormaybefaulty Trouble code E 4 Water Pump Failure Confirmwhetherthepumpismalfunction...

Страница 11: ...Water Pump Drainage 2 To verify if the automatic drain system is functional When the dehumidifier automatically activates the pump after a certain amount of moisture is collected this indicates that...

Страница 12: ...e hose is blocked by foreign objects or bent and deformed 2 The drainage height exceeds the standard 3 Water level switch failure 4 The water pump is malfunctioning or its service life has expired 5 T...

Страница 13: ...ater pump panel and you can see the fixed status of the water pump 2 Use a Phillips screwdriver to unscrew the screw of the pump fixing bracket 3 Pull out the hose fixed in the water reservoir and tak...

Страница 14: ...610 S 611 MERV 1 Filter S 612 AirWerx 35P Filter Remote Control Kit cable remote control Main Control Board Display Board Temperature and Humidity Sensor BlowerMotor Air Duct Set Fan Capacitor Compres...

Страница 15: ...with the product for operation installation and maintenance Baseaire will not provide home service during or after the warranty period You may be responsible for shipping costs to bring the product t...

Страница 16: ...15...

Страница 17: ...dress City State Zip Phone E mail If you have any questions please feel free to contact us at 888 641 8862 or visit www baseaire com Register your unit for warranty using this link https www baseaire...

Страница 18: ......

Отзывы: