Installation Manual
© 2015 basalt
e v1.0
Flush mount for Sentido
basalte bvba | hundelgemsesteenweg 1A | 9820 merelbeke | belgium
t +32 (0)9 385 78 38 | f +32 (0)9 329 66 95 | www.basalte.be | [email protected]
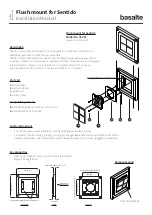
Step 2 – Mud and tape (fig 3.)
•
Ensure that the front surface of the mount is aligned with the drywall and that all of the screws are flush with the
surface of the drywall.
•
Before applying tape, fill gaps with setting-type compound.
•
Perform standard mud and tape drywall joining procedure.
•
Do not apply drywall compound to front surface. Apply drywall compound to external groove only.
•
Sand excess drywall compound to reveille front wall mount surface.
Step 3 – Painting (fig 4.)
•
Do not paint internal surfaces!
•
Paint and painting procedure are in the same manner as drywall painting.
•
Paint the number of coats necessary to achieve the desired coverage and texture.
•
Good practice: in case of any finish imperfections found around the installed wall mount
(after paint), you may apply some acrylic wall putty afterwards, gently sand and paint again.
Step 1 – Cut and place (fig 1. & 2.)
•
Determine where the flush mount will be located.
•
Flush mount needs to fit between two studs.
•
Route adequate cabling to the installation point (in accordance with your local electric regulations).
•
Flush mount needs to fit between two studs and be installed on two horizontal supports secured to the studs.
•
Fix the wall adapter through the holes located on its perimeter using #6 bugle head screws (not included). Make sure to position
the wall adapter as shown on figure 1.
Good practice: apply construction adhesive between wall mount and supports.
•
Cut appropriate drywall pieces and plug voids on the mount sides.
•
Secure all drywall edges to the studs and the horizontal supports.
fig 1.
fig 3.
fig 2.
fig 4.
horizontal
support
studs
tape
external groove
front wall
mount surface
do not paint
internal surfaces


