195 Plus - 220 Plus - 250 Plus -
275 Plus - 300 Plus
174196-174221-174251-174276-174301
Страница 1: ...195 Plus 220 Plus 250 Plus 275 Plus 300 Plus 174196 174221 174251 174276 174301 ...
Страница 2: ...scher GmbH Franz Kleine Str 28 D 33154 Salzkotten Germany Phone 49 5258 971 0 Fax 49 5258 971 120 Technical Support Hotline 49 5258 971 197 www bartscher com Version 4 0 Date of preparation 2023 10 25 EN 2 ...
Страница 3: ...ansport Packaging and Storage 7 3 1 Delivery Check 7 3 2 Packaging 7 3 3 Storage 7 4 Technical Data 8 4 1 Technical Specifications 8 4 2 List of Components of the Appliance 11 4 3 Functions of the Appliance 13 4 4 Protective Elements of the Appliance 14 5 Installation and operation 16 5 1 Installation 16 5 2 Operation 17 6 Cleaning and Maintenance 22 6 1 Safety Instructions for Cleaning 22 6 2 Cle...
Страница 4: ...dling of the appliance Additionally accident prevention occupational health and safety and legal regulations in force in the area the appliance is used apply Before you start using the appliance especially before turning it on read this instruction manual in order to avoid personal injuries and property damages Improper use may cause damage This instruction manual forms and integral part of the pr...
Страница 5: ... the mains voltage To avoid short circuit the appliance should be kept dry If there are malfunctions during operation disconnect the appliance from the power supply Do not touch the appliance s plug with wet hands Never take hold of the appliance if it has fallen into water Immediately disconnect the appliance from the power supply Any repairs or housing opening may be carried out by professionals...
Страница 6: ... product to be sliced to the movable slice thickness partition The blade is very sharp caution is advised when checking the blade sharpness During operation wear cut protection gloves class 5 of DIN EN 388 standard During operation the operator should wear safety clothing that meets local sanitary standards Supervised Usage only Only supervised appliance may be used Always remain in an immediate v...
Страница 7: ...uce any changes in the appliance nor modify it 1 3 Intended Use As described below every use of the appliance for a purpose differing and or diverging from its intended standard use is prohibited and considered to be an unintended use The following is an intended use Slicing sausages 1 4 Unintended Use An unintended use may lead to personal injuries or property damages caused by hazardous voltage ...
Страница 8: ...ntroduced by the user usage of unapproved spare parts We reserve the right to introduce technical modifications to the product intended for improvement of the appliance and its performance 2 2 Copyright Protection This instruction manual and texts drawings and images included in it as well as its other components are copyright protected It is prohibited to reproduce this instruction manual includi...
Страница 9: ...e used to store the appliance when relocating or when shipping the appliance to our service point in the case of any damages The packaging and its elements are made of recyclable materials Particularly these are plastic films and bags cardboard box When disposing of the packaging observe applicable domestic regulations Recyclable packaging materials should be recycled 3 3 Storage Leave the packagi...
Страница 10: ... OFF switch Indicator light ready for operation 4 1 Technical Specifications Name Slicing machine 195 Plus Art No 174196 Material aluminium plexiglas plastic Blade diameter in mm 195 Maximum rotational speed in RPMs 277 Slicing thickness range in mm 1 12 Slicing length in mm 185 Slicing height in mm 130 Degree of protection IPX3 Connected load 0 11 kW 230 V 50 Hz Dimensions W x D x H in mm 335 x 4...
Страница 11: ...d load 0 13 kW 230 V 50 Hz Dimensions W x D x H in mm 410 x 475 x 360 Power cord length in mm 1 4 Weight in kg 14 0 Name Slicing machine 250 Plus Art No 174251 Material aluminium plexiglas plastic Blade diameter in mm 250 Maximum rotational speed in RPMs 190 Slicing thickness range in mm 1 12 Slicing length in mm 195 Slicing height in mm 140 Degree of protection IPX3 Connected load 0 13 kW 230 V 5...
Страница 12: ...ed load 0 13 kW 230 V 50 Hz Dimensions W x D x H in mm 435 x 520 x 385 Power cord length in mm 1 4 Weight in kg 16 9 Name Slicing machine 300 Plus Art No 174301 Material aluminium plexiglas plastic Blade diameter in mm 300 Maximum rotational speed in RPMs 186 Slicing thickness range in mm 1 15 Slicing length in mm 230 Slicing height in mm 175 Degree of protection IPX3 Connected load 0 2 kW 230 V 5...
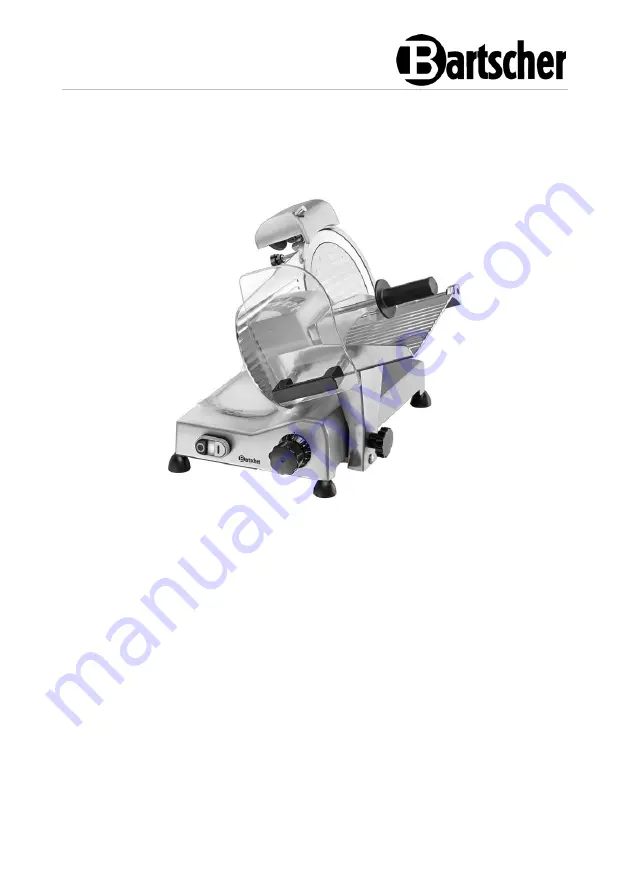
Страница 13: ...Technical Data 174196 11 28 EN 4 2 List of Components of the Appliance Fig 1 ...
Страница 14: ...e slice thickness partition 14 Pusher handle guard 15 Sharpener 16 Slice guide 17 Sharpener retaining screw 18 Blade guard retaining screw 19 Power cord 20 Blade protection device Accessories included in the scope of delivery Basic blade Material high alloy steel Application sausages Compatible model 195 Plus 220 Plus 250 Plus 275 Plus 300 Plus Diameter mm 195 220 250 275 300 Dimensions mm W 195 D...
Страница 15: ... 23 Weight kg 0 64 0 67 1 17 1 47 2 13 Art No 174050 174052 174054 174056 174058 Blade non stick coating Material stainless steel Teflon coated Compatible model 195 Plus 220 Plus 250 Plus 275 Plus 300 Plus Diameter mm 195 220 250 275 300 Dimensions mm W 195 D 195 H 13 W 220 D 220 H 15 W 250 D 250 H 18 W 275 D 275 H 22 W 300 D 300 H 23 Weight kg 0 64 0 67 1 17 1 47 2 13 Art No 174051 174053 174055 ...
Страница 16: ... 175251 174276 174301 model 174196 non removable carriage The carriage can only be removed for cleaning when the slice thickness adjustment knob is undone beyond the zero setting and the carriage is pulled towards the slice thickness adjustment knob In doing so the carriage lock knob must be loosened If it cannot be completely loosened pull the carriage again in the direction of the carriage lock ...
Страница 17: ...cal and electrical protective means the appliance is equipped with according to the regulations both in the operational phase and during cleaning and maintenance residual risks exist that cannot be completely precluded In this instruction manual they are indicated by the warning word WARNING Observe also warning indications on warning stickers placed on the appliance Residual risks e g danger of i...
Страница 18: ...ons easily accessible so that they may be quickly disconnected if such a need arises The appliance should be placed on surfaces that are even with sufficient bearing capacity resistant to water dry and resistant to high temperatures sufficiently large and thus enabling usage of the appliance with no problems easily accessible well ventilated Maintain sufficient clearance from table edges The appli...
Страница 19: ...tion Connect the appliance to a single properly grounded mains socket with protective contact Do not connect the appliance to a multi socket The power cord should be laid in a way preventing anyone from threading on it or tripping against it 5 2 Operation Before First Use 1 Thoroughly clean the appliance and equipment before first use observing instructions in section 6 Cleaning and Maintenance 2 ...
Страница 20: ...age 6 and that no obstacle is blocking and no object is on the carriage tray 5 lifting and lowering of the pusher handle 4 without any obstacles during its movement hole of the cut thickness movable partition 13 with the slice thickness adjustment knob 8 rotating it clockwise and counter clockwise whether the sharpener 15 is correctly mounted and that there is the possibility of removing it withou...
Страница 21: ...vable slice thickness partition 13 and the pusher handle with the pusher 4 WARNING In order to avoid accidents always use the pusher handle 4 to push the product to be sliced to the movable slice thickness partition 13 7 Adjust slice thickness rotate the slice thickness adjustment knob 8 counter clockwise until it reaches the desired position 8 Assume correct stance at the slicing machine Fig 8 Pu...
Страница 22: ... put into initial position and the slice thickness adjustment knob 8 should be set to 0 position 13 Switch the appliance off with the black STOP button A in the appliance ON OFF switch 9 Do not allow the appliance to run idle 14 The sliced good can be now removed from the slice tray WARNING Cut wounds hazard Never operate the appliance with wet or moist hands Never put hands between the blade 1 an...
Страница 23: ... the sharpener is close to the edge of the blade Otherwise correct it 6 Connect the appliance to a grounded single socket and switch it on with the white START button B Fig 9 Fig 10 7 Hold the depressed button b Fig 10 of the sharpener on the back of the sharpener 1 and leave the appliance switched on for approx 60 seconds until the blade is burred 8 Then hold the c button in the front and the b b...
Страница 24: ...n reverse order ATTENTION In order to keep the blade in the optimum condition and maintain safety it should be replaced when its height is reduced by approx 5 7 mm 6 Cleaning and Maintenance 6 1 Safety Instructions for Cleaning Before cleaning disconnect the appliance from the power supply Leave the appliance to cool down completely Make sure water does not enter the appliance Do not immerse the a...
Страница 25: ...if needed thoroughly clean all parts of the appliance that come into contact with food products 2 Carry out the cleaning of the individual groups observing the instructions below Carriage and Pusher Handle Fig 11 1 To clean remove the carriage 6 from the appliance NOTE The carriage can only be removed when the slice thickness adjustment knob is undone beyond the zero setting and the carriage is pu...
Страница 26: ...m in the appliance Blade and Blade Cover WARNING Cut wounds hazard The blade is very sharp Never touch the blade edge with bare hands During cleaning of the blade wear class 5 cut resistant protective gloves of DIN EN 388 standard 1 Remove the sharpener from the appliance Fig 9 2 In order to remove the blade guard 3 for cleaning loosen the fixing screw d at the back of the appliance Fig 12 and pus...
Страница 27: ...djustment screws e maintaining correct stance and the blade guard 3 with the use of the screw d Blade Protection Device and Slice Guide Fig 14 Fig 14 1 Loosen the lower screw f of the protection device 20 at the rear side of the appliance Remove the slice guide 16 2 Loosen the upper screw f and remove the protection device 20 for cleaning 3 Clean removed parts in warm water with a neutral cleaning...
Страница 28: ...screws Sharpener Fig 15 1 Remove the complete sharpener assembly from appliance fig 9 2 After sharpening clean the sharpener elements g with a cleaning brush soaked in alcohol Fig 15 6 3 Maintenance Regular Lubrication Greasing 1 Lubricate the carriage regularly with a food grade machine grease 2 To do this lay the slicing machine on its side 3 Apply some machine oil to both ends of the carriage a...
Страница 29: ...d electrical installation Contact the supplier Damaged switch Contact the supplier Damaged motor Contact the supplier The blade does not cut or the slices are fuzzy and or irregular Blade is not sharpened Sharpen the blade section Blade Sharpening Blade excessively worn Replace the blade The blade sharpening is not satisfactory Position is not correct Fit the sharpener correctly section 5 2 Operat...
Страница 30: ...appliances must be disposed of and recycled in a correct and environmentally friendly manner You must not dispose of electric appliances with household waste Disconnect the appliance from the power supply and remove power cord from the appliance Electrical appliances should be returned to designated collection points ...