background image

BARTHE


www.barthe-audio.com 

 Technology to Advance Education


14

- Accessories supplied with the device  


1.


Power cable 

2.


Remote control 

3.


Emitter : HH : micro handheld  (depending on model) 

                              2 batteries AA depending on model 

4.


User guide 


VI QUESTIONS 

 
Double check the following points before concluding that your system is down. 

1-


Are all connections correct? 

2-


Is the system used in accordance with the instruction manual? 

If the system is not working properly, perform the check list below. If any of these checks does not resolve the 
problem, the system may be defective. Then immediately unplug the power cord and contact your dealer. 


SYMPTOME 

CAUSE 

SOLUTION 

The device does not turn on 
when you press the power 
switch. 

- The power cord is not properly 
plugged into the wall outlet. 
- The main plug is not working 
- The mains voltage does not 
match the device’s specification. 
- Blown fuse. 

- Plug the power cord into the wall 
outlet. 
- Call an electrician. 
- Obtain an adapter. 
- Replace the fuse (see section 
« cleaning »). 

The device does not react to the 
action of keys. 

-  The  switch  is  in  the  Off 
position. 
- The device is not connected. 

- Turn the switch On. 
- Disconnected and reconnected 
the device. 

There is no sound. 

- The level of the command of the 
general volume is insufficient. 
- The level of the volume control 
of the source is insufficient. 
 

- Adjust the volume control on the 
right position. 
- Adjust the volume control on the 
right position. 
 

The wireless microphone is not 
working. 
 

- The battery  is installed in the 
wrong direction. 
 
- The battery is too low. 

- Replace the battery in the right 
direction. 
 
- Put a new battery with a proper 
voltage. 

The  wire  microphone  is  not 
working. 

- The microphone is in position 
« off ». 
-  The  microphone  is  not 
connected. 

- Press the key « on ». 

-  Disconnect  and  reconnect  the 
microphone  input  « micro »  of 
the device. 


Содержание SOL 300

Страница 1: ...g the unit and keep it for reference BARTHE Technology to Advance Education USER MANUAL FOR SOL 300 Please read this manual carefully before operating the unit and keep it for reference www barthe aud...

Страница 2: ...2 TABLE OF CONTENTS I SAFETY INSTRUCTIONS 3 II CHARACTERISTICS 5 II 1 SWITCHING ON 5 III PARTS DESCRIPTION 6 III 1DEVICE Description 6 III 2 CONTROL PANEL 7 REMOTE CONTROL 11 IV 1 GENERAL USE 12 IV 2...

Страница 3: ...ch as radiators in places submitted to high temperature near naked flames Power supply cord should be routed so that they are not likely to be walked on or pinched by items placed upon or against it K...

Страница 4: ...n contact with the gas emanating from these products electrical components inside the unit may ignite or cause an electric shock Always turn off the power when you move it to avoid damaging the cord a...

Страница 5: ...ility 98 dB Effective range 25 m Dimensions Width 44 cm Height 70 cm Depth 36cm Weight 16 kg USB SD connector Audio format MP3 FLAC WAV and Line IN OUT RCA Microphone input 1 Bass treble adjustment US...

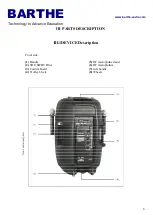
Страница 6: ...2 SD USB BT Drive 3 Control board 4 Trolley block Non contractual photo BARTHE Technology to Advance Education III PARTS DESCRIPTION III 1DEVICE Description 5 HF microphone stand 6 HF microphones 7 si...

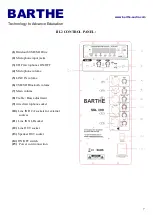
Страница 7: ...ume 6 USB SD Bluetooth volume 7 Main volume 8 Treble Bass adjustment 9 wired microphone socket 10 Line IN RCA sockets for external sources 11 Line IN XLR socket 12 Line OUT socket 13 Speaker OUT socke...

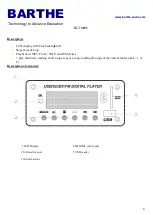
Страница 8: ...gs repeat a song F Description of elements 1 LCD Display 2 Infrared receiver 3 Action buttons BARTHE Technology to Advance Education III 3 MP3 LCD display with blue backlight off FLAC WAV and WMA file...

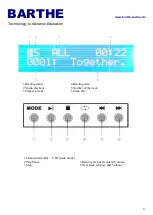
Страница 9: ...mode 1 Mode and standby 4 Playback modes 2 Play Pause 3 Stop BARTHE Technology to Advance Education 4 Reading time 5 Number of the track 6 Track title 4 Playback modes 5 Return previous track and 6 Ne...

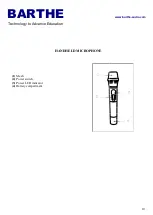
Страница 10: ...HE Technology to Advance Education HANDHELD MICROPHONE 1 Mesh 2 Power switch 3 Power LED indicator 4 Battery compartment BARTHE Technology to Advance Education HANDHELD MICROPHONE www barthe audio com...

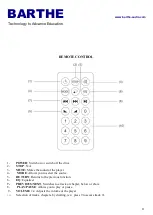
Страница 11: ...es the sound of the player 4 MODE Allows you to select the source 5 RETURN Returns to the previous function 6 EQ Equalizer 7 PREVIOUS NEXT Switches to a track or chapter below or above 8 PLAY PAUSE Al...

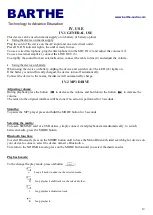
Страница 12: ...Technology to Advance Education IV USE IV 1 GENERAL USE mains supply or on battery if battery option AC input and on an electrical outlet Press ON ON indicator lights the unit is ready for use To use...

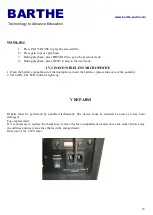
Страница 13: ...MICROPHONE 1 Open the battery compartment of the microphone insert the batteries please take care of the polarity 2 Set to ON The LED indicator lights up V REPAIRS Repairs must be performed by qualif...

Страница 14: ...working The mains voltage does not match the device s specification Blown fuse Plug the power cord into the wall outlet Call an electrician Obtain an adapter Replace the fuse see section cleaning The...

Страница 15: ...tions in this manual and excluding accessories and battery Accessories are guaranteed for one year Batteries are guaranteed for 6 month Notes on environmental protection In accordance with European Di...

Страница 16: ...ributed by 11 rue des Sapeurs 34 380 St Martin de Londres FRANCE Phone 33 04 67 55 14 57 Fax 33 04 67 63 54 95 www barthe audio com info barthe audio com Limited Company with a capital of 202 000 572...

Отзывы: