12 / 34
www.bartec-syscom.com
Copyright © Bartec Syscom 2019
2.2 Keyboard
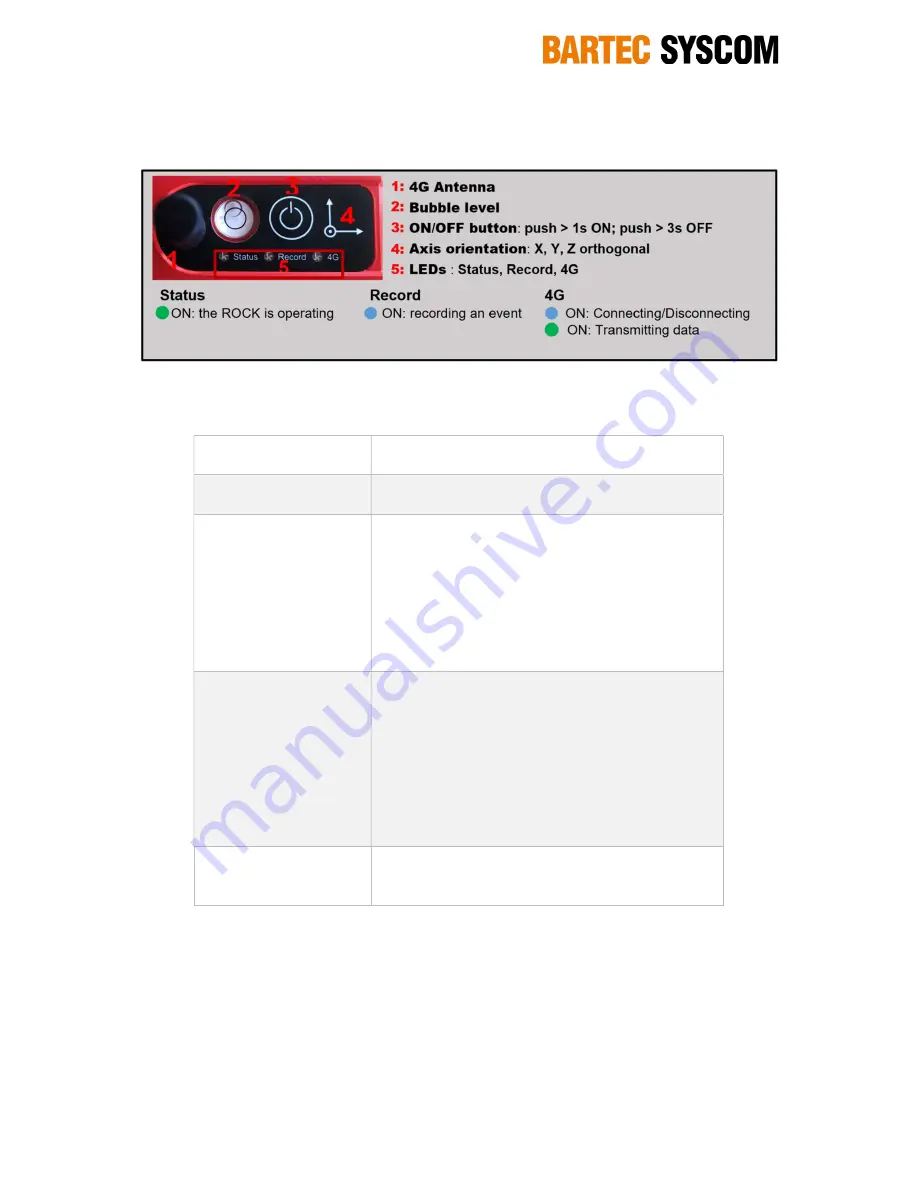
The general keyboard overview with LEDs colors and status are given in Figure 6 below.
Figure 6: ROCK keyboard and LEDs status
The ON/OFF button has the following functions:
SWITCH ON
Push around 1s until the Status LED turns ON and
release
SWITCH OFF SW
Push around 3s until the Status LED turns ON and
release. The ROCK is turned OFF by the processor
FIRMWARE UPGRADE
Push around 10s until LEDs Status and Record are
ON. This Set the Rock ready for firmware upgrade.
With the ROCK connected to a computer using the
ROCK USB cable, the ON/OFF button must be
pushed until the LEDs Status and Record are
permanently ON, copy the firmware file *.ava into the
ROCK folder. The firmware upgrade starts
automatically.
DIAG REPORT
Push around 20s until the 3 LEDs Status, Record and
4G are ON. This generates a diagnostic report of the
ROCK. The diag report can be downloaded using the
USB cable and a computer. The diag report should
be given to Syscom for evaluation.
Important: Disconnect the USB cable from the
ROCK once the diag report has been downloaded.
Otherwise the ROCK will no longer be able to
generate events
SWITCH OFF HW
Push around 30s. The ROCK will be turn OFF by the
hardware. This can be used if the processor is
crashed and need a reboot of the ROCK.
It is recommended to install the ROCK at a proper location, level it and then switch it ON. Once
switched ON and the ROCK is taking in a project and turn ON within the SCS plateform, the
permanent monitoring starts automatically.
ROCK device have to be setup using the SCS, refer to §3.4.
2.3 Status LED
Refer to Figure 6. 3 LEDs are available, giving important device conditions.


