


4
5
www.barska.com
www.barska.com
7. Focus Adjustment: Focus the picture by turning the focus wheel clockwise
or anti-clockwise
8. IR LED
9. Lens cap: Take off for night-time use. Failure to do so will result in severely
limited performance.
(Note: Uncovering the lid during the day time will NOT damage the lens, but it
will affect the image quality.)
10. TF card and USB slot: These are located just above the eyepiece. First make
sure the power is off. Then push the card into the slot to lock it. To remove
the card, first turn off device then push it in to release. When the card is
partially ejected, pull it out.
11. Eyepiece
Using The Night Vision Binocular
1. Turn the night vision by press the ON button down for a short period.
2. Pick an infrared power level by pressing the IR button to illuminate at night.
There are 3 brightness setting. A higher setting will provide a brighter picture,
but will deplete the batteries quicker.
3. Focus the picture by turning the focus wheel clockwise or anti-clockwise
4. You can use digital zoom to increase the zoom ratio more by press the Zoom
button to magnify the picture from 1.0x->1.07->1.14…to 2.0x then will go back
to 1x magnification.
5. When need, adjusting the LCD brightness level by press down the INTEN
button. Operating night vision at night may have LCD brightness to bright
issue, use intensity button for adjusting LCD brightness easily.
6. Press the Mode button to switch modes - the night vision four modes are
Photo, Video, Gallery and Setting. These are explained in the next sections.
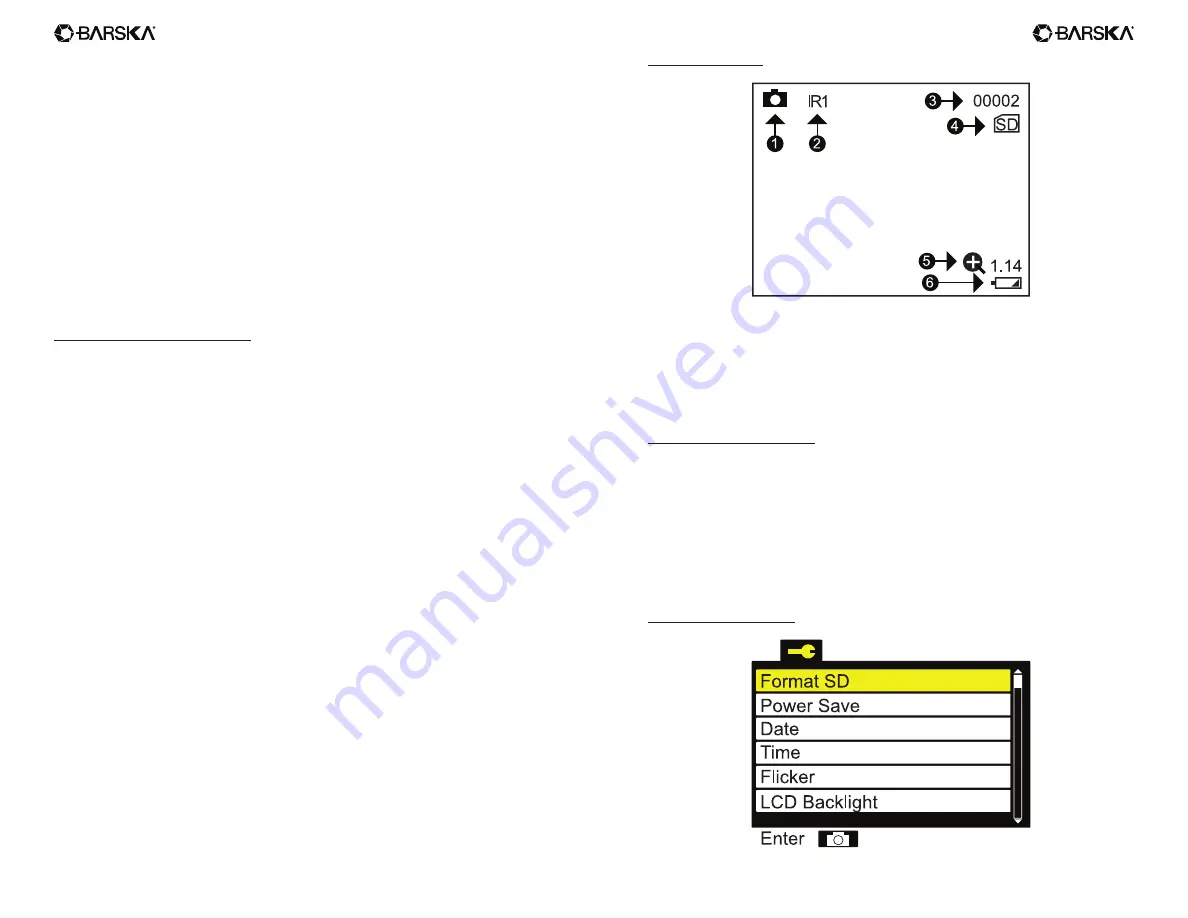
Display information
1. Photo/Video mode icon
2. IR level Indication
3. No. of photos taken
4. TF card insert indication
5. Zoom Ratio indication
6. Battery level indicator
Taking Pictures And Videos
1. To take a picture: go to Photo mode (this is the default mode when the night
vision is switched on.) A camera icon shows at the bottom of the screen. To
take a photo, press the OK button.
2. To record a video: go to Video mode. A small video icon will appear at the
bottom of the screen. To start recording, press the OK button. To stop
recording, press the OK button again. Video will save automatically onto the
Micro SD memory card.
Setting Menu Navigation