239 of 285
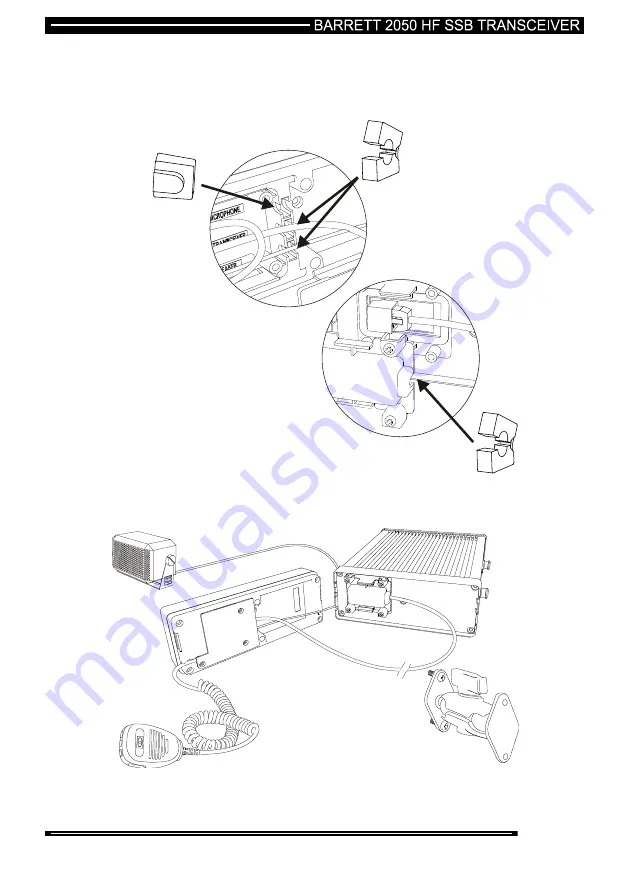
Place the cable grommets around the cables on the remote head and push the
cables into the grooves on the remote head. Place the blanking grommet into the
unused slot. Replace the plastic cover on the remote head. If required, this cover,
whilst having clips, can then be secured with M3 screws to provide a solid cable
clamp.
Attach the RAM mount using the 2 x M5 screws provided to the centre of the
remote head.
Содержание 2050
Страница 31: ...31 of 285 then press the key ...
Страница 66: ...66 of 285 then press the key type in your messages using the alpha numeric keys then press the key ...
Страница 91: ...91 of 285 use the Scroll keys to select Yes to erase the address book entry then press the key ...
Страница 93: ...93 of 285 enter the telephone number using the numeric keys up to 16 digits then press the key ...
Страница 99: ...99 of 285 then press key to save the new alias ...
Страница 110: ...110 of 285 Add an Entry press the key type in a new label using the Alpha keys then press the key ...
Страница 118: ...118 of 285 Upload pack See section Cloning programming from another transceiver ...
Страница 134: ...134 of 285 then press the key Change the Selcall format associated with the ID if required then press the key ...
Страница 172: ...172 of 285 If the operator attempts to change channels while linked the following screen is shown ...
Страница 175: ...175 of 285 If the operator attempts to change channels while linked the following screen is shown ...
Страница 186: ...186 of 285 Press the key and the first address that matches or the closest match the prefix entered is selected ...
Страница 189: ...189 of 285 Pressing the key displays the link status Or if you already have a link established ...
Страница 224: ...224 of 285 Fitting the 2050 Into the 2040 Manpack Adaptor Removing the Battery Cartridge ...


