


8-2
Random Access Adjustment Mode
5975498A BARCOREALITY 9200LC 170698
Select with or
then <ENTER>
<EXIT> to return.
Select with or
then <ENTER>
<EXIT> to return.
Select with or
then <ENTER>
<EXIT> to return.
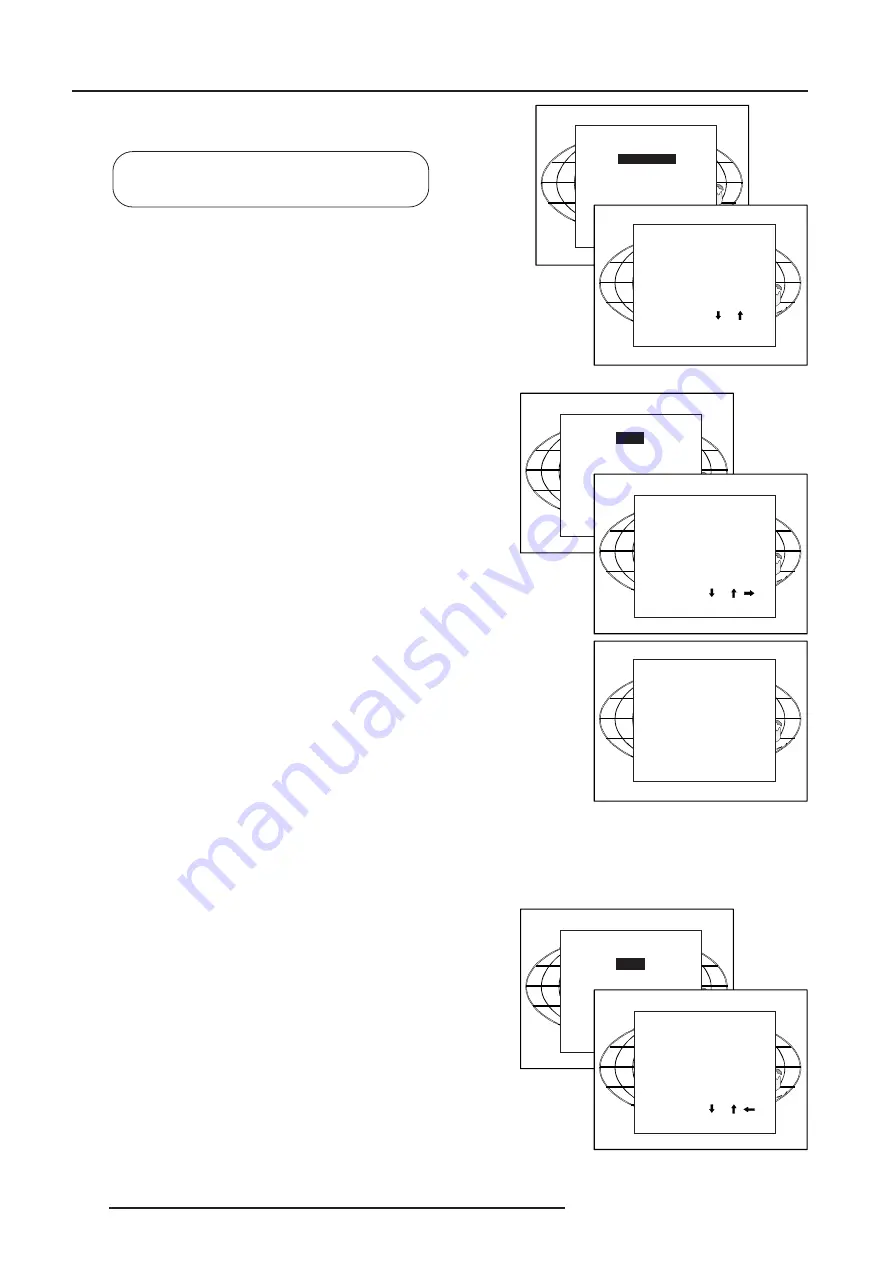
Highlight
File Service
by pushing the control disc up or down and press
ENTER
to select. The File service menu will be displayed.
ENTER
displays the File Service menu;
EXIT
returns to the Path selection menu.
ADJUST
returns to operational mode.
The following file manupulations are possible :
- Load : installation of a file for a new source.
- Edit : editing a loaded file to the source specs.
- Rename : renaming a file.
- Copy : copying a file to a new file.
- Delete : deleting an existing file.
- Options : way of sorting the files.
Load File
Push the control disc up or down to select LOAD and press
ENTER
to
display the Load menu.
The Load menu displays the corresponding files depending on the
installed filter.
This filter can be "Fit" or "All". To change the filter, push the control disc
to the right to select "filter list" (filter list will be hightlighted) and press
ENTER
to toggle the annotation between brackets.
"All" : all files that can be loaded will be displayed.
"Fit" : only the best fitting files will be displayed (with a distinction of ±
2 lines and line duration distinction of ± 300 ns, if noting is found wihtin
this small area, the projector continues searching until it finds something.)
Push the control disc up or down to select the best fitting file and press
ENTER
to select.
When scrolling through the files, the image will be adapted according to
the settings of the selected file (on line adaptation). When the best fitting
image is displayed, press
ENTER
to select this file. A confirm Load file
menu will be displayed with the newly created file and the one on which
the new file is based on.
Press
ENTER
to confirm your new creations or
EXIT
to return to the load
file menu.
If the displayed image is not correct, go to the Edit menu, select the active
file and change the File settings.
During a load file, the actual active file is displayed next to the indication
'Active file'.
Edit File
The Edit file menu makes it possible to change the settings of the file
according to the real settings of the connected source. Consult the
source specification before entering the data.
To start up the EDIT menu, push the control disc up or down to select EDIT
in the FILE menu and press
ENTER
.
Select the file which must be edited (mostly the active file) and press
ENTER
.
The Edit file adaptation menu will be displayed.
RANDOM ACCESS
ADJUSTMENT MODE
FILE SERVICE
PICTURE TUNING
GEOMETRY
FILE SERVICE
LOAD
EDIT
RENAME
COPY
DELETE
OPTIONS
Select with or
then <ENTER>
<EXIT> to
return
.
FILE SERVICE
LOAD
EDIT
RENAME
COPY
LOAD FILE
FILTER LIST [All]
Filename
Src
Resolution
-----------------------------------------------------
ntsc .s01 1
675x240i
ntsc .c01 1
675x240i
ntsc_2 .s01 1
675x240i
-----------------------------------------------------
Active file : ntsc.c50
Select with or ,
<ENTER> to accept
<EXIT> to
return
.
CONFIRM
LOAD FILE
Create file
ntsc.c02
based on file
ntsc.s01?
<ENTER> to confirm
<EXIT> to return
FILE SERVICE
LOAD
EDIT
RENAME
COPY
EDIT FILE
Filename
Src
Resolution
-----------------------------------------------------
ntsc .s01 1
675x240i
ntsc .c01 1
675x240i
ntsc_2 .s01 1
675x240i
-----------------------------------------------------
Active file : ntsc.c50
Select with or ,
<ENTER> to accept
<EXIT> to
return
.
Содержание REALITY 9200LC R9001227
Страница 1: ...OWNER S MANUAL REALITY 9200LC R9001227...
Страница 2: ......
Страница 3: ...BARCO PROJECTION SYSTEMS Date 170698 OWNER S MANUAL Rev 01 REALITY 9200LC R9001227 Art No R5975498A...
Страница 14: ...Installation Set Up 4 2 5975498A BARCOREALITY 9200LC 150997...
Страница 28: ...7 2 Start up of the Adjustment Mode 5975498A BARCOREALITY 9200LC 150997...
Страница 44: ...9 6 Installation Mode 5975498A BARCOREALITY 9200LC 150997...
Страница 52: ...ServiceMode 10 8 5975498A BARCOREALITY 9200LC 170698...


