Barco R9002250 Скачать руководство пользователя страница 42

Service Mode

7-4

5975708 BARCODATA 1209s 050698
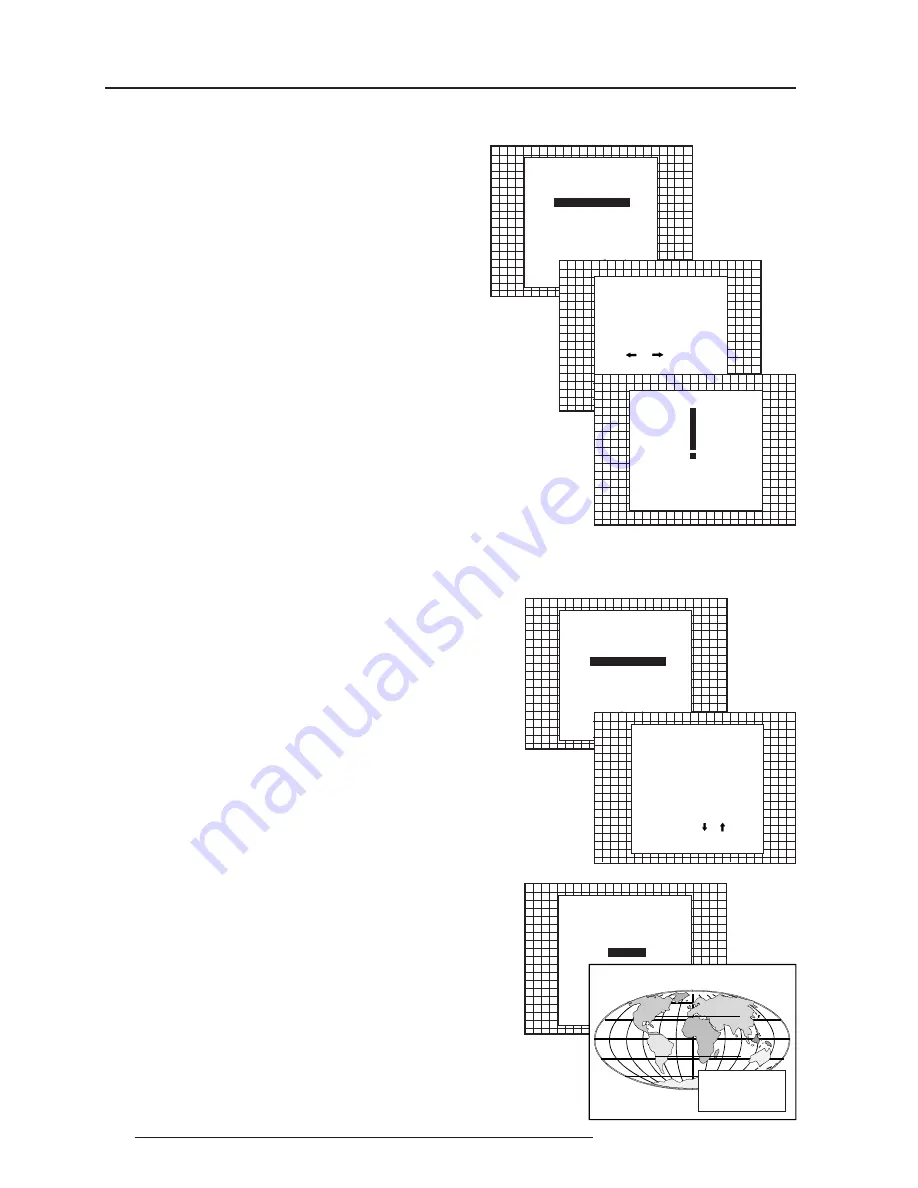
Select with       or

then <ENTER>

<EXIT> to return.

Select with       or

then <ENTER>

<EXIT> to return.

Select with       or

then <ENTER>

<EXIT> to return.

SERVICE MODE

IDENTIFICATION

COPY A BLOCK

DELTE A BLOCK

DELETE ALL BLOCKS

CHANGE PASSWORD

CHANGE LANGUAGE

RUN TIME

SET TO MIDPOSITION

CONVERGENCE MID

MORE...

RUN TIME

105 h

Use        and        to select,

and reprogram

with numeric keys.

<ENTER> to confirm

<EXIT> to return

Change password

This item is password protected.

Highlight 

'change password'

 with the control disc and press 

ENTER

.

The current password is displayed.  The new password must

consist of 4 digits between 0 and 9.  Push the control disc to the left

or to the right to select the digits to be changed.  Use the numeric keys

to enter the new digits.

Press 

ENTER

 to save the new password.  Before saving the new

password, a confirmation screen will be displayed.

Press 

EXIT

 to return to the Service menu without saving the new

password.

Change Language

The 'Change Language' function offers the possibility to change the

language of the screen menus to :

- English

- Spanish

- French

- German

therefore, pusj the control disc up or down to highlight 'Change

language' and press 

ENTER

 to select the language menu.

Push the control disc up or down to select the desired language and

press 

ENTER

 to change the language.

When the displayed password is correct, press 

ENTER

 to save.

If not correct, press 

EXIT

 to cancel the saving.

Run time

Highlight 

'run time'

 with the control disc and press 

ENTER

 to display

the amount of time the projector has played since its first start up at

the factory.

Note : all projectors leave the factory after a burn-in period of

approximately 100 hours.

Press 

EXIT

 to return the service mode menu.

SERVICE MODE

PASSWORD

Enter new password :

0 0 0 0

IDENTIFICATION

COPY A BLOCK

DELTE A BLOCK

DELETE ALL BLOCKS

CHANGE PASSWORD

CHANGE LANGUAGE

RUN TIME

SET TO MIDPOSITION

CONVERGENCE MID

MORE...

Password will be

reprogrammed as xxxx

<ENTER> to confirm

<EXIT> to cancel

CHANGE PASSWORD

SERVICE MODE

IDENTIFICATION

COPY A BLOCK

DELTE A BLOCK

DELETE ALL BLOCKS

CHANGE PASSWORD

CHANGE LANGUAGE

RUN TIME

SET TO MIDPOSITION

CONVERGENCE MID

MORE...

LANGUAGE

ENGLISH

ESPAÑOL

FRANCAIS

DEUTSCH

Select new language

 with       or

then <ENTER>

<EXIT> to return.

Содержание R9002250

Страница 1: ...R9002250 R9002259 OWNER S MANUAL DATA 1209s...

Страница 2: ...BARCO PROJECTION SYSTEMS Date 040698 Art No R5975708 R9002250 R9002259 OWNER S MANUAL DATA 1209s Rev 00...

Страница 3: ...ice Produced by BARCO NV June 1998 All rights reserved Trademarks are the rights of their respective owners BARCOnv ProjectionSystems Noordlaan5 B 8520Kuurne Belgium Tel 32 56 368211 Fax 32 56 351651...

Страница 4: ...g a VS05 switcher to the projector 3 6 Connecting an IR Remote Receiver to the projector 3 6 Controlling 4 1 Battery installation in the RCU 4 1 How to use your RCU 4 2 Projector Address 4 2 How to di...

Страница 5: ...ck 7 3 Deletion of all blocks 7 3 Change password 7 4 Change Language 7 4 Runtime 7 4 Set to midposition 7 5 Undo Midposition 7 5 Convergence Mid 7 5 Undo Convergence Mid position 7 5 Dynamic Astigmat...

Страница 6: ...tch over from 230Vac to 120 Vac or from 120Vac to 230 Vac If you are not sure of the type of AC power available consult your dealer or local power company 2 This product is equipped with a 3 wire grou...

Страница 7: ...ing to qualified service personnel under the following condi tions A When the power cord or plug is damaged or frayed B If liquid has been spilled into the equipment C If the product has been exposed...

Страница 8: ...232 Input Port Connection between the projector and an IBM PC or compatible or MAC RS422 for remote computer control and data communication RS 232 Output Port RS232InputPortallowsacommunicationlinkfo...

Страница 9: ...n to stop projection without main power off Pause to blank the image press PAUSE The image disappears but full power is retained for immediate restart ing Digit buttons direct input selection Picture...

Страница 10: ...the wall outlet voltage is different call a qualified technician for power adaptation of the projector Switching On Off The projector is switched ON and OFF using the power mains switch ON OFF Pressed...

Страница 11: ...LEASEUSE EXIT TO LEAVETHIS PROCEDURE PROJECTOR WARM UP A FULL WHITE PATTERN WILL BE GENERATED FOR 20 MINUTES FOR IMMEDIATE USE OF THE PROJECTOR PRESS EXIT WARNING SKIPPING THIS PROCEDURE CAN REDUCE TH...

Страница 12: ...or ENTER to accept EXIT to return PICTURE TUNING COLOR BALANCE SYNC FAST PORT2 S VIDEO LINE DOUBLER ON Highlight Picture Tuning and press ENTER Select Selected source and press ENTER Input selection...

Страница 13: ...Vert sync Analog Input Selection with the RCU or build in RCU press digit button 3 Connecting a RGB Analog source to port 4 5 RGB analog input terminals with separate H and V sync inputs with composit...

Страница 14: ...s digit button 6 To select the component video input with the RCU or the build in RCU press digit button 8 Connecting a Component Video source with Tri level sync to port 4 5 Opion A component video R...

Страница 15: ...765 Connecting a VS05 switcher to the projector The VS05 can switch up to 5 Composite Video sources 3 S Video Sources and 1 RGB analog or component Video source to the projector In addition an audio s...

Страница 16: ...tall first the battery Remove the battery cover on the backside of the RCU by pushing the indicated handle a little to the bottom of the RCU Lift up the top side of the cover at the same time fig 1 In...

Страница 17: ...remote cable in the connector on the bottom of the RCU and the second side in the connector in the rear panel of the projector labelled REMOTE d Built in RCU local keypad To gain access to the built i...

Страница 18: ...ync or with separate Hor and Vert sync or sync on green composite sync 3 Input signal R Y Y and B Y with separate composite sync or with separate Hor and Vert sync or with composite sync on Y 4 Input...

Страница 19: ...he color saturation using the and buttons RCU A bar scale gives a visual indication on the screen of the current color setting while pressing on the above indicated keys If the bar scale is not visibl...

Страница 20: ...n to perform the installation procedure see example of projected warning on the next page GUIDED Guided should be selected if the user intends to perform a complete alignment of the projected image Al...

Страница 21: ...sword contains 4 digits Enter the digits with the numeric keys on the RCU Example 2 3 1 9 For each digit entered a X appears on the screen under the displayed text enter password When your password is...

Страница 22: ...ontinues to Setup Pattern Selection EXIT returns to Operational mode Overview Random Access Adjustment mode RANDOMACCESS ADJUSTMENTMODE HPHASE RASTERSHIFT PICTURETUNING GEOMETRY LEFTSIDECORRECTIONS VC...

Страница 23: ...IZE V SIZE BLANKING LEFT BOTTOM RIGHT TOP VLINEARITY GREENONLY BLUEONGREEN REDONGREEN FOCUSING BLUE GREEN RED BLUE GREEN RED REDANDBLUE BLUEANDGREEN REDANDGREEN COLORSELECT ORBITING CONTRASTMODULATION...

Страница 24: ...enu will be displayed if the internal cross hatch pattern has been selected or if no source is connected to the projector The table below lists the 16 fixed factory preset frequencies available Anothe...

Страница 25: ...ER COLOR BALANCE FIXED COLOR BALANCE 3200 4900 6500 9300 CUSTOM RED BLUE GAIN CUSTOM GREEN GAIN CUSTOM RED BLUE CUT OFF CUSTOM GREEN CUT OFF Select with arrow keys then ENTER Red Blue adjust red with...

Страница 26: ...FAST and SLOW Note SYNC is normally used in the SLOW position For Video and S Video the sync is automatically set to FAST Select with or ENTER to accept EXIT to return PICTURE TUNING COLOR BALANCE SY...

Страница 27: ...trol disc and press ENTER to toggle between ON active and OFF non active EXIT will return to the random access selection menu Select with or ENTER to accept EXIT to return PICTURE TUNING COLOR BALANCE...

Страница 28: ...o the top focusing Push the control disc to the left or to the right to adjust the top focusing Adjust until the upper part of the image is sharp ENTER to return to the Green Focusing menu Bottom imag...

Страница 29: ...ontal Phase not for internal pattern Raster Shift Left Right Corrections Left Side Corrections Top Bottom Corrections Horizontal Size Vertical Linearity Vertical Size Blanking The convergence correcti...

Страница 30: ...becomes visible on the face of the CRT ENTER will select green raster shift adjustment EXIT returns to random access adjustment mode menu Warning In order to ensure maximum CRT longevity and to avoid...

Страница 31: ...CENTERLINE SKEW SIDE BOW SIDE KEYSTONE SEAGULL CORRECTION Warning Use this correction to adjust the right side of the image The warning Use this correction to adjust the right side of the image appea...

Страница 32: ...cal lines Correct by pushing the control disc to the right Correct by pushing the control disc to the left To enter an alignment push the control disc up or down to highlight a function and press ENTE...

Страница 33: ...mber between 0 and 100 Adjust the next alignments until the vertical lines are straight To enter an alignment push the control disc up or down to highlight a function and press ENTER to activate this...

Страница 34: ...control disc up or down to highlight H SIZE on the Geometry menu and then press ENTER ENTER will select horizontal size adjustment EXIT returns to random access adjustment mode menu ADJUST returns to...

Страница 35: ...Y H PHASE RASTER SHIFT LEFT RIGHT E W LEFT SIDE CORRECTION TOP BOTTOM N S H SIZE V LINEARITY V SIZE BLANKING VLINEARITY 70 Vertical Size Adjustment Push the control disc up or down to highlight V SIZE...

Страница 36: ...then ENTER EXIT to return BLANKING TOP BOTTOM LEFT RIGHT The following blanking corrections are possible top blanking bottom blanking left blanking right blanking Therefore if the internal pattern was...

Страница 37: ...age Vertical corners adjust the horizontal lines in the four corners within a certain area without influencing the middle of the image Repeat for blue on green The screen area is divided into 25 areas...

Страница 38: ...nes are on the green lines or as close as possible to the green lines During these adjustments the horizontal convergence adjustments in zones 10 to 25 will be set to midposition barscale 50 FineConve...

Страница 39: ...vice versa push the control disc up or down to select more SERVICE MODE Overview flowchart Service mode IDENTIFICATION COPY A BLOCK DELETEABLOCK DELETEALLBLOCKS CHANGEPASSWORD CHANGELANGUAGE RUNTIME...

Страница 40: ...py a block The copy a block function copies the settings of a selected block into the active block Highlight copy a block with the control disc and press ENTER ENTER will select the highlighted item T...

Страница 41: ...lock Highlight Delete a block with the control disc and press ENTER Push the control disc up or down to select the desired adjustment block Press ENTER to delete the selected adjustment block A confir...

Страница 42: ...e the language of the screen menus to English Spanish French German therefore pusj the control disc up or down to highlight Change language and press ENTER to select the language menu Push the control...

Страница 43: ...ir midposition UndoMidposition When Set to Midposition is selected all settings are set to their midposition To cancel this action select Undo Midposition by pushing the control disc up or down and pr...

Страница 44: ...djustment direction axial or diagonal and adjustment value are given in a text box on the screen When all areas are adjusted press EXIT to return to the service main menu Follow the next procedure Hig...

Страница 45: ...qualified installation or service personnel should perform these adjustments If you are qualified press ENTER to continue If not qualified press EXIT to return to the Service mode main menu Further de...

Страница 46: ...up or down and press ENTER to display the CRT drive mode menu To change the boost mode push the control disc up or down to select a display mode and press ENTER to select The following modes are avail...

Страница 47: ...ojector selects the last used memory bank Press ENTER and push the corresponding digit between 1 and 8 of a non existing memory bank The memory banks can be created in random order e g first creating...

Страница 48: ...a pencil or other small object WARNING input not available When using the projector with the RCVDS this warning will be dis played when selecting an input slot of an RCVDS where the input board is mis...

Страница 49: ...communication error be tween the RCVDS and the projec tor FAILURE IRIS commu nication error WAIT starting up IRIS Message during the start up of the IRIS Messagewilldisappearwhen the IRIS is ready to...

Страница 50: ...se of mouse control pull down menus and dialog boxes Two main applications are available with this software remote control and transfering and receiving data of projector settings Remote Control Simul...

Страница 51: ...d 5 BNC to 5 BNC cable To connect an analog source to the BNC input of the projector Available lenght 60 cm order number R9828260 150 cm order number R9828261 5 m order number R9828262 15 m order num...

Страница 52: ...ovement of the projected image imperceptible Adjustment procedure The orbiting path is automatically added to the Random access adjustment mode menu when installed Press ADJUST to enter the adjustment...

Страница 53: ...ting mode set to OFF This alignment must be performed in case of a multiple projector installation with Master and Slave projectors in order to ensure a correct operation of the Orbiting for all proje...

Страница 54: ...adjusting the horizontal and the vertical deviation the picture moves in corresponding direction allowing the set up of the deviation without orbiting operation EXIT to return SLAVE ORBITING CHANGE T...

Страница 55: ...ata representing the values for all adjustments eg Convergence and Geometry in the projector for the source the block corresponds to The block header contains the basic characteristics of the source a...

Страница 56: ...nt block is automatically stored Follow the steps below to create a second adjustment block for a source between 0 and 9 1 Select the source between 0 and 9 that the second adjustment block is to be c...

Отзывы: