12. Display setup
Autoimage works only for data signals.
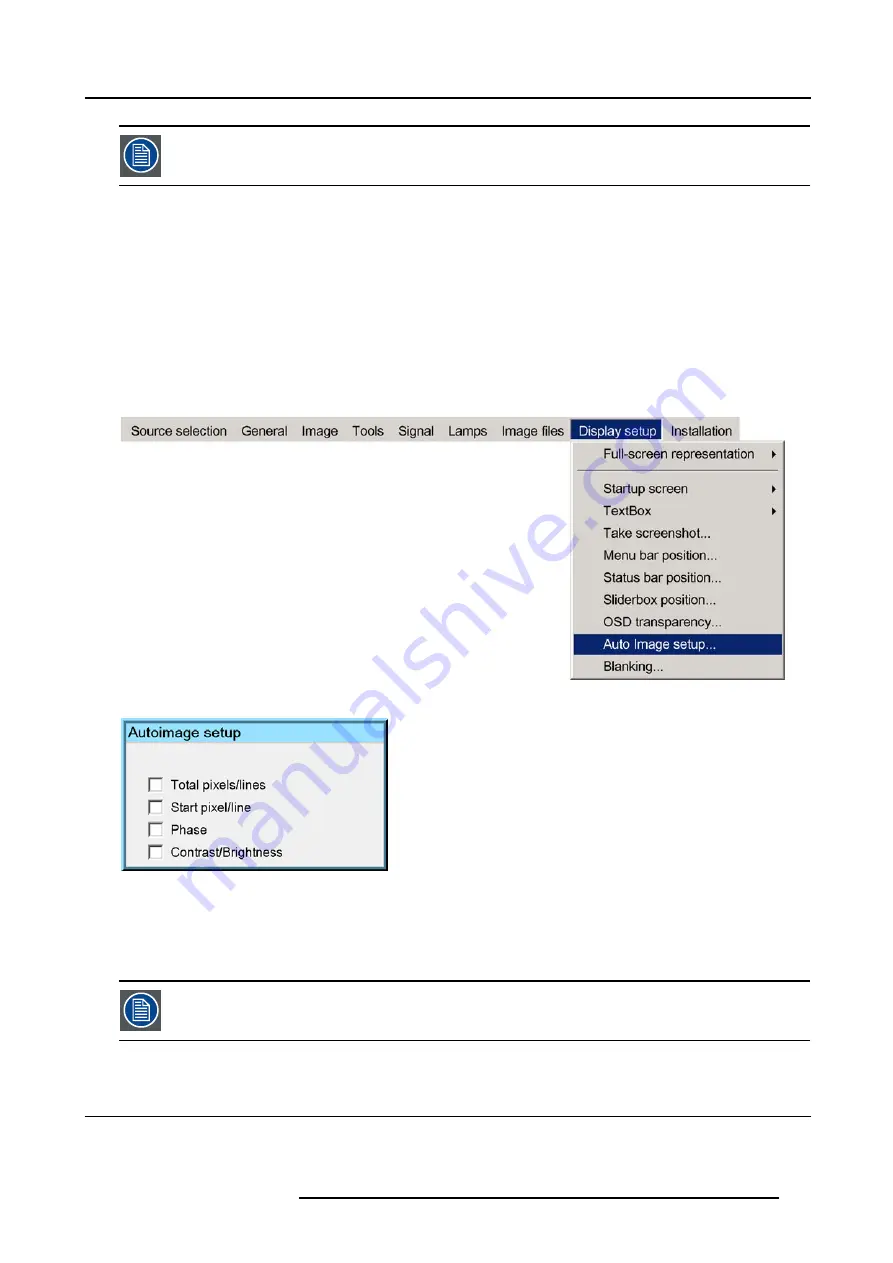
How to set up AutoImage?
1. Press
MENU
to activate the Tool bar
2. Press
→
to select the
Display setup
item
3. Press
↓
to Pull down the
Display setup
menu
4. Use
↑
or
↓
to select
AutoImage setup
5. Press
ENTER
A dialog box is displayed.
6. Use the arrow keys to select the desired item and press
ENTER
to activate or disactivate the item.
Image 12-12
Image 12-13
How to perform AutoImage ?
1. Press
AutoImage
on the RCU
A textbox showing a progress bar is displayed.
During the AUTOIMAGE measuring process the data source disappears temporarily (logo is displayed if back-
ground is set to logo )
12.10 Blanking
What can be done ?
The image can be blanked in several ways :
R5976694 IQ PRO R500 01/02/2007
111
Содержание iQ Pro R500 R9010221
Страница 1: ...iQ Pro R500 Owner Manual R9010221 R5976694 04 01 02 2007...
Страница 6: ......
Страница 10: ...Table of contents 4 R5976694 IQ PRO R500 01 02 2007...
Страница 17: ...2 Installation Guidelines 1 2 3 4 Image 2 1 R5976694 IQ PRO R500 01 02 2007 11...
Страница 24: ...2 Installation Guidelines 18 R5976694 IQ PRO R500 01 02 2007...
Страница 34: ...3 Connections 28 R5976694 IQ PRO R500 01 02 2007...
Страница 48: ...4 Getting started 42 R5976694 IQ PRO R500 01 02 2007...
Страница 54: ...5 Source Selection Image 5 9 48 R5976694 IQ PRO R500 01 02 2007...
Страница 60: ...6 General Menu Image 6 10 54 R5976694 IQ PRO R500 01 02 2007...
Страница 80: ...7 Image Menu Image 7 38 74 R5976694 IQ PRO R500 01 02 2007...
Страница 100: ...10 Lamp Menu 94 R5976694 IQ PRO R500 01 02 2007...
Страница 110: ...11 Image files menu Image 11 20 104 R5976694 IQ PRO R500 01 02 2007...
Страница 120: ...12 Display setup 114 R5976694 IQ PRO R500 01 02 2007...
Страница 188: ...19 Troubleshooting 182 R5976694 IQ PRO R500 01 02 2007...


