3. Physical Installation
3. PHYSICAL INSTALLATION
Overview
•
Connecting the projector with the power net
•
Alignment of a table mounted projector
•
Mounting the bottom carry handler
•
Mounting the top carry handler
•
Suspension of the projector with rigging clamps
•
Alignment of a ceiling mounted projector
3.1
Connecting the projector with the power net
C
AUTION
:
Use only the power cord provided with the projector.
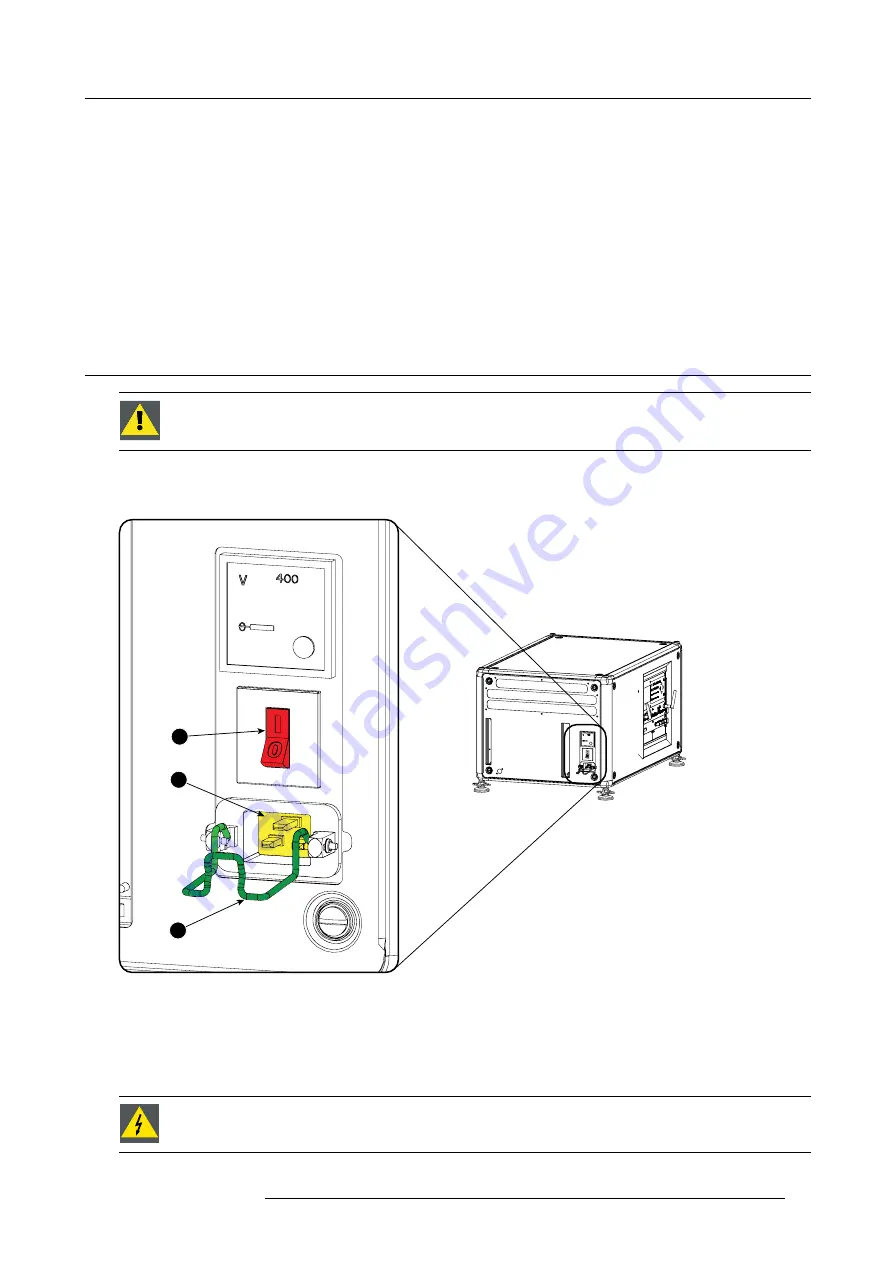
How to connect with local power net
1. Ensure that the power switch stands in the ’0’ (OFF) position (1).
1
2
3
Image 3-1
Power input
2. Connect the female side of the power cord with the power input socket of the projector (2).
3. Secure the power plug by locking the plug holder clamp (3).
4. Connect the male side of the power cord to the local power net.
Caution:
Ensure that the power net meets the power requirements of the projector.
W
ARNING
:
Do not attempt operation if the AC supply and cord are not within the speci
fi
ed voltage and power
range.
R5906070 HDX 4K 23/09/2016
21
Содержание HDX 4K
Страница 1: ...HDX 4K User guide R5906070 00 23 09 2016 ...
Страница 4: ......
Страница 24: ...2 Installation preparations 20 R5906070 HDX 4K 23 09 2016 ...
Страница 44: ...4 Lenses Lens selection 40 R5906070 HDX 4K 23 09 2016 ...
Страница 50: ...5 Input Communication 46 R5906070 HDX 4K 23 09 2016 ...
Страница 59: ...7 Graphic User Interface GUI Image 7 5 Test Pattern menu OFF button R5906070 HDX 4K 23 09 2016 55 ...
Страница 60: ...7 Graphic User Interface GUI 56 R5906070 HDX 4K 23 09 2016 ...
Страница 62: ...8 GUI Source 58 R5906070 HDX 4K 23 09 2016 ...
Страница 66: ...9 GUI Image 62 R5906070 HDX 4K 23 09 2016 ...
Страница 72: ...10 GUI Installation 68 R5906070 HDX 4K 23 09 2016 ...
Страница 78: ...12 Maintenance 74 R5906070 HDX 4K 23 09 2016 ...
Страница 90: ...13 Servicing 86 R5906070 HDX 4K 23 09 2016 ...
Страница 94: ...A Specifications 90 R5906070 HDX 4K 23 09 2016 ...


