6. GUI orientation
6.25 Programming Menu > Adjustment area > Presets con
fi
guration
General
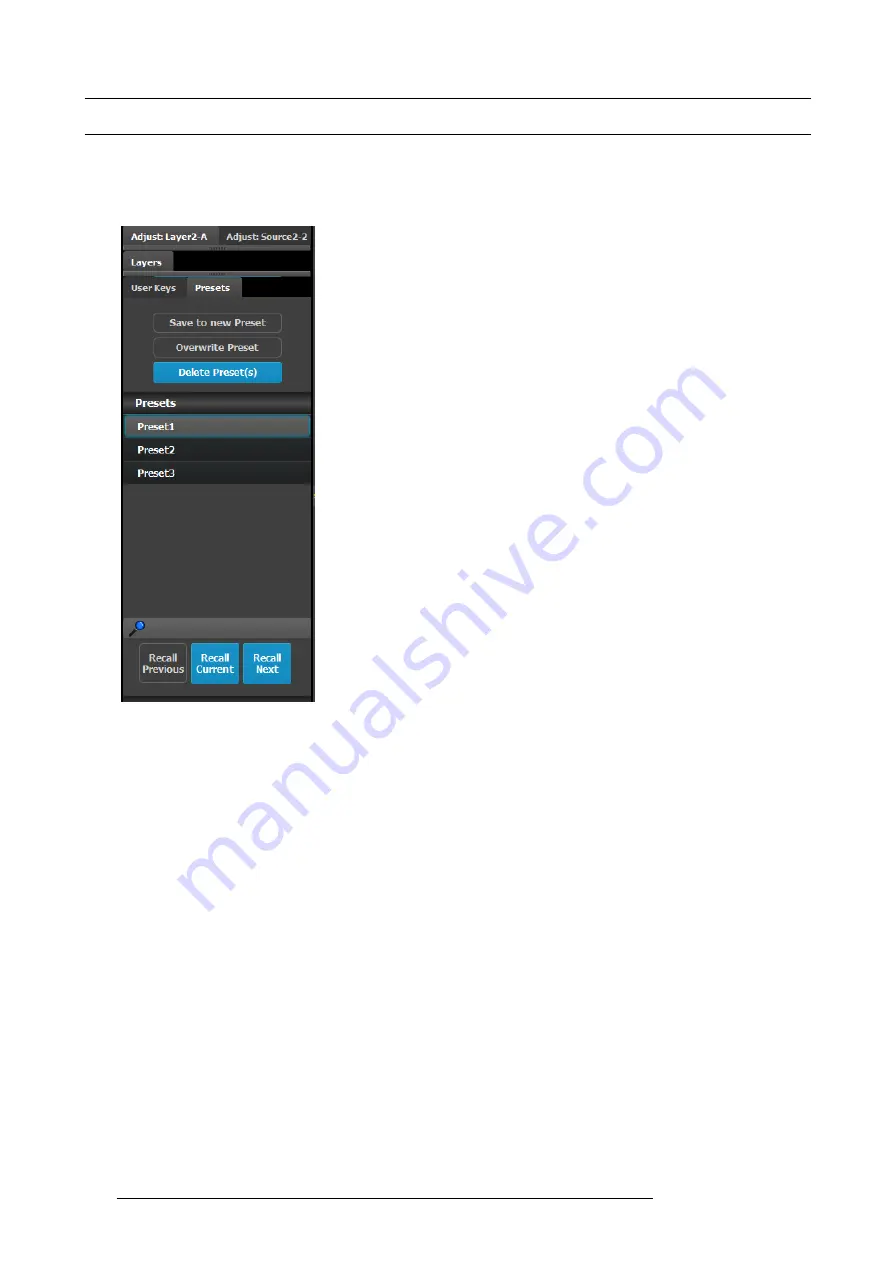
The Preset is a register that enables you to store destination setups, “looks”, to memory, and recall them back.
Presets con
fi
guration menu description
This menu provides:
•
The list of the available Presets.
•
A button to create new Preset.
•
A button to overwrite the preset data in the selected Preset.
•
A button to enter a multiple delete of preset mode.
•
A search edit box to search Presets.
•
Three buttons to manage preset recall actions.
Save to new Preset
Saves the current look into a new Preset. Only Destinations that are active or selected will be saved. For example: There are 3
Destinations. User enables Dest1 and Dest 3 presses “Save to new Preset.” Only Dest1 and Dest3 looks will be stored. Dest 2 will
not be part of this Preset
Overwrite Preset
This button allows the override of a selected Preset, if the destination is active. The name of the preset will not be updated.
Delete Preset(s)
By pressing this button, the delete “x” marks will appear next to all presets. Select the presets you like to delete and then press the
red “Delete Selected” button.
Search edit box
Search Presets by name. User types in Presets name and press ENTER, if match, the vertical slider will move to show the Presets
as the top most entry in the list and selects the Preset.
Recall buttons
They are not enabled unless a Preset is selected from the list.
1.
Recall Previous button: Recalls the Previous preset. Not active is the Preset1 is selected.
2.
Recall Selected button: Recalls the currently selected Preset.
3.
Recall Next: Recalls the next preset. Not active the last preset in the list is selected.
130
R5905948 E2 12/12/2014
Содержание Event Master E2
Страница 1: ...E2 User s guide R5905948 00 12 12 2014...
Страница 8: ...Table of contents 4 R5905948 E2 12 12 2014...
Страница 16: ...2 Safety 12 R5905948 E2 12 12 2014...
Страница 32: ...3 General 28 R5905948 E2 12 12 2014...
Страница 82: ...6 GUI orientation Image 6 8 78 R5905948 E2 12 12 2014...
Страница 94: ...6 GUI orientation Image 6 20 90 R5905948 E2 12 12 2014...
Страница 115: ...6 GUI orientation Image 6 37 Thumbnail view Image 6 38 R5905948 E2 12 12 2014 111...
Страница 186: ...7 System Setup 182 R5905948 E2 12 12 2014...
Страница 192: ...8 Updating firmware 188 R5905948 E2 12 12 2014...
Страница 196: ...9 General operation example Image 9 3 192 R5905948 E2 12 12 2014...
Страница 213: ...9 General operation example Image 9 25 R5905948 E2 12 12 2014 209...
Страница 216: ...9 General operation example 212 R5905948 E2 12 12 2014...
Страница 220: ...10 Maintenance 10 2 Process Overview Flow chart Image 10 2 216 R5905948 E2 12 12 2014...
Страница 226: ...10 Maintenance Image 10 11 2 Pull out the Front cover and lay it flat in front of the unit 222 R5905948 E2 12 12 2014...
Страница 281: ...10 Maintenance Disregard the heatsink from the spare kit R5905948 E2 12 12 2014 277...
Страница 282: ...10 Maintenance 278 R5905948 E2 12 12 2014...
Страница 286: ...11 Environmental information Republic of Turkey In conformity with the WEEE Regulation 282 R5905948 E2 12 12 2014...
Страница 288: ...11 Environmental information 284 R5905948 E2 12 12 2014...
Страница 298: ...B Remote Control Protocol 294 R5905948 E2 12 12 2014...
Страница 299: ...C Troubleshooting C TROUBLESHOOTING R5905948 E2 12 12 2014 295...
Страница 300: ...C Troubleshooting 296 R5905948 E2 12 12 2014...


