3. Physical installation
1
2
3
3
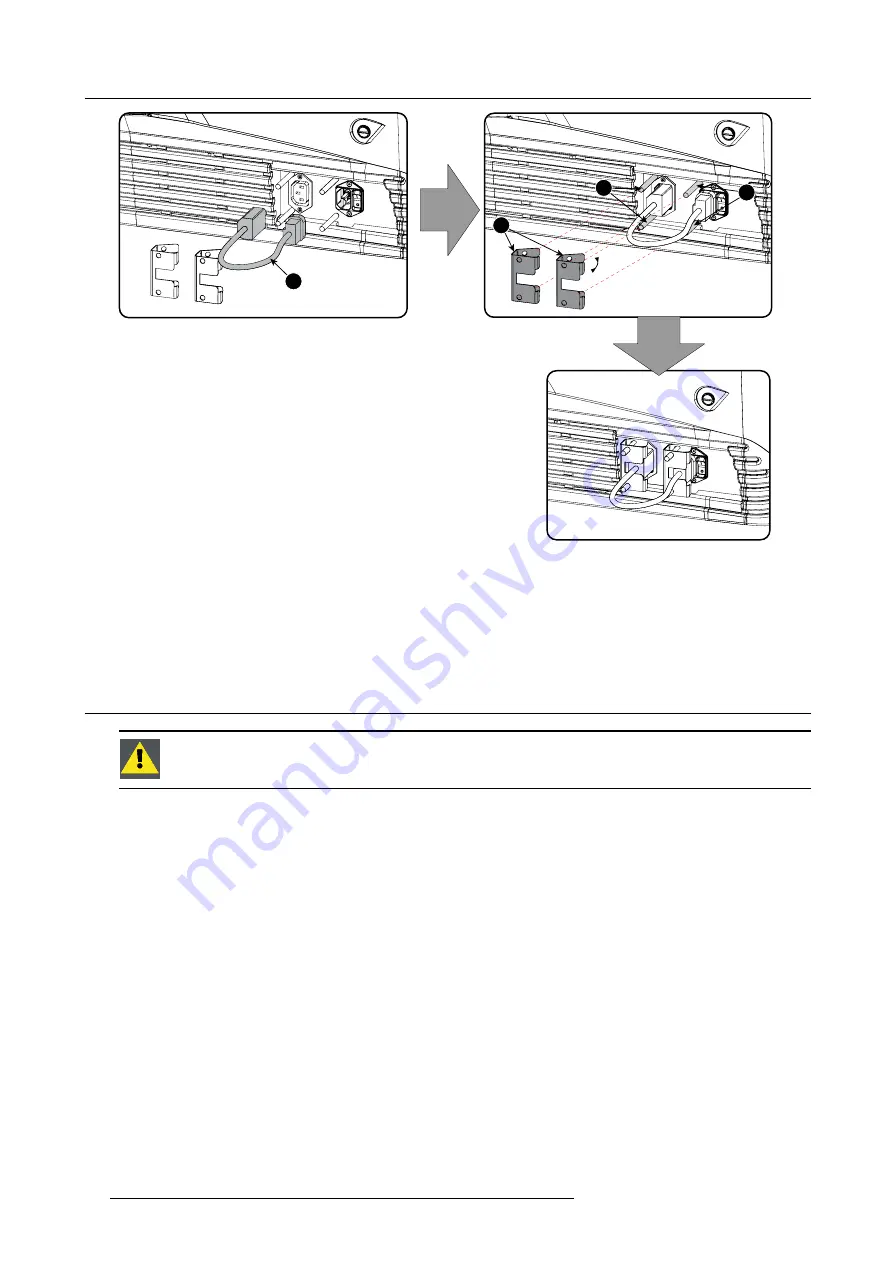
Image 3-11
Power loop through connection
2. Secure both plugs of the short cable with a
fi
xation spring (2). Handle as follow:
-
Squeeze the
fi
xation spring together.
-
Slide the
fi
xation spring on the
fi
xation pins (3) while squeezing together and push it against the power plug.
-
Release the
fi
xation spring.
3.6
Connecting a UPS to the projector electronics
W
ARNING
:
Only use UPS units which are suitable for the B-series projector. See chapter ”General”, “Instal-
lation requirements” for more information about the requirements of the UPS.
How to connect the UPS
1. Install the UPS according to the instructions of the manufacturer and the local regulations.
2. Connect the power output cord from the UPS unit to the UPS inlet socket of the projector (right socket).
Connect directly (A) or drag the cable behind the front cover so that the front cover can be removed without removing the UPS
INLET cable (B).
24
R5905067 DPXK-19B/23B/P 17/09/2012
Содержание DP2K-19B
Страница 6: ......
Страница 14: ...1 Safety 8 R5905067 DPXK 19B 23B P 17 09 2012...
Страница 22: ...2 General 16 R5905067 DPXK 19B 23B P 17 09 2012...
Страница 32: ...3 Physical installation 26 R5905067 DPXK 19B 23B P 17 09 2012...
Страница 62: ...5 Lenses lens holder 56 R5905067 DPXK 19B 23B P 17 09 2012...
Страница 76: ...7 Communicator Touch Panel Image 7 8 Connections 70 R5905067 DPXK 19B 23B P 17 09 2012...
Страница 78: ...8 Starting up 72 R5905067 DPXK 19B 23B P 17 09 2012...
Страница 100: ...10 Removal and installation of the projector covers 94 R5905067 DPXK 19B 23B P 17 09 2012...
Страница 112: ...12 Convergence Green 1 5 4 6 5 Image 12 8 Green on blue convergence 106 R5905067 DPXK 19B 23B P 17 09 2012...
Страница 120: ...A Specifications 114 R5905067 DPXK 19B 23B P 17 09 2012...
Страница 124: ...B Pin configurations 118 R5905067 DPXK 19B 23B P 17 09 2012...