


5. Non-Cinema Operation
5.4.2
Remote Control Functions
Function of the RCU keys
No function
No function
Menu keys
No function
Text On/Off
Image Freeze
ACSAR Input
Image keys
IR LED
Macro keys
Lamp On/Off
Lens keys
Pause On/Off
Address key
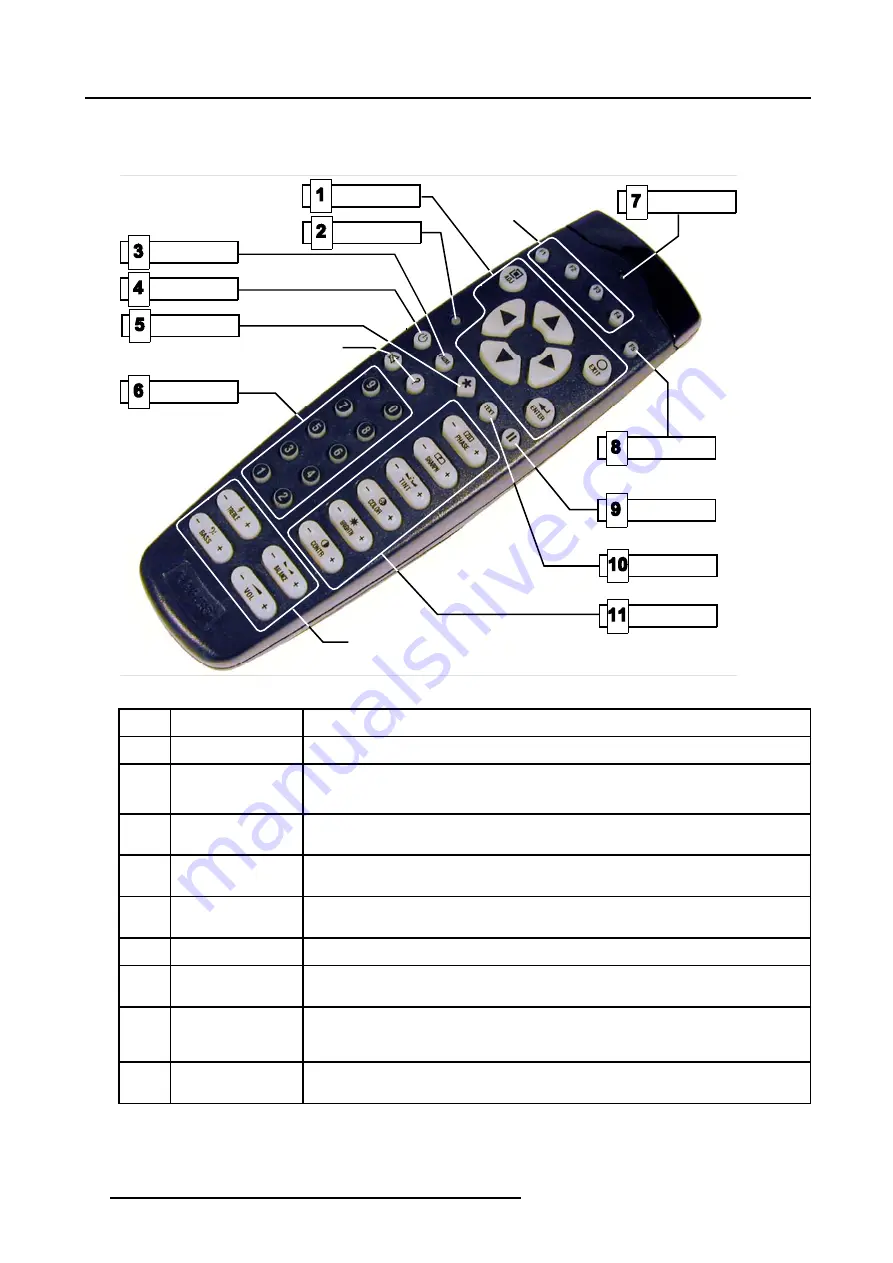
Image 5-6
Function of the RCU keys
Ref.
Key name
Description
1
Menu keys
Keys used to enter, to exit, to scroll in....the menus
2
Address key
(Recessed key) Allows to match the address of the projector.
Procedure: press a digit key , 0 to 9, while pressing the address key.
3
Pause On/Off
Press pause key to stop image display. The image disappear but full power is retained for
immediate restart when pause key is pressed again.
4
Lamp On/Off
After power on the projector, pressing this key starts ignition of the lamp. Pressing again,
turns of the lamp.
5
Lens keys
Press this key to call up the lens menu. Further, use the menu keys to execute lens
adjustment.
6
Macro keys
Pressing a digit key, 0 to 9, activate the respective macro in sequence of storing.
7
IR LED
Blinks (together with the background lighting) when a key is pressed. Is a visual indication
of the proper working of the remote control (Battery load).
8
ACSAR 2 input
Press this key to select the ACSAR input menu. Further, use the menu keys to select the
image layout (Full 1, 2, 3 or 4 or a combination of the 4 - each image displayed in a quarter
of the window - or the 4 at the same time.
9
Image freeze
Press to freeze the displayed image from an ACSAR 2 after the input has been chosen
(see key F5)
18
R5976907 D-CINE PREMIERE DP100 02/11/2005
Содержание D-Cine Premiere DP100
Страница 1: ...D Cine Premiere DP100 User s manual R9010111 R9010118 R5976907 00 02 11 2005 ...
Страница 4: ......
Страница 6: ...Table of contents 2 R5976907 D CINE PREMIERE DP100 02 11 2005 ...
Страница 12: ...2 Check up the D Cine Premiere DP100 8 R5976907 D CINE PREMIERE DP100 02 11 2005 ...
Страница 24: ...5 Non Cinema Operation 20 R5976907 D CINE PREMIERE DP100 02 11 2005 ...
Страница 30: ...7 Maintenance of the D Cine Premiere DP100 26 R5976907 D CINE PREMIERE DP100 02 11 2005 ...


