18
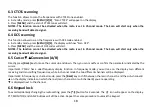
6.3 CTCSS scanning
The function allows to scan the frequencies with CTCSS tone enabled.
a. In standby mode, press
[MENU] [2][9]
, “Scan CTCSS” will appear on the display.
b. Press
[MENU]
and the scan of CTCSS tones will start.
NOTES: The function cannot be activated when the radio is set in Channel mode. The Scan will start only when the
receiving band will detect a signal.
6.4 DCS scanning
This function allows to scan the frequencies with DCS code enabled.
a. In standby mode, press
[MENU] [3][0]
; the display will show “Scan DCS”.
b. Press
[MENU]
and the scan of DCS codes will start.
NOTES: The function cannot be activated when the radio is set in Channel mode. The Scan will start only when the
receiving band will detect a signal.
6.5 Cursor
▼▲
Conversion (A/B)
Directly press
[Back]
key to move the cursor up and down. Then, you can modify or confirm the parameters indicated by the
cursor.
Important1: P10UV has a dual-frequency display function. In frequency mode, you will see on the display two
different
receiving and transmitting frequencies; while in channel mode the two different channels will be displayed.
Important2: In frequency or channel mode, press the
[Back]
key to shift between the main channel A and the sub-channel B
▲
on the display indicates on which channel (main channel A or sub channel B) you are operating.
▼
is displayed next to the channel.
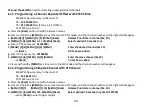
6.6 Keypad lock
To avoid accidentally changing the radio setting, press the
[* ]
button for 2 seconds. The
icon will appear on the display.
PTT, MONITOR, and LAMP buttons will still be active. Repeat the same procedure to unlock the keypad.
Содержание Pofung P10UV Series
Страница 1: ...USER S MANUAL...
Страница 13: ...10 Chapter4 Radio Overview...


