Banner SolutionsKit9-Vibe-MH Скачать руководство пользователя страница 12

Configure

 the DXM to Push Information to the Cloud

1. Within the DXM Configuration Software, go to the 

Settings

 > 

Cloud Services

 screen.

2. Set the 

Server name/IP

 to push.bannercds.net.

3. Select the appropriate 

Push interface

 to either Cellular or Ethernet.

• To set up Ethernet, use the 

Settings

 > 

Network

 screen.

• To set up cellular, refer to the 

Activating a Cellular Modem

 (p/n 205026) technical note.

4. Leave the 

Cloud push interval

 and 

Sample count

 unchanged. The DXM script controls this to push every 5 minutes.

5. Modify the 

Cloud Permissions

 for the registers.

Registers are preselected to push to the cloud. Some registers can be removed if you are not using all 40 Nodes. Additional

registers can be added by going to the Local Registers tab on the left. The preselected READ registers are 1-200 for the raw

Node data, 201-240 for vibration failure mask info, 281-320 for Node connection status, and 5181-5660 for baseline/

threshold data. The preselected READ/WRITE registers are 321-360, which are the re-baselining registers. READ/WRITE is

used so the Baseline registers can be updated from the website from a 0 to a 1 to trigger a new baseline remotely.
• Click on each register and edit the 

Cloud Permissions

 at the bottom of the screen; or

• Choose the 

Modify Multiple Registers

 tab at the bottom of the 

Local Register

 screen to edit the 

Cloud Permissions

for a block of registers

6. In the Web Server section, keep the 

Site ID

 is drop-down selection as GUID and paste the copied ID from the webpage into

the 

Site ID

 field.

Save and Upload the 

Configuration

 File

After making any changes to the configuration, you must save the configuration files to your computer, then upload it to the device.
Changes to the XML file are not automatically saved. Save your configuration file before exiting the tool and before sending the XML

file to the device to avoid losing data. If you select 

DXM

 > 

Send XML Configuration to DXM

 before saving the configuration file, the

software will prompt you to choose between saving the file or continuing without saving the file.

1. Save the XML configuration file to your hard drive by going to the 

File

 > 

Save As

 menu.

2. Go to the 

DXM

 > 

Send XML Configuration to DXM

 menu.

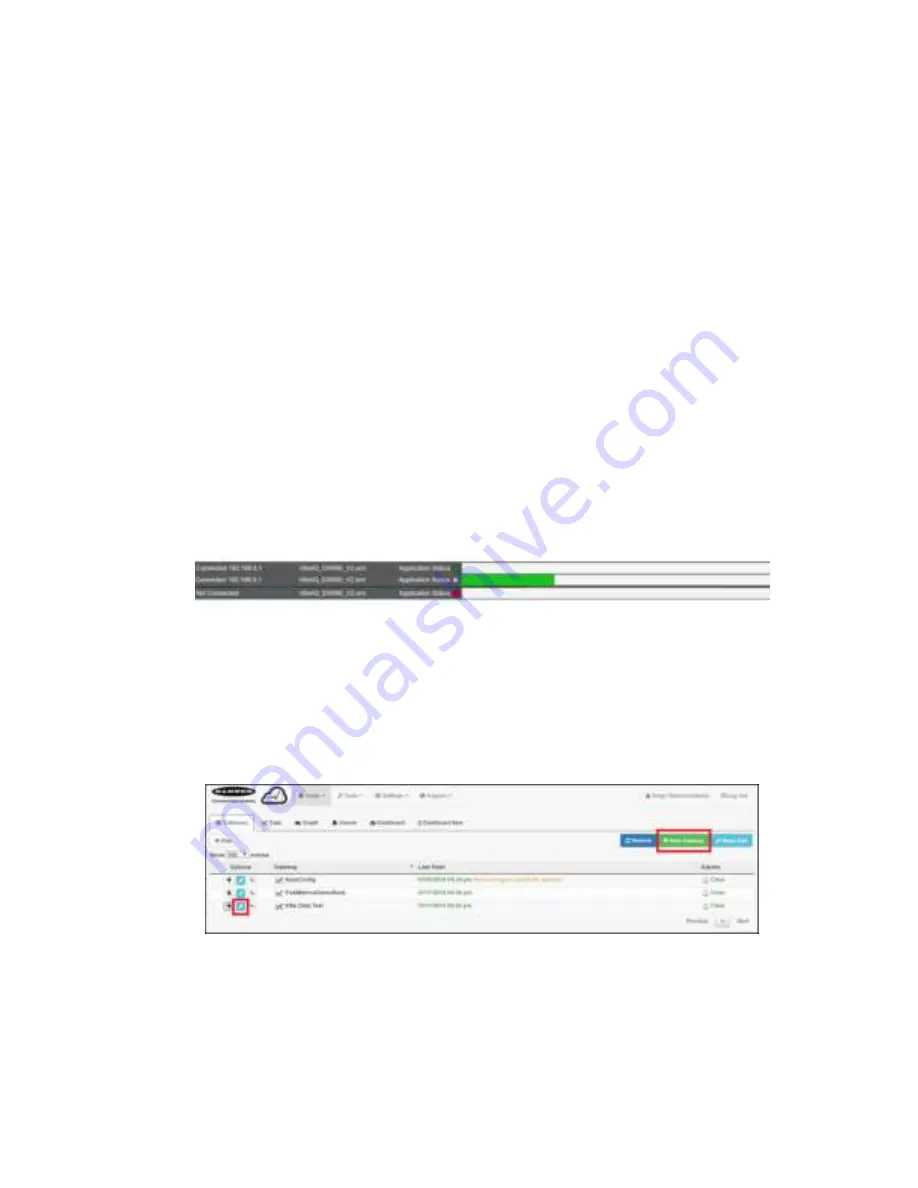
Figure 2. Status indicator bar

• If the Application Status indicator is red, close and restart the DXM Configuration Tool, unplug and re-plug in the cable

and reconnect the DXM to the software.

• If the Application Status indicator is green, the file upload is complete.

• If the Application Status indicator is gray and the green status bar is in motion, the file transfer is in progress.

After the file transfer is complete, the device reboots and begins running the new configuration.

Upload the XML 

Configuration

 File to the Website

To upload an XML configuration file to the website, follow these instructions.

1. At the webserver, select the 

Home

 screen.


2. On the row displaying your new site, click the 

Edit Gateway

 (pencil) icon.

3. Select 

Update XML

.

4. Click 

Choose File

 and select the file that was just updated to the DXM and click 

Save

.


Vibration Monitoring and Predictive Maintenance Solutions Kit Quick Start Guide (MultiHop)

12

www.bannerengineering.com - Tel: + 1 888 373 6767

P/N 214301 Rev. F

Содержание SolutionsKit9-Vibe-MH

Страница 1: ...R4 Wireless Controller 5 port Ethernet switch 14 x 12 Polycarbonate enclosure DIN rails and terminal blocks M12 power input connector SolutionsKit9 Vibemetric MH 900 MHz Metric SolutionsKit2 Vibe MH 2...

Страница 2: ...odbus Sensor ID value from 11 to 50 Use the left button to cycle the value from 0 to 9 and the right button to accept the value and move the cursor to the next digit right 6 Push and hold button 2 The...

Страница 3: ...are needed for the system Note that entering binding mode causes all radios to go out of sync with the DXM until after the DXM exits binding mode The radios will resume communicating with the DXM wit...

Страница 4: ...es when that Node is baselining Only temperature warnings and alarms appear during the baselining phase After baselining is complete the threshold levels are established and vibration alerts may begin...

Страница 5: ...hold for five samples in a row or the user setting on the Settings screen and Chronic alerts are when a 100 point moving average crosses the thresholds Only data from an operational asset is used to c...

Страница 6: ...etwork via Ethernet or a separately sold cellular modem DO NOT set the cloud push interval in the XML file because the script triggers the push Enable Password for Settings Lvl 8 Turn ON OFF the switc...

Страница 7: ...box in any of the New Settings rows to manually enter a new value for any or all the warning or alarm thresholds including temperature 5 Set vibration settings back to zero to use the original baselin...

Страница 8: ...use this button before powering down to avoid data file corruption If a Failed to write logged data to file or Failed to save message appears this is because of a power loss during the saving process...

Страница 9: ...ical Note p n b_4510565 on the Vibration and Temperature sensor Web page Only the default configuration of 1x 2x 3 10x is available on the Solutions Kit Table 2 Spectral band floating point registers...

Страница 10: ...less Controller can connect to the Web via Ethernet or an internal cell module The controller pushes data from the DXM to be stored and displayed on a website The Banner platform for storing and monit...

Страница 11: ...ownload the existing configuration file from your DXM to your hard drive 1 On the computer download the DXM Configuration Software v4 from the Banner Engineering website and install it 2 On the DXM Ap...

Страница 12: ...ebpage into the Site ID field Save and Upload the Configuration File After making any changes to the configuration you must save the configuration files to your computer then upload it to the device C...

Страница 13: ...r PC b_4492805 This creates continuity between the site created on the website with the DXM If the DXM has network connection it will upload data on its next cloud push interval Refer to the Banner CD...

Страница 14: ...F DXM LCD 20 C to 80 C 4 F to 176 F Micro SD Card if applicable 25 C to 85 C 13 F to 185 F 90 maximum relative humidity non condensing Certification Banner Engineering Europe Park Lane Culliganlaan 2...

Страница 15: ...t conomique Canada L exploitation est autoris e aux deux conditions suivantes 1 L appareil ne doit pas produire de brouillage 2 L utilisateur de l appareil doit accepter tout brouillage radio lectriqu...

Отзывы: