background image


5

INTRODUCTION


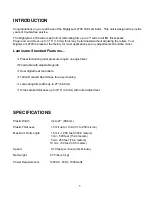
Congratulations on your purchase of the MightyLam 2700 Roll Laminator.  This unit is designed to provide 
years of trouble-free service. 
 
The MightyLam 2700 will accept rolls of laminating film up to 27” wide in all film thicknesses. 
Paper and card stock up to 1/16” (1.6mm) thick may be laminated without adjusting the rollers.


Your 

MightyLam 2700 is preset at the factory for most applications so any adjustments should be minor.   
 

Laminator Standard Features...


 Preset laminating roller pressure require no adjustment. 


Feed table with adjustable guide 


 Dual digital heat controllers. 


 Teflon® coated Heat Shoes for easy cleaning. 


 Laminating film widths up to 27” (68.6cm). 

    
      Total material thickness up to 3/16” (4.8mm) with roller adjustment. 


SPECIFICATIONS


Plastic Width   


  Up to 27” (68.6cm) 

 
Plastic Thickness 


  1.5 mil up to 10 mil (37 to 250 micron) 

 
Maximum Roll Length    

  1.5 mil - 1,000 feet (304.8 meters) 


              3 mil - 500 feet (152.4 meters) 


  5 mil - 250 feet (76.2 meters) 


 10 mil - 100 feet (30.5 meters) 

 
Speed   


  0-10 feet per minute (3m/minute) 

 
Net weight 


             97.5 lbs (44 kg) 

 
Power Requirements     

 120VAC, 60Hz, 1800 watts 


Содержание MightLam 2700

Страница 1: ...OPERATING INSTRUCTIONS MIGHTYLAM 2700 ROLL LAMINATOR ...

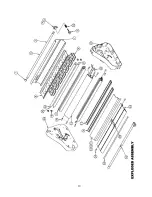
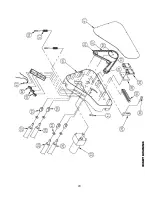
Страница 2: ...oading Laminating Film 8 Threading Laminating Film 8 9 Adjusting Mandrel Film Tension 10 Heat Shoe Temperature 10 Laminating Coating Mount Board 11 Mounting Laminating 12 Troubleshooting 13 Maintenance Cleaning Heat Shoes Rollers 14 Removing Wrap Arounds 14 Warranty Return Policy 15 Parts List 16 17 Parts Illustrations Exploded View 18 Side Panels 19 20 Wiring Diagram 21 ...

Страница 3: ...on the laminator They may contact dangerous voltage points or short out components that could result in fire or electrical shock The laminator should only be operated from the type of power source indicated in these Operating Instructions and on the data plate located on the rear panel of the laminator The three pronged grounding plug is a safety feature and will only fit into a grounding type pow...

Страница 4: ...e representative When the power supply cord or plug is damaged or frayed If liquid has been spilled into the laminator or it has been exposed to water If the laminator has been subjected to excessive jarring through being dropped or bumped If the laminator does not operate normally when following the operating instructions KEEP THE LAMINATOR OUT OF THE REACH OF CHILDREN ...

Страница 5: ... Laminator Standard Features Preset laminating roller pressure require no adjustment Feed table with adjustable guide Dual digital heat controllers Teflon coated Heat Shoes for easy cleaning Laminating film widths up to 27 68 6cm Total material thickness up to 3 16 4 8mm with roller adjustment SPECIFICATIONS Plastic Width Up to 27 68 6cm Plastic Thickness 1 5 mil up to 10 mil 37 to 250 micron Maxi...

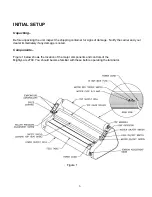
Страница 6: ...tainer for signs of damage Notify the carrier and your dealer immediately if any damage is noted Components Figure 1 below shows the location of the major components and controls of the MightyLam 2700 You should become familiar with these before operating the laminator Figure 1 ...

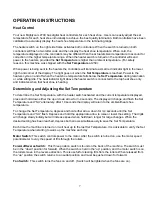
Страница 7: ...ning and Adjusting the Set Temperature To determine the Set Temperature with the heater switch activated and the current temperature displayed press and hold down either the up or down arrow for 3 4 seconds The display will change and flash the Set Temperature and SU alternately After 10 seconds the display will return to the ambient heat shoe temperature To change the Set Temperature depress and ...

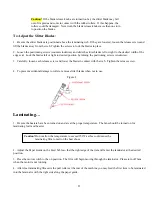
Страница 8: ... poly in film rolls shiny side out dull side in 1 For the top supply roll place the mandrel ends into the slots in the top of the laminator If you are facing the front of the laminator the film should unwind toward you from the bottom of the roll as in figure below 2 Pull 6 12 of film from the top roll Pass the film under the idler bar heat shield and over the heat shoes Make sure the shiny side o...

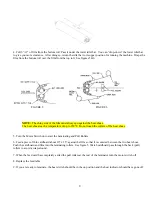
Страница 9: ... to 350 F Do not touch the surface of the heat shoes 5 Turn the Motor Switch on to start the Laminating and Pull Rollers 6 Feed a piece of thin cardboard about 10 x 25 against the film so that it is centered between the two heat shoes Push the cardboard and film into the laminating rollers See figure 5 Watch cardboard pass through the back pull rollers to avoid a wrap around 7 When the feed card h...

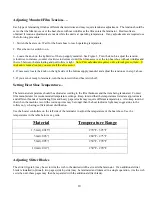
Страница 10: ... above 5 If you are not ready to laminate turn the motor switch and heat switch off Setting Heat Shoe Temperature The laminator temperature should be adjusted according to the film thickness and the item being laminated Contact film manufacturer for recommended temperature settings Keep in mind that the temperatures listed are approximate and different brands of laminating film and heavy paper sto...

Страница 11: ...e 3 Carefully loosen each release screw and lower the blade in contact with the web Tighten the release screw 4 To prevent accidental damage to rollers remove slitter blades when not in use Figure 8 Laminating 1 Be sure the heaters have been turned on and are at the proper temperature The fans should be turned on for laminating 3mil and heavier 2 Adjust the Paper Guide on the Feed Table so that th...

Страница 12: ...mandrel to keep the adhesive from accumulating on the rollers and heat shoes Thread as for laminating film 3 Using the supplied allen wrench back out the four pressure adjustment screws 1 full turn for each 1 16 thickness of the board I e 3 16 3 full turns Be sure to count the number of turns so the screws can be returned to original position 4 Turn heat switch to ON position if heat is needed for...

Страница 13: ...gher temperatures than indicated for mounting and laminating mount board 5 Turn the fans on 6 Perform a test mount to ensure proper settings for successful mounting If any adjustments are necessary make them now and run another test Repeat this step until you obtain desired results 7 Feed the print and mount board slowly and evenly into the laminator behind a leader board so that the leading edge ...

Страница 14: ... laminated items running parallel with the outside edges ACTION Increase film tension on top and or bottom supply rolls Reduce heat shoe temperature Clean heat shoes of residual adhesive See MAINTENANCE section for cleaning instructions PROBLEM Blistering of the film appears over the item or along the edge ACTION Reduce temperature on one or both heat shoes If the indicator light remains on after ...

Страница 15: ...tic film at the top and bottom mandrels 4 Turn the motor switch on and pull the film out of the back of the machine 5 Turn the motor switch off 6 Use a soft cloth moistened with denatured alcohol to remove any residue from the Teflon surface of the heat shoes and laminating rollers 7 Allow the heat shoes and laminating rollers to dry before re threading the film Removing Wrap Arounds When laminati...

Страница 16: ...mproper usage The manufacturer makes no other warranty stated or implied except as stated above Return Policy If your laminator is not operating properly first review the Operating Instructions and Troubleshooting Guide If the malfunction cannot be corrected contact your local dealer for instructions Be sure to have your machine serial number and date of purchase handy If the laminator must be ret...

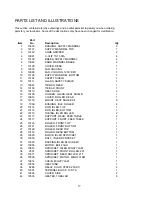
Страница 17: ...EAT SHOE 2 16 10105 HOLDER GLASS HEAT SHIELD 1 17 10816 COVER ROLLER REAR 1 18 10118 MOUNT HEAT SHOE EZII 8 19 1060 BUSHING IDLE ROLLER 4 20 10114 ROD IDLER TOP 1 21 10115 ROD IDLER BOTTOM 1 22 10119 TUBING IDLER ROLLER 2 23 10117 SUPPORT REAR FEED TABLE 2 24 10117 SUPPORT FRONT FEED TABLE 1 25 10120 ROLLER FRONT TOP 1 26 10121 ROLLER FRONT BOTTOM 1 27 10129 ROLLER REAR TOP 1 28 10130 ROLLER REAR ...

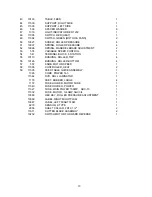
Страница 18: ...N 1 55 10113 BUSHING ROLLER TOP 4 56 10126 BUSHING ROLLER BOTTOM 4 57 557 KNOB MOTOR SPEED 1 58 11596 CONTROLLER HEAT 2 59 11535 FEED TABLE GUIDE ASSEMBLY 1 1395 CORD POWER 14 3 1 11544 DVD ROLL LAMINATOR 1 1170 FEET RUBBER LARGE 4 1172 FUSE HOLDER MOTOR FUSE 1 11540 FUSE HOLDER POWER 1 11327 FUSE MAIN POWER 15AMP ABC 15 1 11532 FUSE MOTOR 3 4 AMP AGC3 4 1 10386 HEX KEY ROLLER PRESSURE ADJUSTMENT ...

Страница 19: ...19 ...

Страница 20: ...20 ...

Страница 21: ...21 ...

Страница 22: ...22 ...

Отзывы: