


设备使用说明书
第
13
页 共
23
页
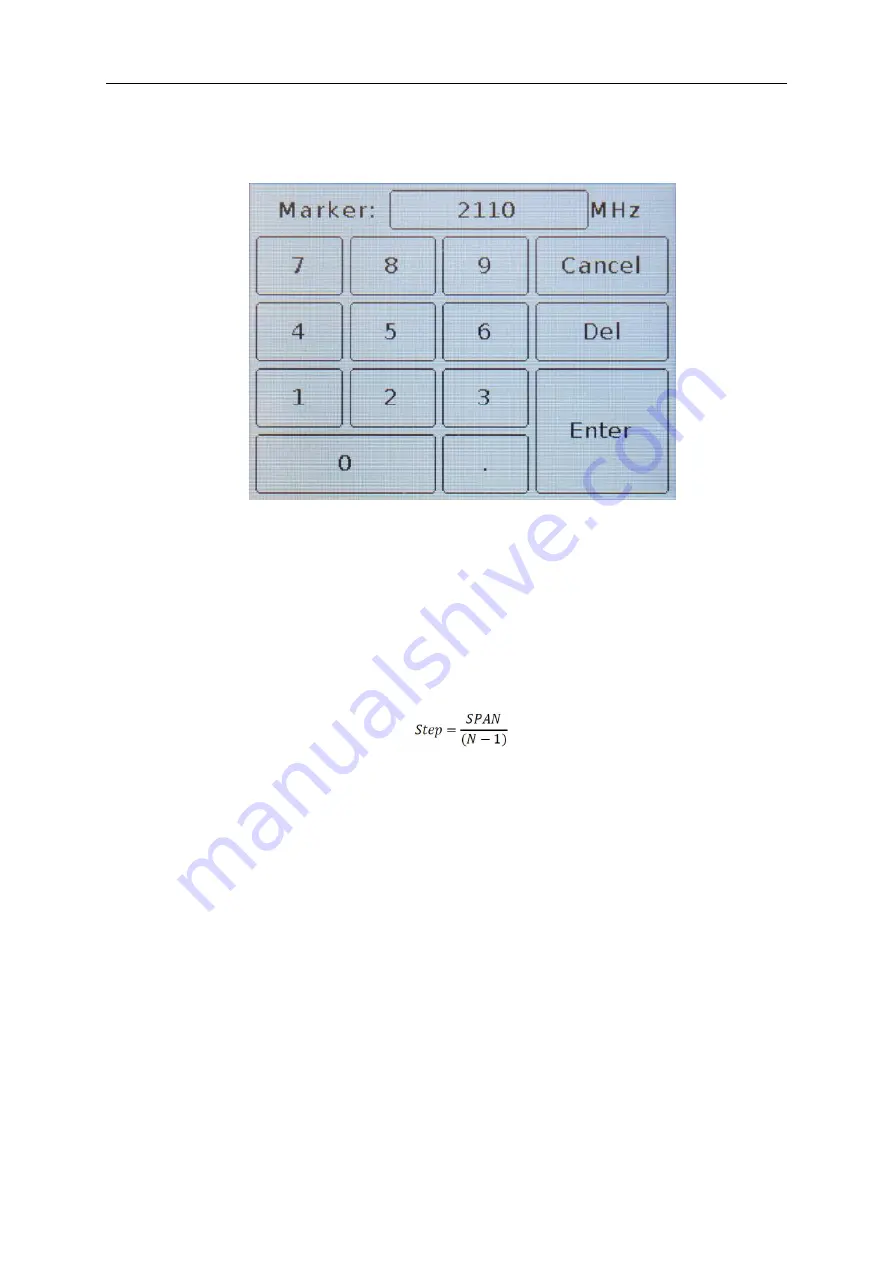
8.4.5. To set the frequency on which the marker will be set, in the menu of markers (Figure 8.8) in the
Frequency
column, click on the corresponding marker. A submenu for entering numerical values will appear on
the screen, as in Figure 8.10.
Figure 8.10 – Entering numerical values of the frequency to set the marker
8.4.6. Enter the numerical value of the frequencies and press
or
Enter
. To delete erroneous or previously
entered values, press
×
or
Del
. To refuse to enter a value, click
˂
or
Cancel
.
In our example, in figure 8.10, the frequency of 2110 MHz is entered to set the marker to this frequency value
on the plot
.
The markers can be moved left-right along the plot using the navigation buttons and switching between the
markers with the button
“marker”
. The marker will move in steps equal to:
where
Step – marker movement step
SPAN – scanning frequency range
N – number of scan points.
8.4.7. The marker turned on and set to a user-defined frequency will be displayed on the measurement plot in
the corresponding color. The parameters of the values displayed by the markers are displayed next to the
measurement plot and change in real time (Figure 8.11).


