background image

Security Setup 

38


Blocked List, make the appropriate changes and click 

Modify

. To 

delete an existing application from the Blocked List, select the 
application and click 

Delete

Single Port Forward 


Single Port Forwarding 

Port Forwarding allows you to set up public services on your network, 
such as web servers, ftp servers, e-mail servers, and other specialized 
Internet applications.   

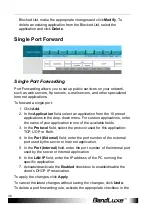
To forward a single port: 

1. Click 

Add

2. In the

 Application

 field, select an application from the 10 preset 

applications in the drop-down menu. For custom applications, enter 
the name of your application in one of the available fields. 

3. In the

 Protocol

 field,


select the protocol used for this application: 

TCP, UDP, or Both. 

4. In the

 Port (External)

 field,


enter the port number of the external 

port used by the server or Internet application. 

5. In the

 Port (Internal)

 field,


enter the port number of the internal port 

used by the server or Internet application.   

6. In the

 LAN IP

 field,


enter the IP address of the PC running the 

specific application. 

7. Activate/deactivate the 

Enabled

 checkbox to enable/disable the 

client’s DHCP IP reservation.   

To apply the changes, click 

Apply

.  

To cancel the latest changes without saving the changes, click 

Undo

To delete a port forwarding rule, activate the appropriate checkbox in the 

Содержание R500 Series

Страница 1: ...User Manual BandLuxe R500 Series LTE HSPA Wi Fi VOIP Router P N 64003700011 Rev D...

Страница 2: ......

Страница 3: ...s 8 Internet Setup 16 Basic Setting 16 DDNS 18 Host 19 Router Setup 21 Network Setting 21 Advanced Routing 23 WiFi Setup 25 Basic WiFi Network 25 WPS 30 4G LTE Setup 32 PIN Verification 32 PIN Managem...

Страница 4: ...tus 47 4G LTE Internet 47 Router 48 Telephony 50 VOIP 50 Appendix A FAQ 51 Appendix B Specification 58 Appendix C Important Safety Information and Glossary 61 Europe EU Declaration of Conformity 61 Fe...

Страница 5: ...stalling and configuring the product Read the manual carefully before you use the product so that you can fully exploit the product functions Package Contents LTE HSPA WiFi VOIP Router Power Adaptor U...

Страница 6: ...To reset the Router press the reset button briefly To restore the Router s factory settings press the reset button for longer than 5 sec 3 LAN Port Connect Ethernet devices such as computers switches...

Страница 7: ...ntenna Port To connect the secondary 4G External Antenna if needed 11 Power LED Solid light indicates that the power supply is connected properly 12 WiFi External Antenna Port To connect to a WiFi Ext...

Страница 8: ...nect the power adaptor to the Router and connect it to an outlet 2 Insert your SIM card into the slot on the Router making sure the SIM card orientation matches the SIM card slot as shown in the pictu...

Страница 9: ...ion and choose View Available Wireless Networks Select the LTE_ROUTER wireless network and click Connect B To link the Router with your PC via Ethernet cable connect one end of the cable to the LAN po...

Страница 10: ...r the Router User name admin and Password lterouter Basic Functions Powering On and Off To power the router on slide the power switch located on the side of the chassis to the ON position When the rou...

Страница 11: ...VoIP status Ethernet status Subscriber s Network Operator Date Clock Status Indicators The top of the screen may display the following icons depending on the status of the device Signal Strength Leve...

Страница 12: ...ng Service The WiFi icon indicates whether the WiFi feature is enabled or disabled The Roaming icon indicates whether the roaming feature is enabled or disabled The VoIP status icon indicates connecti...

Страница 13: ...yed When a VOIP Call is initiated or received the screen updates to provide information such as Incoming or Outgoing call indication phone number and call connection indicator once the current call is...

Страница 14: ...S connection within 2 minutes No Device found is displayed and you must begin the process again When WPS is enabled the screen automatically reverts to the Main Screen after a period of inactivity whe...

Страница 15: ...creen Saver Mode The screen automatically enters Screen Saver Mode after 60 seconds of inactivity The Date and Time are displayed moving randomly on the screen Any router state change such as incoming...

Страница 16: ...et preferred settings step by step via Wizard If the router is in Factory default settings the GUI will always open Wizard User can select the preferred language and then set the Wizard via Basic Sett...

Страница 17: ...Wizard Setup 15...
Страница 18: ...priority 4G LTE Setting Get Latest APN Database Get the latest Profile Name Number User Name Password and APN from the web site automatically Roaming Connection To allow roaming network connection sel...

Страница 19: ...your mobile network operator You can choose to set the APN automatically or manually In most cases the Router works properly when the APN is set to Auto To set the APN manually contact your mobile ne...

Страница 20: ...can use this feature you need to sign up for DDNS with a DDNS provider www dyndns org or www TZO com Status Check this box to enable or disable DDNS Service Type From the drop down list select your DD...

Страница 21: ...me ISPs require this name as identification In most cases leaving the fields blank will work MTU MTU Maximum Transmission Unit specifies the largest packet size permitted for Internet transmission To...

Страница 22: ...tup 20 Time Time Setting Select the Time Zone from the drop down menu according to your current location Automatically adjust clock for daylight saving changes Select the checkbox to enable Daylight S...

Страница 23: ...s is 192 168 1 1 and the default Subnet Mask is 255 255 255 0 Keeping the default values will work DHCP Service DHCP stands for Dynamic Host Control Protocol The DHCP Server will automatically assign...

Страница 24: ...deactivate the Enabled checkbox to enable disable the client s DHCP IP reservation To apply the changes click Apply To cancel the latest changes without saving the changes click Undo To delete a clie...

Страница 25: ...mmunicating information about which networks each Router can reach and how far away those networks are Static Routing This section allows you to define fixed routes to defined destinations To add a ne...

Страница 26: ...nnection built upon publicly accessible infrastructure such as the Internet They usually provide connectivity to various devices behind a gateway or firewall IPSec Passthrough IP Security IPSec provid...

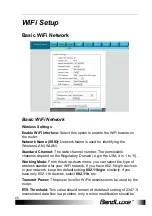
Страница 27: ...Regulatory Domain e g in the USA it is 1 to 11 Working Mode From this drop down menu you can select the type of wireless standard for your WiFi network If you have 802 11b g n devices in your network...

Страница 28: ...ystems The default setting Short Preamble should be used unless you are experiencing WiFi problems such as frequent disconnects slow upload download along with a low signal strength SSID Suppress For...

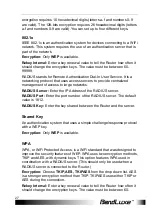
Страница 29: ...rks RADIUS Server Enter the IP Address of the RADIUS server RADIUS Port Enter the port number of the RADIUS server The default value is 1812 RADIUS Key Enter the key shared between the Router and the...

Страница 30: ...he RADIUS server RADIUS Port Enter the port number of the RADIUS server The default value is 1812 RADIUS Key Enter the key shared between the Router and the server WPA WPA2 Mixed WPA and WPA2 Mixed me...

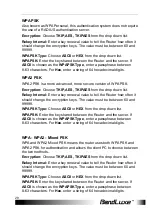
Страница 31: ...the Router how often it should change the encryption keys The value must be between 60 and 99999 WPAPSK Type Choose ASCII or HEX from the drop down list WPAPSK Enter the key shared between the Router...

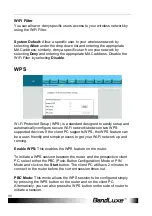
Страница 32: ...re Wi Fi networks between two WPS supported devices If the client PC supports WPS the WPS feature can be a user friendly and simple process to get your Wi Fi network up and running Enable WPS This ena...

Страница 33: ...e WPS session between the router and the client PC Enter a PIN code maximum 8 digits consisting of 0 9 or click Generate to automatically generate a random 8 digit number The PIN entered on the client...

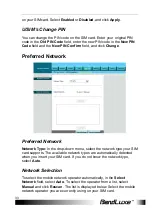
Страница 34: ...ur SIM card PIN protection is enabled you must enter the PIN code for verification Enter the code in the PIN Code field and click Verify PIN Management U SIM s PIN Management After your SIM card is ve...

Страница 35: ...eferred Network Network Type In the drop down menu select the network type your SIM card supports The available network types are automatically detected when you insert your SIM card If you do not kno...

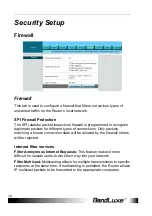
Страница 36: ...rent types of connections Only packets matching a known connection state will be allowed by the firewall others will be rejected Internet filter services Filter Anonymous Internet Requests This featur...

Страница 37: ...ava you run the risk of not having access to Internet sites created using this programming language ActiveX ActiveX is a programming language for websites Select this option to disable ActiveX If you...

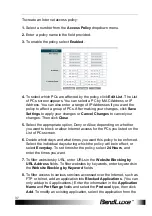
Страница 38: ...ty Setup 36 Internet Access Policy Access can be managed by a policy Use the settings on this screen to establish and access policies To display a policy s settings select the policy from the drop dow...

Страница 39: ...lock or allow Internet access for the PCs you listed on the List of PCs screen 6 Decide which days and what times you want this policy to be enforced Select the individual days during which the policy...

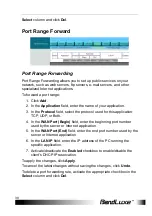
Страница 40: ...s enter the name of your application in one of the available fields 3 In the Protocol field select the protocol used for this application TCP UDP or Both 4 In the Port External field enter the port nu...

Страница 41: ...pplication TCP UDP or Both 4 In the WAN Port Begin field enter the beginning port number used by the server or Internet application 5 In the WAN Port End field enter the end port number used by the se...

Страница 42: ...ication Check with the Internet application documentation for the port number needed Enter the starting port number of the Triggered Range in the left field Enter the ending port number of the Trigger...

Страница 43: ...he Router s Acknowledgement feature is disabled the Router will not re send data if an error occurs select the default Disabled Otherwise select Enabled Internet Access Priority You can set the Intern...

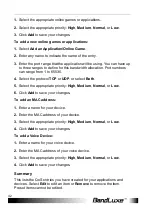
Страница 44: ...rotocol TCP or UDP or select Both 5 Select the appropriate priority High Medium Normal or Low 6 Click Add to save your changes To add an MAC address 1 Enter a name for your device 2 Enter the MAC addr...

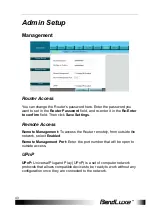
Страница 45: ...ld Then click Save Settings Remote Access Remote Management To access the Router remotely from outside the network select Enabled Remote Management Port Enter the port number that will be open to outs...

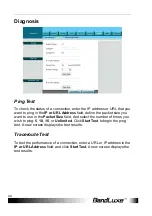
Страница 46: ...t size you want to use in the Packet Size field And select the number of times you wish to ping 5 10 15 or Unlimited Click Start Test to begin the ping test A new screen displays the test results Trac...

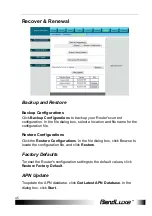
Страница 47: ...file name for the configuration file Restore Configurations Click the Restore Configurations In the file dialog box click Browse to locate the configuration file and click Restore Factory Defaults To...

Страница 48: ...ware click Browse and locate the latest firmware upgrade file After the file is located click Start Upgrade The upgrade progress is displayed Warning Upgrading firmware may take a few minutes do not t...

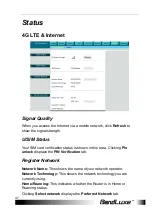
Страница 49: ...tion status is shown in this area Clicking Pin unlock displays the PIN Verification tab Register Network Network Name This shows the name of your network operator Network Technology This shows the net...

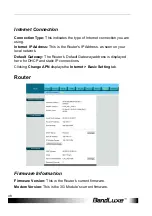
Страница 50: ...s IP Address as seen on your local network Default Gateway The Router s Default Gateway address is displayed here for DHCP and static IP connections Clicking Change APN displays the Internet Basic Set...

Страница 51: ...of IP Addresses used by devices on your local Ethernet network End IP Address The end of the range of IP Addresses used by devices on your local Ethernet network is shown here DHCP Client Table Click...

Страница 52: ...OIP VOIP allows the user to connect a standard analog phone to the router via the RJ 11 jack and make voice calls over the internet Use the information provided by your ISP or VOIP service provider to...

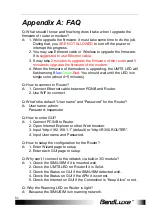
Страница 53: ...er A 1 Connect Ethernet cable between PC NB and Router 2 Use WiFi to connect Q What s the default User name and Password for the Router A User name admin Password hsparouter Q How to enter GUI A 1 Con...

Страница 54: ...ed Q Why can t I link on the GUI A If you have changed your WiFi security SSID Local IP address you have to repair your network to get a new IP that you can link the GUI XP If you are a WiFi user clic...

Страница 55: ...If you are a WiFi user please click Network and Sharing Center Manage network connections Wireless Network Connection Diagnose 2 Please click Reset the network adapter Wireless Network Connection and...

Страница 56: ...tings here If you want to set your WiFi Security please click WiFi Security There are six wireless security mode options supported by the Router WEP WPA Personal WPA2 Personal WPA Enterprise WPA2 Ente...

Страница 57: ...Setting Ethernet Setting Change Connection Type to PPPoE Fill information in the blank of Username and Password which provide by your ISP Remember to connect your xDSL or Modem to the WAN Port on you...

Страница 58: ...Q Where can I change the password of Router A Enter GUI Admin Management Q Can I backup all my settings of Router A Enter GUI Admin Recover Renewal Select Backup Configuration Q How to use the Reset...

Страница 59: ...Appendix A FAQ 57 Defaults Q If I remove the SIM when 3G is connected why can t I see the SIM status change A You have to restart the router to see the status...

Страница 60: ...figured to be 2nd LAN port Telephone port RJ11 x 1 POTS port for standard analog phone connection Power supply plug Yes Reset button Long push 5s Reset to factory default setting Short push device res...

Страница 61: ...features IPv4 TCP UDP ICMPv4 ARP DHCP Server Client HTTPs NTP TFTP server MAC Clone RTP RTCP DiffServ TOS SNTP Browser based Administration GUI Setup Wizard in GUI Browser supported IE Firefox Safari...

Страница 62: ...uthority provisioning configuration authentication Status Indication LCD Display Status Bar Cellular Signal Strength Radio Technology Wi Fi Ethernet SIP status Roaming indication Main Screen Network O...

Страница 63: ...EN 301 489 24 Electromagnetic compatibility and Radio spectrum Matters ERM Electromagnetic Compatibility EMC standard for radio equipment and services Part 24 Specific conditions for IMT 2000 CDMA dir...

Страница 64: ...essly approved by the part responsible for compliance could void the user s authority to operate the equipment 15 105 b Federal Communications Commission FCC Statement This equipment has been tested a...

Страница 65: ...is device has been tested and meets FCC RF exposure guidelines when used with an accessory that contains no metal and that positions the device a minimum of 20 cm from the body Use of other accessorie...

Страница 66: ...dentifiers are changed frequently and authentication can be requested by the server at any time DNS Domain Name System Helps route network traffic by making the addressing process more user friendly D...

Страница 67: ...difference between PAP authentication and a manual or scripted login is that PAP is not interactive The username and password are entered in the client s dialing software and sent as one data package...

Отзывы: