background image

Advanced Features


23 


Macro Buttons 

 
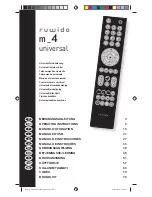
The buttons labeled M1, M2, M3, M4, and POWER can be used as macro 
buttons
. Each of these macro buttons can send out up to 15 commands with 
the press of one button. Macro buttons can be used to turn on and off 
multiple components with one button or to directly access favorite channels. 
The POWER button can operate as a POWER command for a single device 
or as a macro button that can send out multiple commands to multiple 
devices. 
 

Note: The MUTE button is used to designate POWER commands during Macro 
Button 
programming. See the Example: Macro Button Programming, for 
further description. 
 

The five macro buttons (M1, M2, M3, M4, and POWER) operate in two 
discrete sections on the remote control: Section 1 and Section 2. Section 1 
consists of the B&K, CD, DVD, and TAPE device modes. Section 2 consists 
of the SAT, TV, V1, and V2 device modes.  
 
Macro Buttons M1-M4 and POWER for Section 1 are programmed using the 
B&K device button. The M1-M4 and POWER buttons will operate exactly 
the same in all four of the Section 1 device modes (B&K, CD, DVD, TAPE). 
Macro buttons M1-M4 and POWER for Section 2 are programmed exactly 
the same in all four of the Section 2 device modes (SAT, TV, V1, V2).  
 

Example: If the M1 button is programmed is in Section 1 to turn on the TV, turn 
on the audio receiver, turn on the VCR, and turn on the satellite receiver, it will 
perform the same series of commands when then M1 button is pressed in the 
B&K, CD, DVD, and TAPE device modes. 


• 

Favorite Channels 

       Macro Buttons can provide direct access to your favorite channels with  
    the pressing of a single button. 
 

• 

Macro Commands 

  Macro Buttons can store multiple selections, including Power On / Off 
  sequences. 
 

Example: In the B&K mode, the POWER Macro Button can be programmed to 
turn on the TV, turn on the Audio Receiver, turn on the VCR, and turn on the 
Satellite receiver with the push of one Macro Button.  

Содержание AV7.1

Страница 1: ...B K AV7 1 Preprogrammed Learning Remote Control...

Страница 2: ......

Страница 3: ...Individual Buttons 15 Erasing All Buttons in One Device Mode 16 Erasing All Buttons in All Device Modes 16 D Operation 17 Device Buttons 17 Main Device Mode 18 Automatic Audio Mode 18 Backlighting 19...

Страница 4: ...VCRs TV VCR combination units 3 Cable boxes Internet set tops 4 Satellite receivers DSS Primestar Dish DBS C Band 5 Audio Receivers Preamplifiers Surround Processors 6 Compact disc players Multi Disc...

Страница 5: ...remote control and lift the latch up 2 To close the battery cover slide the battery cover straight in towards the top of the remote and push down until it clicks into place B Low Battery Message When...

Страница 6: ...Using Your Remote 4 A Function Table Reference...

Страница 7: ...Recall 22 Menu I Menu Menu Menu 23 Exit Rec Return Exit Exit Cancel Exit Clear 24 DVD Audio Eject DVD Audio Mode Prev Ch Q View Last Ch 25 29 1 5 1 5 1 5 1 5 30 6 EX 6 6 6 31 7 7 7 7 32 8 Direct 8 8...

Страница 8: ...y Select 21 Save I Mode F Adv Slow I Guide Recall 22 Menu I X2 Intro Slow I Menu 23 Exit Rec Record Exit 24 DVD Audio Eject Eject Prev Ch 25 29 1 5 1 5 1 5 30 6 EX 6 6 31 7 7 7 32 8 Direct 8 8 33 9 Lt...

Страница 9: ...ch Set Up Deck A 22 Menu I Search Menu Deck B 23 Exit Rec Clear Record 24 DVD Audio Eject Eject Intro Open Close Rev Play 25 29 1 5 1 5 1 5 1 5 30 6 EX 6 6 6 31 7 7 7 7 32 8 Direct 8 8 8 33 9 LtRt 9 9...

Страница 10: ...three digit Set Up Code Number for your device from the tables on pages 32 49 Example To set up the remote to operate a SONY TV go to the TV Set Up Code table found on pages 36 38 and look for SONY un...

Страница 11: ...the Auto Search Method on page 10 to program your remote control 5 Once your device turns off press the Device Button selected in Step 3 once again to store the Set Up Code number PASS will flash in t...

Страница 12: ...trol Each button press sends the signal for one Set Up Code number Keeping the CHANNEL UP button pressed produces a quick scanning of the Set Up Code numbers Release the CHANNEL UP button as soon as t...

Страница 13: ...se devices on the remote press the corresponding Device Button to turn the equipment ON and press the POWER button to turn the equipment OFF 6 Please repeat the above steps to program the remote contr...

Страница 14: ...ogrammed functions on the remote control Learned functions are automatically erased when a new function is learned on the same button Learned functions are retained even after a different three digit...

Страница 15: ...Your Remote 13 3 Press and hold both the Device Button selected in Step 1 and the SEL PLAY button for approximately three seconds until the LCD on the AV7 1 shows LEARN The AV7 1 is now in the learnin...

Страница 16: ...rasonic frequencies and are unable to be learned If you continue to experience difficulty during set up please contact the dealer you purchased your unit from or our customer service department for as...

Страница 17: ...SEL PLAY buttons simultaneously once again The LCD in the AV7 1 will show SAVED and then return to the B K mode The remote control has now returned to the original operating mode Erasing Learned Func...

Страница 18: ...LCD on the remote control returns to the Device Mode all the learned functions have in the selected Device Mode have been erased All the buttons in that Device Mode will now operate with the default...

Страница 19: ...equipment The most common functions are labeled on the remote However some of the secondary functions might be stored under a button that has a different name from the one on your original remote con...

Страница 20: ...and surround controls in seven different device modes of the remote control by pressing the same Device button a second time The Automatic Audio Mode enables you to watch a video program or listen to...

Страница 21: ...nd Controls Macro Buttons Light Button Backlighting All the buttons and the LCD on the AV7 1 are backlit for eight seconds when the LIGHT button is pressed The backlight is extended an additional eigh...

Страница 22: ...Control Punch Through 2 Press the corresponding Device and MUTE buttons simultaneously SET will appear in the LCD 3 Press the VOLUME UP button PUNCH will appear in the LCD 4 Press either the B K Devi...

Страница 23: ...in the LCD 4 Press either the SAT Device Button to set up for SAT Channel Control Satellite or the V2 Device Button to set up for V2 Channel Control Cable Either SAT or V2 will flash in the LCD depend...

Страница 24: ...e SELECT PLAY button PUNCH will appear in the LCD 4 Press either the V1 Device Button to set up for V1 Transport Control or the CD Device Button to set up for CD Transport Control V1 or CD will flash...

Страница 25: ...V1 and V2 device modes Macro Buttons M1 M4 and POWER for Section 1 are programmed using the B K device button The M1 M4 and POWER buttons will operate exactly the same in all four of the Section 1 dev...

Страница 26: ...ds that you want stored in that Macro button Each successive button selection will appear as M 1 5 __ 01 10 in the LCD You can select functions from another mode by first pressing the corresponding De...

Страница 27: ...will appear in the LCD Press the MUTE button to turn on the VCR M2__05 will appear in the LCD Press the SAT Device Button to change to SAT mode M2__06 will appear in the LCD Press the MUTE button to...

Страница 28: ...splay please use the following procedure 1 Press and hold the Device Button for which you would like to change the LCD setting 2 While pressing the Device Button press and release the MENU button Each...

Страница 29: ...r for the device from the tables found on pages 38 55 5 Point the remote toward the device and press in the first Set Up Code number SET followed by the Set Up Code number will appear in the LCD Your...

Страница 30: ...em Controller comes with a One year warranty from the date of purchase Specifications Model B K AV7 1 infrared remote control Power Four 1 5V AAA Batteries Dimensions h w d 7 88 x 2 5 x 1 25 inches We...

Страница 31: ...top of the remote control During normal operation the LCD indicates the mode The LCD also indicates the remote s programming status Macro Buttons Buttons labeled M1 M2 M3 M4 and POWER These buttons ca...

Страница 32: ...st the functions for each of the Set Up Code numbers that work with your device to determine the best Set Up Code number for your particular device Note Some Devices such as CD players and DVD decks t...

Страница 33: ...p Code Table DSS Primestar DBS Echostar C Band Receivers TV Set Up Code Table TVs Monitors Video LCD Projectors V1 Set Up Code Table VCRs TV VCR Combination Units V2 Set Up Code Table Cable Boxes Inte...

Страница 34: ...0 011 012 013 014 015 016 BOSE 070 170 BRYSTON 023 CARVER 022 027 28 029 061 077 180 185 201 214 226 CASIO 076 CHIRO 140 CINEMA SOUND 034 CITATION 148 CLARION 026 CURTIS MATHES 076 DENON 027 034 037 0...

Страница 35: ...129 130 132 PHILIPS 063 249 250 251 PIONEER 033 035 039 044 045 050 069 078 098 116 159 168 PROCEED 144 RCA 048 067 117 156 REALISTIC 019 056 073 075 078 095 ROTEL 074 083 085 SANSUI 035 040 048 110 1...

Страница 36: ...040 057 058 093 094 095 096 097 098 099 100 122 EUROSAT 114 FUJITSU 017 021 022 027 133 134 GENERAL ELECTRIC 106 GENERAL INSTRUMENT 003 004 016 029 031 059 101 HITACHI 139 140 HOME CABLE 029 044 080...

Страница 37: ...SAMSUNG 123 SATELLITE SERVICE 028 035 047 085 SONY 103 SUPERGUIDE 020 TEE COM 023 026 075 087 088 090 107 130 137 TOSHIBA 127 TOWN COUNTRY 023 026 UNIDEN 016 025 042 043 044 045 048 049 078 079 080 08...

Страница 38: ...LUTRON 158 159 LUXMAN 035 137 139 MAGNAVOX 027 MAKITA 186 MARANTZ 014 027 056 065 087 MCINTOSH 238 NAD 029 048 NAKAMICHI 025 244 245 NILES 160 187 NSM 161 ONKYO 012 016 017 018 019 115 OPTIMUS 026 054...

Страница 39: ...8 042 201 MINERVA 088 MITSUBISHI 004 024 028 040 042 109 124 146 191 MTC 004 062 101 201 NAD 015 025 NEC 016 019 024 040 056 130 132 134 NIKEI 043 ONKING 043 ONWA 043 OPTONICA 019 081 PANASONIC 034 05...

Страница 40: ...GN 004 028 043 SPECTRICON 112 SSS 004 043 SYLVANIA 044 059 060 063 064 127 160 164 201 TANDY 081 TATUNG 056 062 TECHNICS 034 080 TECHWOOD 004 TEKNIKA 004 024 028 043 072 101 0143 TELEFUNKEN 037 046 08...

Страница 41: ...39 043 DYNATECH 034 053 ELECTROHOME 059 EMERSON 006 017 025 027 029 031 034 035 036 037 046 101 129 131 138 153 FISHER 003 008 009 010 FUNAI 034 GENERAL ELECTRIC 031 063 072 107 109 144 123 HARMAN KAR...

Страница 42: ...14 QUASAR 066 145 RADIO SHACK 123 RCA 013 020 034 040 041 107 109 140 144 145 147 REALISTIC 003 008 010 014 031 034 040 053 054 101 RICO 058 RUNCO 148 SALORA 014 SAMSUNG 032 040 102 104 107 109 112 11...

Страница 43: ...TOSHIBA 008 013 042 047 059 079 082 112 131 TOTEVISION 040 101 UNITECH 040 VECTOR RESEARCH 012 VICTOR 048 VIDEO CONCEPTS 012 034 046 141 VIDEOSONIC 040 WARDS 003 013 017 024 031 034 040 053 054 131 Y...

Страница 44: ...IX 014 ARCHER 005 007 014 B K 001 CENTURION 092 CENTURY 007 CITIZEN 007 COMBANO 080 081 EAGLE 020 040 EASTERN 057 066 ELECTRICORD 032 GENERAL ELECTRIC 072 GEMINI 008 054 GENERAL INSTRUMENT 074 201 HAM...

Страница 45: ...43 V2 Manufacturer Brand Set Up Code Number TOCOM 039 040 056 TOSHIBA 052 UNIKA 007 014 UNITED CABLE 004 053 UNIVERSAL 005 007 014 032 035 VIEWSTAR 012 015 018 086 087 088 089 ZENITH 052 060 093 For F...

Страница 46: ...50 086 107 130 134 135 138 139 167 203 204 CASIO 111 182 CLARINETTE 182 CREEK 159 CROWN 035 DENON 123 EMERSON 042 069 102 FISHER 050 134 FRABA 111 GENEXXA 010 069 102 GOLDSTAR 080 HAITAI 093 HARMAN KA...

Страница 47: ...093 PANASONIC 103 172 201 PARASOUND 233 PHILIPS 041 107 PIONEER 010 020 025 056 174 175 176 PROCEED 239 PROTON 107 228 QUASAR 103 RCA 017 042 150 REALISTIC 042 050 051 102 181 182 187 ROTEL 107 SAE 1...

Страница 48: ...Set Up Code Tables 46 CD Manufacturer Brand Set Up Code Number TOSHIBA 006 067 091 148 160 VECTOR RESEARCH 080 VICTOR 004 022 114 124 WARDS 033 YAMAHA 024 046 054 YORX 182 For Future Applications...

Страница 49: ......

Страница 50: ...LUTRON 158 159 LUXMAN 035 137 139 MAGNAVOX 027 MAKITA 186 MARANTZ 014 027 056 065 087 MCINTOSH 238 NAD 029 048 NAKAMICHI 025 244 245 NILES 160 187 NSM 161 ONKYO 012 016 017 018 019 115 OPTIMUS 026 05...

Страница 51: ...Set Up Code Tables 49 TAPE Manufacturer Brand Set Up Code Number TURBOSCAN 167 VICTOR 106 X 10 183 XANATECH 168 169 170 171 172 188 189 YAMAHA 021 026 031 067 For Future Applications...

Страница 52: ...B K Components Ltd 2100 Old Union Rd Buffalo NY 14227 2725 1 800 543 5252 www bkcomp com Rev 0006 ENB...

Отзывы: