


6 |
Configuring the ZC1
The ZC1 can control up to 4 compatible MFDs (Multi Function
Displays). Refer to your MFD’s website for more information.
From the factory the ZC1 is not assigned to control any MFD. It will
not be responsive until it has been assigned to control an MFD on
the network.
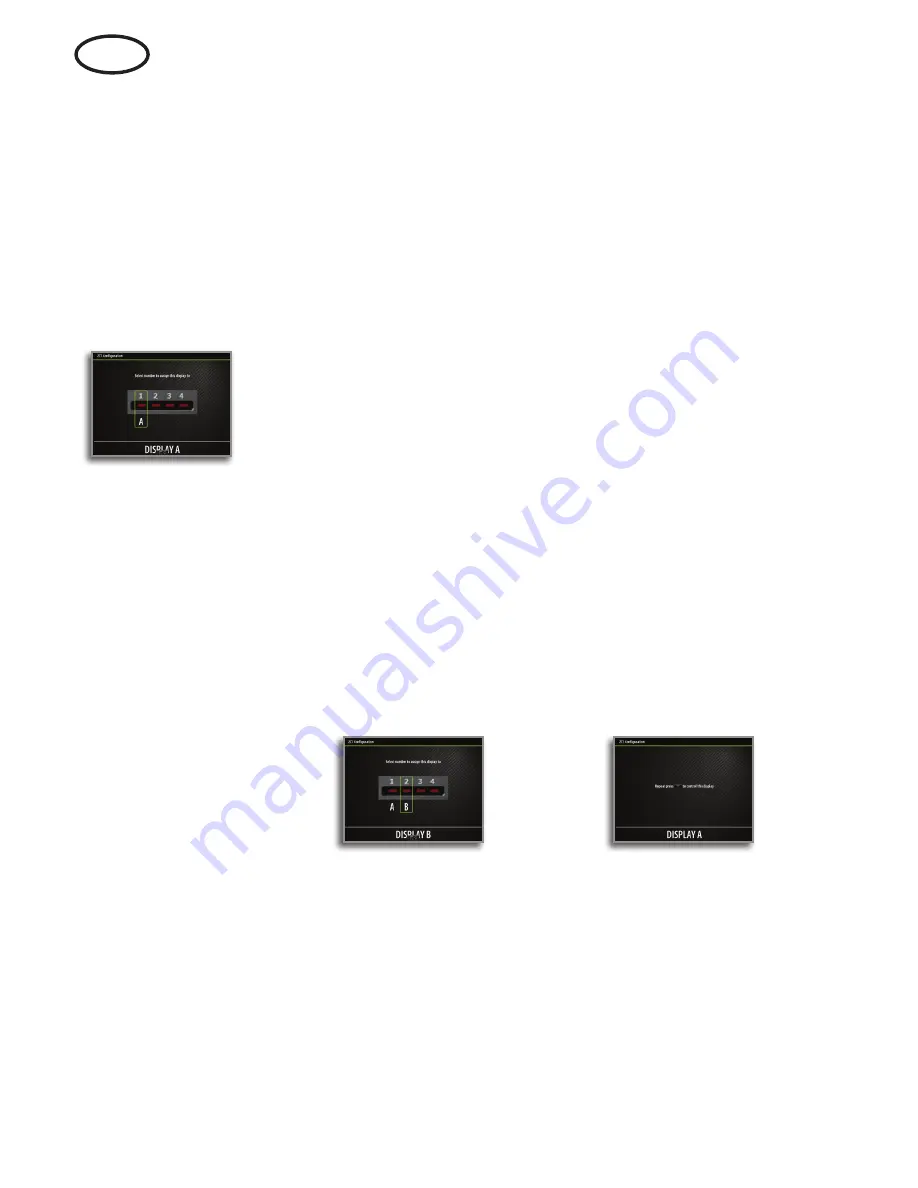
1.
Turn ON all MFDs that are to be configured for ZC1 control
2.
Press and hold the
DISPLAY
key on ZC1 for 5 seconds to enter ZC1
configuration mode
-
All LEDS on the ZC1 turn red to indicate that the ZC1 is in
configuration mode
3.
Press the
DISPLAY
key until the MFD to be assigned shows the
active assignment dialog
¼
Note:
The MFDs are identified with letters for assignment purpose.
These letters are random and not in any particular order.
4.
Press the
1
,
2
,
3
or
4
key on the ZC1 to assign active MFD to LED
position 1, 2, 3 or 4 respectively
-
It is logical to assign LED(s) 1 through 4 (left to right) to units
moving from left to right.
5.
Press the
DISPLAY
key until the next MFD to be assigned shows
the active assignment dialog
-
Already assigned MFDs will now show the passive assignment
dialog
Active MFD
Passive MFD
6.
Repeat step 3 and 4 until all MFDs are assigned to a LED
7.
Press the
X
key to save your settings and return to normal operation.
EN
Содержание ZC1
Страница 1: ...EN DE ES FR IT bandg com ZC1 User Guide ...


