background image

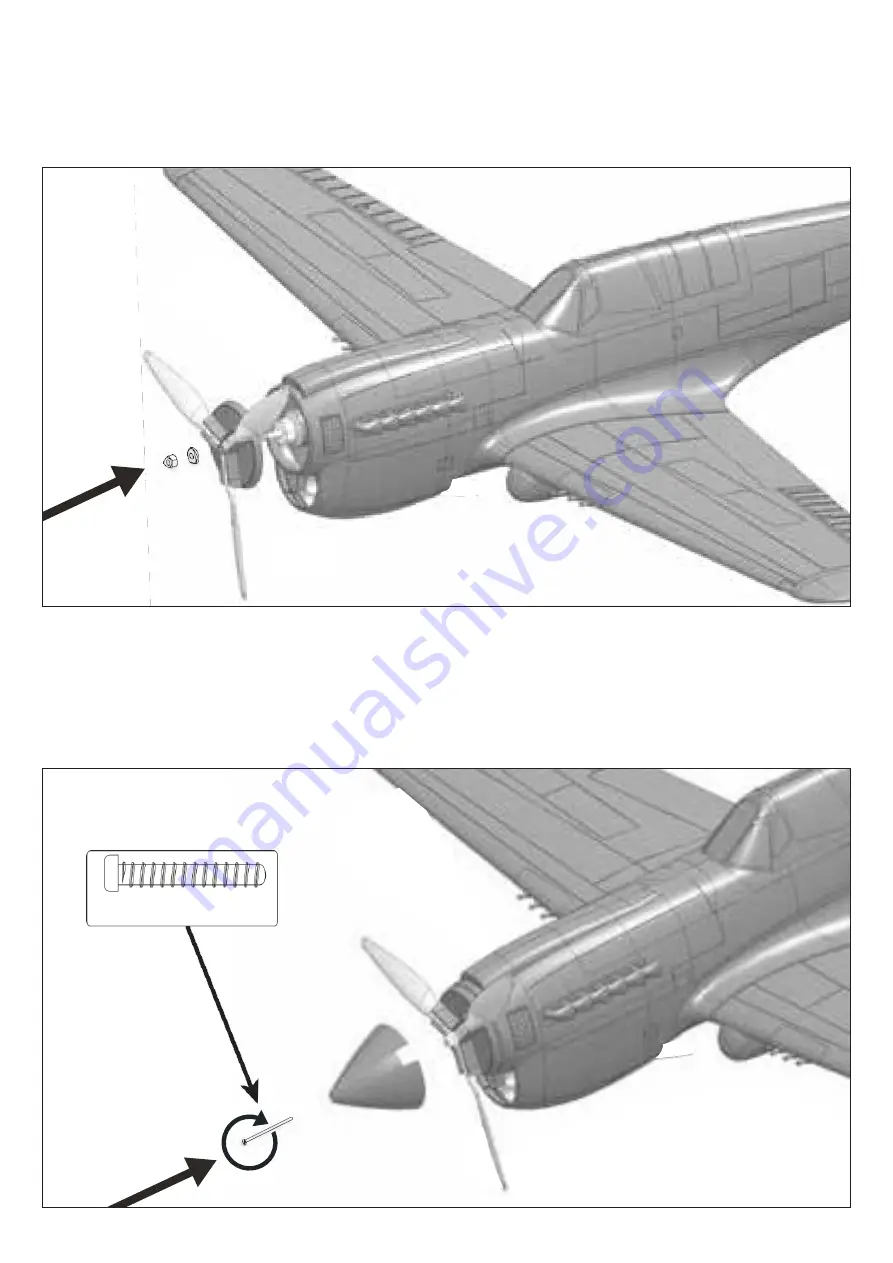
3x50mm bolt


7. Slide the assembled back plate and blades onto the motor shaft ensuring the back plate keys properly onto
the base of the shaft. Fit the supplied washer then nut onto the shaft and tighten the nut firmly to the shaft.

8. Position the spinner in place over the back plate and insert the 3x50mm bolt into the tip and tighten. A small
amount of medium thread lock can be used if desired for extra security.

Содержание BlitzRCWorks P-40N

Страница 1: ...0g 45 49oz 3 4 cell Length 1000mm 39 3 Servos 7 x 9g type 2 aileron 2 flap elevator rudder bomb system Motor Banana Hobby 3536 900Kv brushless outrunner ESC Banana Hobby 45amp Battery 2200mah 3S 60 65...

Страница 2: ...ry See battery supplier for full safety procedures Never power up the model in confined spaces and always keep the prop clear of obstructions This product is not a toy Children must be accompanied by...

Страница 3: ...push rods Screw each horn in place as shown below using the screws provided Aileron horn screws pass through the aileron and screw into the receiving horn plate The flaps screws screw directly into th...

Страница 4: ...plastic screw tabs key fully into the fuselage sides Repeat with the second half and once aligned screw firmly in place with the 3x8mm screws as shown A little glue may be applied at this stage for a...

Страница 5: ...s correctly on the fuselage Once in place screw the wing firmly down using the screws provided as shownbelow 6 Push each of the propeller blades fully into the slots of the spinner back plate Note tha...

Страница 6: ...properly onto the base of the shaft Fit the supplied washer then nut onto the shaft and tighten the nut firmly to the shaft 8 Position the spinner in place over the back plate and insert the 3x50mm bo...

Страница 7: ...tube onto the leading edge of the left wing panel as illustrated below 10 Position the radiator cowl into place on the bottom leading edge of the wing Using the 2x20mm screws supplied screw directly i...

Страница 8: ...he wing center and you are done the magnets will take care of the rest The bomb release system is covered on page 12 of this manual Assembly of your Banana Hobby P 40N is now complete Before you move...

Страница 9: ...ervos are centered and all control surfaces are level If not adjust by turning the control clevis s by hand accordingly until the control surfaces are level as shown 2 Check all control surfaces are m...

Страница 10: ...in either direction fromneutral Bomb AUX switch 100 up 100 down If you can hear bomb servo straining adjust this percentage 4 Flaps on the P 40N will need to be set for 3 stages up flap mid flap and...

Страница 11: ...following diagram From the leading edge of the wing CG is approximately 55 65mm NOTE Your P 40N has two lipo options either a 60 65C 2200mah 3S or 25 30C 2200mah 4S both options weigh approximately t...

Страница 12: ...Battery Battery and receiver location Battery angle required for correct CG positioning...

Страница 13: ...kwards 1 Prop installed backwards 1 Turn the props around Control surfaces not moving with stick input 1 The servo lead is connected to Rx incorrectly 2 The servo is damaged 1 Make sure the servo lead...

Отзывы: