background image

14

english

7


Operating mode (continued)

Special function

PuMP

Example for fill level regulation with 2 sensors and 

amplifiers:

System 1 (amplifier and sensor 1) reports minimum fill level 

L1 to system 2 (amplifier and sensor 2) via control line.

System 1 is not used in IO-Link operation.

Fig. 7-6: 

MAX

MIN

wh

bk

bk

Ett = PumP

Out = PushPull

L1

L2

Out-

put

1)

Fill level

1)

 e.g. for pump control

Special function

Signal linking as follows:
–  Output 

bk

 active if fill level falls below L1 (sensor 1) 

(e.g. switching on a pump).

–  Output 

bk

 switches to low as soon as fill level exceeds 

L2 (sensor 2) (pump switches off).

After a power failure, the system starts in the last 

mode (draining or filling). A maximum of 300,000 

cycles is possible.

7.6.3  Setting the switch-on delay

don


Set a value for the switch-on delay (value range: 

0…6500 × 10 ms).


Switch-on is delayed by the set value.

7.6.4  Setting the switch-off delay

doF


Set a value for the switch-off delay (value range: 

0…6500 × 10 ms).


Switch-off is delayed by the set value.

7.7 

Display settings

di SP

7.7.1  Display of software/hardware version

Display Configuration

FW

Firmware version (e.g. FW0214)

HW

Hardware version (e.g. HW0215)

Tab. 7-4:  Display of software/hardware version

7.7.2  Adjusting the luminosity

Display Configuration

50

Luminosity at 50%

100

Luminosity at 100%

Tab. 7-5:  Adjusting the luminosity

7.7.3  Display text rotation (0/180°)

Display Configuration

0

Text rotated 0°

180

Text rotated 180°

Tab. 7-6:  Display text rotation (0/180°)

7.7.4  Dampening rate display in RUN mode

Display Configuration

Off

No display of dampening in digits in RUN 

mode

On

Display of dampening in digits in RUN mode

Tab. 7-7:  Dampening rate display in RUN mode

7.8 

Closing the menu

E nd


Press the 

 button.


All settings are saved; the display indicates 

r un


and the sensor dampening rate in digits.

7.9 

Returning to factory settings


Briefly press the 

 and 

 buttons simultaneously


After releasing the buttons, 

r St

 appears on the 

display.

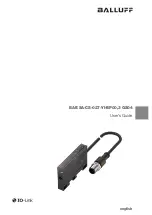
BAE SA-CS-027-YI-BP00,3 GS04

IO-Link Sensor Amplifier

Содержание IO-Link BAE SA-CS-027-YI-BP00,3 GS04

Страница 1: ...BAE SA CS 027 YI BP00 3 GS04 deutsch Betriebsanleitung english User s guide ...

Страница 2: ...www balluff com ...

Страница 3: ...BAE SA CS 027 YI BP00 3 GS04 Betriebsanleitung deutsch ...

Страница 4: ...www balluff com ...

Страница 5: ...s 9 5 4 SIO Modus 9 5 5 IO Link Betrieb 9 6 Inbetriebnahme und Betrieb 10 6 1 Inbetriebnahme 10 6 2 Hinweise zum Betrieb 10 6 3 Wartung 10 7 Bedienmodus 11 7 1 Übersicht Menüstruktur 11 7 2 Analoger Sensorwert in Digits 11 7 3 Schaltpunkte einlernen 12 7 4 Schaltpunkt 1 manuell einstellen 12 7 5 Schaltpunkt 2 manuell einstellen 12 7 6 Konfiguration 12 7 6 1 Schaltendstufentyp einstellen 12 7 6 2 E...

Страница 6: ...nd Entsorgung 19 9 1 Reparatur 19 9 2 Entsorgung 19 10 Technische Daten 20 10 1 Umgebungsbedingungen 20 10 2 Elektrische Merkmale 20 10 3 Elektrischer Anschluss 20 10 4 Ausgang Schnittstelle 20 10 5 Zulassungen und Kennzeichnungen 20 11 Zubehör 21 12 Anhang 22 12 1 Menüstruktur 22 BAE SA CS 027 YI BP00 3 GS04 Sensorverstärker IO Link ...

Страница 7: ...en Einzelne Handlungsanweisungen werden durch ein vorangestelltes Dreieck angezeigt Handlungsanweisung 1 Handlungsabfolgen werden nummeriert dargestellt 1 Handlungsanweisung 1 2 Handlungsanweisung 2 Zahlen ohne weitere Kennzeichnung sind Dezimalzahlen z B 23 Hexadezimale Zahlen werden mit vorangestell tem 0x dargestellt z B 0x12AB Hinweis Tipp Dieses Symbol kennzeichnet allgemeine Hinweise 1 4 Bed...

Страница 8: ...ht eingesetzt werden in sicherheitsgerichteten Anwendungen in denen die Personensicherheit von der Gerätefunktion abhängt in explosionsgefährdeten Bereichen 2 3 Allgemeine Sicherheitshinweise Tätigkeiten wie Einbau Anschluss und Inbetriebnahme dürfen nur durch geschulte Fachkräfte erfolgen Eine geschulte Fachkraft ist wer aufgrund seiner fachli chen Ausbildung seiner Kenntnisse und Erfahrungen sow...

Страница 9: ...ion kann unter ww balluff com heruntergeladen werden 3 2 Transport Produkt in Originalverpackung bis zum Verwendungs ort transportieren 3 3 Lagerbedingungen Produkt in Originalverpackung lagern Umgebungsbedingungen beachten siehe Umge bungsbedingungen auf Seite 20 3 Lieferumfang Transport und Lagerung BAE SA CS 027 YI BP00 3 GS04 Sensorverstärker IO Link ...

Страница 10: ... die Menüeinstellung Tasten und Display oder die IO Link Schnittstelle bedient Bei Verbindung mit einem IO Link Master wird im Display I OL angezeigt Ohne IO Link Master arbeitet das Gerät im SIO Modus Serial Input Output und verhält sich wie ein Produkt mit konventioneller Ausgangsendstufe Der Ausgang ist überstrom und kurzschlussgesichert Die Grenzwerte für Überlaststrom ca 200 mA und für Über t...

Страница 11: ...auf M12 Stecker Pin Farbe Signal 1 BN L Betriebsspannung SIO 10 30 V IO Link 18 30 V 2 WH Teach Leitung 3 BU L Betriebsspannung 4 BK Ausgangssignal C Q Tab 5 1 Pinbelegung Der Teachmodus ist nur im SIO Modus sinnvoll Im Normalbetrieb muss die weiße Teach Leitung immer mit der blauen Minusleitung verbunden sein 5 Einbau und Anschluss 5 4 SIO Modus Bild 5 3 BN OUT ext prog 3 BK BU WH PNP 1 4 2 3 BN ...

Страница 12: ...nd richtige Polung prüfen Beschädigte Anschlüsse tauschen 2 System einschalten 3 Messwerte und einstellbare Parameter prüfen und ggf den Sensorverstärker neu einstellen Dabei Entfer nungen über den gesamten Messbereich prüfen Insbesondere nach dem Austausch des Sensor verstärkers oder der Reparatur durch den Herstel ler die korrekten Werte prüfen 6 2 Hinweise zum Betrieb Funktion des Sensorverstär...

Страница 13: ...Betätigen Sie die Taste End mit der Taste Alle Einstellungen werden gespeichert das Display zeigt run und den Bedämpfungsgrad in Digit an Bei 10 minütiger Inaktivität wird der Bedienmodus ohne Speicherung von Teachwerten verlassen 7 1 Übersicht Menüstruktur Ebene Display Funktion Kapitel 1 2 1 i n88888 Analoger Sensorwert in Digits 7 2 2 tS88888 Schaltpunkte einlernen 7 3 3 SP 18888 Schaltpunkt 1 ...

Страница 14: ...Display Konfiguration P no PNP Schließer n no NPN Schließer PP no Push Pull betätigt High Side P nc PNP Öffner n nc NPN Öffner PP nc Push Pull betätigt Low Side Tab 7 3 Schaltendstufentyp einstellen Schaltmodus einstellen Mod Nach Auswahl des Schaltmodus springt die Auswahl zum Einstellen der Schaltpunkte auf das Hauptmenü tS zurück Beispiele für typische Einlernvorgänge siehe Abbildungen in Kapit...

Страница 15: ...iße Teach Leitung immer mit der blauen Minusleitung verbunden sein Der hohe Teachwert wird SP1 zugeordnet größere Bedämpfung kleinerer Objektabstand Der niedrige Teachwert wird SP2 zugeordnet niedrigere Bedämpfung größerer Objektabstand Teach Leitung aktiv tEA Der externe Teachvorgang ist für die Schaltmodi Std 2Pt und Win vorgesehen Jeder Teachvorgang speichert die Einstellung Es sind max 300 000...

Страница 16: ...einen Wert für die Ausschaltverzögerung ein Wertebereich 0 6500 10 ms Das Ausschalten wird um den eingestellten Wert verzögert 7 7 Display Einstellungen di SP 7 7 1 Anzeige Software Hardware Version Display Konfiguration FW Version der Firmware z B FW0214 HW Version der Hardware z B HW0215 Tab 7 4 Anzeige Software Hardware Version 7 7 2 Einstellung Leuchtkraft Display Konfiguration 50 Leuchtkraft ...

Страница 17: ...et oder begrenzt Zulässige Last anschließen siehe Technische Daten auf Seite 20 Erri npt Sensor nicht ange schlossen außerhalb seiner Spezifikation Sensoranschluss prüfen innerhalb des zulässigen Schaltabstands betreiben Tab 7 8 Fehlermeldungen Rückmeldung und Warnungen bei erweiterten Funktionen bei Teachen Bei erweiterten Funktionen Teach Funktionen wird eine fehlerfreie Durchführung mit einem k...

Страница 18: ... 4 12 0 4095 BDC1 Schaltzustand abhängig von Einstellungen in BDC1 Bool 0 1 TRUE Aktiv FALSE Inaktiv 8 3 Parameter Index Name Subindex Datentyp Wertebereich Bemerkung 2 System Kommando UINT8 W Siehe Kapitel 8 4 12 Device Access Locks UINT16 R W Bei gesetztem Bit ist entsprechende Funktion gesperrt Bit 0 Parameter Write Bit 1 Data Storage Bit 2 Local Parame terization External Trigger siehe Kapitel...

Страница 19: ...on 2 2 Punktschalten 3 Fensterfunktion 4 Dynamischer Betrieb Schaltmodus siehe Kapitel 7 6 1 70 SIO Output Type UINT8 R W 1 PNP Schließer 2 PNP Öffner 3 NPN Schließer 4 NPN Öffner 5 PushPull Schließer 6 PushPull Öffner Schaltendstufe 71 Debounce Siehe Kapitel 7 6 3 und 7 6 4 Delay On 1 UINT16 R W 0 6500 Einschaltverzögerung 10 ms Delay Off 2 UINT16 R W 0 6500 Ausschaltverzögerung 10 ms 72 External...

Страница 20: ...iehe Kapitel 7 3 66 Teach SP2 Single Value Schaltpunkt SP2 einlernen siehe Kapitel 7 3 128 Reset Device Reset Gerät neu starten 130 Geräteeinstellungen auf Werkseinstellungen rücksetzen 8 5 Events Event Code Name Typ Device Status Bemerkung 0xFF91 Data Storage Upload Request Notification Parameters wurden lokal geändert oder System Kommando ParamDown loadStore 0x4210 Device temperature over run Wa...

Страница 21: ...Sollte das Produkt defekt sein nehmen Sie Kontakt mit unserem Service Center auf 9 2 Entsorgung Befolgen Sie die nationalen Vorschriften zur Entsor gung Weitere Informationen finden Sie unter www balluff com auf der Produktseite 9 Reparatur und Entsorgung BAE SA CS 027 YI BP00 3 GS04 Sensorverstärker IO Link ...

Страница 22: ... Hz Kurzschlussschutz ja Vertauschmöglichkeit geschützt ja Verpolungssicher ja Überspannungsschutz ja 10 3 Elektrischer Anschluss Anschluss Stecker M12x1 4 polig A codiert 10 4 Ausgang Schnittstelle Schnittstelle IO Link Version 1 1 Übertragungsrate COM2 38 4 kBit s Minimale Zykluszeit 4 8 ms Vendor ID 0x0378 888 Device ID 0x070101 459009 10 5 Zulassungen und Kennzeichnungen Mit dem CE Zeichen bes...

Страница 23: ...utsch Zubehör ist nicht im Lieferumfang enthalten und deshalb getrennt zu bestellen Empfohlenes Zubehör finden Sie unter www balluff com auf der Produktseite 11 Zubehör BAE SA CS 027 YI BP00 3 GS04 Sensorverstärker IO Link ...

Страница 24: ...altmodus 2Pt 2 Punktschalten Wi n Fensterfunktion dyn Dynamischer Betrieb Nach Auswahl des Schaltmodus Rücksprung in Hauptmenü tS um Schalt punkte einzustellen c Ett Externe Trigger einstellen 7 6 2 oFF Teach Leitung inaktiv tEA Teach Leitung aktiv SP1 Einschaltpunkt einlernen Teach Leitung weiß kurz auf UB braun legen SP2 Ausschaltpunkt einlernen Teach Leitung weiß kurz auf UB blau legen Gilt für...

Страница 25: ...uchtkraft 7 7 2 50 Leuchtkraft ca 50 100 Leuchtkraft 100 j 180 Textdrehung Display 0 180 7 7 3 0 Anzeige nicht gedreht 180 Anzeige um 180 gedreht k VaL Anzeige Bedämpfungsgrad im Run Modus 7 7 4 Off Keine Anzeige der Bedämpfung in Digits im RUN Modus On Anzeige der Bedämpfung in Digits im RUN Modus 7 End Menü beenden 7 8 Nr 914948 726 DE 02 130901 B21 Änderungen vorbehalten Ersetzt Ausgabe F14 BAE...

Страница 26: ......

Страница 27: ...BAE SA CS 027 YI BP00 3 GS04 User s Guide english ...

Страница 28: ...www balluff com ...

Страница 29: ... mode 9 5 5 IO Link operation 9 6 Startup and operation 10 6 1 Startup 10 6 2 Operating notes 10 6 3 Maintenance 10 7 Operating mode 11 7 1 Overview of menu structure 11 7 2 Analog sensor value in digits 11 7 3 Teaching in switchpoints 12 7 4 Manually adjusting switchpoint 1 12 7 5 Manually adjusting switchpoint 2 12 7 6 Configuration 12 7 6 1 Adjusting the switching power amplifier type 12 7 6 2 ...

Страница 30: ...epair and disposal 19 9 1 Repair 19 9 2 Disposal 19 10 Technical Data 20 10 1 Ambient conditions 20 10 2 Electrical data 20 10 3 Electrical connection 20 10 4 Output Interface 20 10 5 Approvals and markings 20 11 Accessories 21 12 Appendix 22 12 1 Menu structure 22 BAE SA CS 027 YI BP00 3 GS04 IO Link Sensor Amplifier ...

Страница 31: ...Disposal 1 3 Symbols and Conventions Individual action instructions are indicated by a preceding triangle Instruction 1 Action sequences are numbered consecutively 1 Instruction 1 2 Instruction 2 Numbers unless otherwise indicated are decimals e g 23 Hexadecimal numbers are represented with a preceding 0x e g 0x12AB Note tip This symbol indicates general notes 1 4 Explanation of the warnings Alway...

Страница 32: ...ay not be used there In safety oriented applications in which personal safety depends on the device function In explosive atmospheres 2 3 General safety notes Activities such as installation connection and commissioning may only be carried out by qualified personnel Qualified personnel are persons whose technical training knowledge and experience as well as knowledge of the relevant regulations al...

Страница 33: ...e Description can be downloaded from www balluff com 3 2 Transport Transport product to location of use in original packaging 3 3 Storage conditions Store product in original packaging Observe ambient conditions see Ambient conditions on page 20 3 Scope of delivery transport and storage BAE SA CS 027 YI BP00 3 GS04 IO Link Sensor Amplifier ...

Страница 34: ...ings buttons and display or the IO Link interface If connected to an IO Link master the display shows I OL Without IO Link master the device works in SIO mode serial input output and behaves like a product with a standard output power amplifier The output is protected against overcurrent and short circuits The limit values for overcurrent approx 200 mA and for overheating are fixed settings An ove...

Страница 35: ...lug Pin Color Signal 1 BN L Operating voltage SIO 10 30 V IO Link 18 30 V 2 WH Teach line 3 BU L Operating voltage 4 BK C Q output signal Tab 5 1 Pin assignment Teach in mode is only useful in SIO mode In normal operation the white teach line must always be connected to the blue negative line 5 Installation and connection 5 4 SIO mode Fig 5 3 BN OUT ext prog 3 BK BU WH PNP 1 4 2 3 BN 3 BK BU WH NP...

Страница 36: ...nd correct polarity Replace damaged connections 2 Turn on the system 3 Check measured values and adjustable parameters and readjust the sensor amplifier if necessary Check spacing over the entire measuring range Check for the correct values especially after replacing the sensor amplifier or after repair by the manufacturer 6 2 Operating notes Regularly check function of the sensor amplifier and al...

Страница 37: ... button All settings are saved the display indicates run and the sensor dampening rate in digits After 10 minutes of inactivity the operating mode is exited without saving any teach values 7 1 Overview of menu structure Ebene Display Function Section 1 2 1 i n88888 Analog sensor value in digits 7 2 2 tS88888 Teaching in switchpoints 7 3 3 SP 18888 Manually adjusting switchpoint 1 7 4 4 SP28888 Man...

Страница 38: ...nfiguration P no PNP N O n no NPN N O PP no Push pull actuated high side P nc PNP N C n nc NPN N C PP nc Push pull actuated low side Tab 7 3 Adjusting the switching power amplifier type Adjusting the switching mode Mod After the switching mode is selected the selection for adjusting the switchpoints returns to the main menu tS For examples of typical teach in processes see the figures in section 7...

Страница 39: ...ways be connected to the blue negative line The high teach value is assigned to SP1 higher dampening smaller object distance The low teach value is assigned to SP2 smaller dampening larger object distance Teach line active tEA The external teach in process is available for switching modes Std 2Pt and Win Each teach in process saves the settings A maximum of 300 000 cycles is possible Teaching in S...

Страница 40: ...Set a value for the switch off delay value range 0 6500 10 ms Switch off is delayed by the set value 7 7 Display settings di SP 7 7 1 Display of software hardware version Display Configuration FW Firmware version e g FW0214 HW Hardware version e g HW0215 Tab 7 4 Display of software hardware version 7 7 2 Adjusting the luminosity Display Configuration 50 Luminosity at 50 100 Luminosity at 100 Tab 7...

Страница 41: ... is switched off or limited Connect a permissible load see Technical Data on page 20 Erri npt Sensor not connected out of specification Check sensor connection operate within the permissible switching distance Tab 7 8 Error messages Feedback and warnings for advanced functions during teach in With advanced functions teach functions errorfree execution is indicated through a brief flashing of the v...

Страница 42: ...0 4095 BDC1 Switching state dependent on settings in BDC1 Bool 0 1 TRUE aktive FALSE inaktive 8 3 Parameter Index Name Subindex Data type Value range Comment 2 System command UINT8 W See section 8 4 12 Device Access Locks UINT16 R W If bit is set the corresponding function is locked Bit 0 Write parameter Bit 1 Data storage Bit 2 Local parame terization External trigger see sectionl 7 6 2 Bit 3 Loc...

Страница 43: ...g function 2 2 point switching 3 window function 4 dynamic operation Switching mode see section 7 6 1 70 SIO Output Type UINT8 R W 1 PNP N O 2 PNP N C 3 NPN N O 4 NPN N C 5 push pull N O 6 push pull N C Switching power amplifier 71 Debounce See sections 7 6 3 and 7 6 4 Delay On 1 UINT16 R W 0 6500 Switch on delay 10 ms Delay Off 2 UINT16 R W 0 6500 Switch off delay 10 ms 72 External Trigger UINT8 ...

Страница 44: ...itchpoint SP1 see section 7 3 66 Teach SP2 Single Value Teach in switchpoint SP2 see section 7 3 128 Reset Device Reset Restart device 130 Reset device settings to factory settings 8 5 Events Event Code Name Type Device Status Comment 0xFF91 Data Storage Upload Request Notification Parameters were changed locally or ParamDownload Store system command 0x4210 Device temperature over run Warning Out ...

Страница 45: ...rmed by Balluff If the product is defective contact our Service Center 9 2 Disposal Observe the national regulations for disposal Additional information can be found at www balluff com on the product page 9 Repair and disposal BAE SA CS 027 YI BP00 3 GS04 IO Link Sensor Amplifier ...

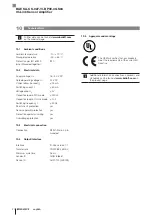
Страница 46: ...equency f 50 Hz Short circuit protection yes Reverse polarity protection yes Protection against miswiring yes Overvoltage protection yes 10 3 Electrical connection Connection M12x1 Male 4 pin A coded 10 4 Output Interface Interface IO Link version 1 1 Transfer rate COM2 38 4 kBit s Minimum cycle time 4 8 ms Vendor ID 0x0378 888 Device ID 0x070101 459009 10 5 Approvals and markings The CE Mark veri...

Страница 47: ...Accessories are not included in the scope of delivery and must be ordered separately Recommended accessories can be found at www balluff com on the product page 11 Accessories BAE SA CS 027 YI BP00 3 GS04 IO Link Sensor Amplifier ...

Страница 48: ...dard switching mode 2Pt 2 point switching Wi n Window function dyn Dynamic operation After selecting the switching mode return to the main menu tS to adjust switchpoints c Ett Setting external triggers 7 6 2 oFF Teach line inactive tEA Teach line active SP1 teach in switch on point briefly connect the teach line white to UB brown SP2 teach in switch off point briefly connect the teach line white t...

Страница 49: ...ng the luminosity 7 7 2 50 Luminosity approx 50 100 Luminosity 100 j 180 Display text rotation 0 180 7 7 3 0 Display not rotated 180 Display rotated 180 k VaL Dampening rate display in RUN mode 7 7 4 Off No display of dampening in digits in RUN mode On Display of dampening in digits in RUN mode 7 End Closing the menu 7 8 No 914948 726 EN 02 130901 B21 Subject to modification Replaces F14 BAE SA CS...

Страница 50: ...engshan Rd 8F Building A Yunding International Commercial Plaza 200125 Pudong Shanghai Phone 86 400 820 0016 Fax 86 400 920 2622 service cn balluff com cn DACH Service Center Germany Balluff GmbH Schurwaldstrasse 9 73765 Neuhausen a d F Phone 49 7158 173 370 service de balluff de Eastern Europe Service Center Poland Balluff Sp z o o Ul Graniczna 21A 54 516 Wrocław Phone 48 71 382 09 02 service pl ...

Отзывы: