


3
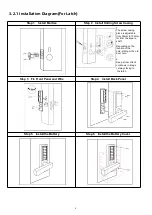
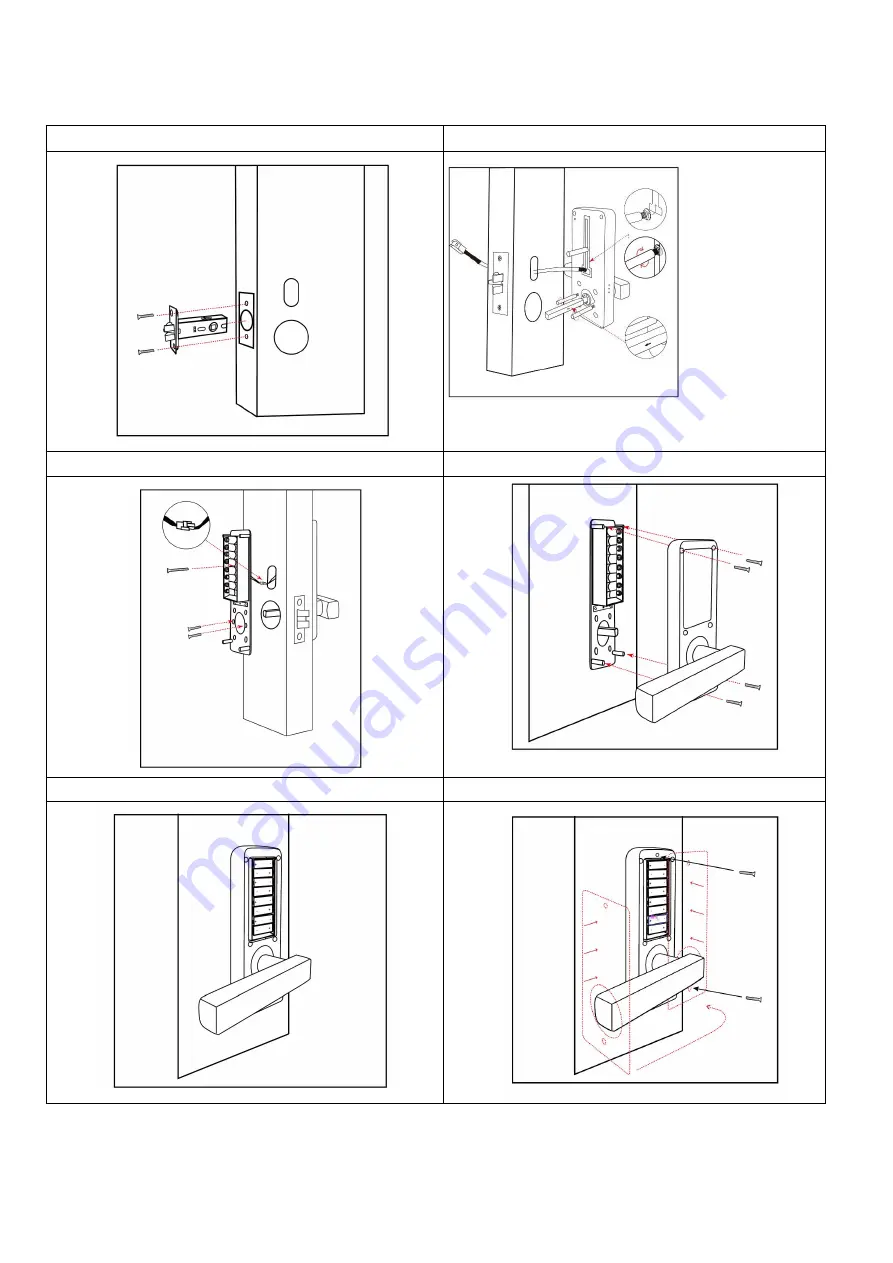
3.2.1 Installation Diagram(For Latch)
Step 1 Install Mortise
Step 2 Install Sliding Screw Casing
Step 3 Fix Front Panel and Wire
Step 4 Install Back Panel
Step 5 Install the Battery
Step 6 Install the Battery Cover
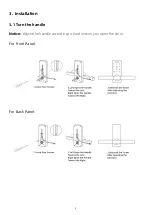
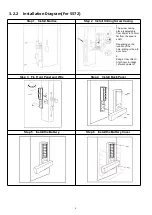
1.
The screw casing
place is adjustable
from 55mm to 100mm
far from the square
shaft.
Depending on the
location of the
hole-drilling or the old
door hole.
2.
Keep arrow directi
on(shows in image
) always facing to
the latch
Содержание WL10
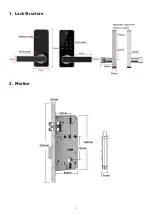
Страница 2: ...1 1 Lock Structure 2 Mortise...
Страница 8: ...7 5 3 User management...


