background image

If you have any trouble installing your Baldwin product, feel free to call our toll-free Consumer Help Line at 1-800-566-1986. Hours: 6 a.m. – midnight (east coast standard), 7 days a week.

10.

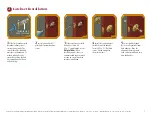
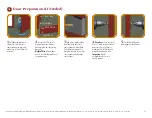
Door Preparation (If Needed)

4

3

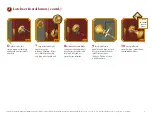
Fold hole template along

door edge with face bore
center point 40" from floor.
Tape template to door. Use
template to mark the backset
center point and edge bore
center point.

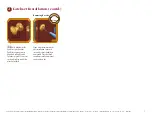
4

Face Bore:

Very carefully

drill 2

1

8

" hole into one side of

door face exactly at pencil
marks until drill bit starts to
protrude on opposite side.

Important:

Drill

perpendicularly (at a 90º
angle) to door. 

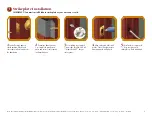
5

Complete drilling hole

from opposite side of door.

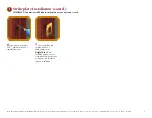
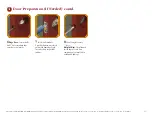
1

Pull door toward you to

check if it’s level. Observe
contact of door to jam and
make sure it’s level. Adjust if
necessary.

hole template

low side of bevel

door stop

top of door

2

(Aerial View) To ensure

proper alignment, only use
hole template on side facing
doorstop. 

Helpful Hint:

Some doors

have a beveled edge with bevel
facing doorstop.

If you have trouble installing your Baldwin product, feel free to call our toll-free Consumer Help Line at 1-800-566-1986.  Hours:  8 a.m. to 8 p.m. E.S.T. - Monday-Friday  10 a.m. to 6 p.m. E.S.T. - Saturday

Содержание PASSAGE Series

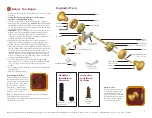
Страница 1: ...onial Knob 5415 Contemporary Knob 5425 Egg Knob 5440 Colonial Lever 5460 Contemporary Lever 5445 Classic Lever 5450 Scroll Lever 5455 Wave Lever 5800 FillmoreTM Knob 5805 Dorchester Knob 5820 Peyton K...

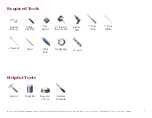
Страница 2: ...ear Phillips Screwdriver 21 8 Dia Face Bore Hole Saw Tape Measure 1 2 Wood Chisel Electric Drill 1 8 Wood Drill Bit 7 8 Spade Bit Utility Knife Pencil 24 Level Masking Tape Hammer Wood Filler Beeswax...

Страница 3: ...tion of your Baldwin hardware 23 8 backset privacy latches for use with knobs are supplied with privacy buttons for 13 8 thick doors If you are installing these latches on a 13 4 thick door you will n...

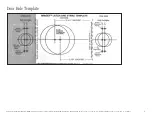
Страница 4: ...Help Line at 1 800 566 1986 Hours 6 a m midnight east coast standard 7 days a week 4 Door Hole Template If you have trouble installing your Baldwin product feel free to call our toll free Consumer Hel...

Страница 5: ...Helpful Hint When installing wood screws it is recommended to put beeswax or soap on screw threads to improve installation 2Insert latch and drill 1 8 pilot holes for combination screws 4Install the i...

Страница 6: ...acy Version Only Insert privacy button into hole on inside rosette and thread it into latch If needed use privacy button extension 9Insert spindle into knob lever and align set screw hole over the mar...

Страница 7: ...ole in handle with V groove in spindle Insert set screw and tighten with Allen wrench provided inside bottom slot If you need to remove rosettes after installation loosen set screw and remove knob lev...

Страница 8: ...rame 2Determine door thickness Use template to mark screw holes and correct center points for door thickness 3Use masking tape to mark 1 from edge of spade bit Drill 7 8 diameter hole 1 deep at center...

Страница 9: ...y is void 3 6Using strike as a template drill 1 8 pilot holes for 8 x 3 4 combination screws 7Secure strikeplate into position with 8 x 3 4 combination screws Helpful Hint When installing wood screws...

Страница 10: ...il drill bit starts to protrude on opposite side Important Drill perpendicularly at a 90 angle to door 5Complete drilling hole from opposite side of door 1Pull door toward you to check if it s level O...

Страница 11: ...xactly at pencil marks 7Insert latch into hole Use utility knife to score chisel guides into door edge Make sure score lines are parallel to door 8Chisel faceplate cavity 1 8 deep Helpful Hint Chisel...

Страница 12: ...t installation step 9 Contact your Baldwin distributor for a replacement or call 1 800 566 1986 for assistance Solution Troubleshooting Guide If parts are missing do not return product Please call Bal...

Отзывы: