BDM 400 Microphones
Operating Instructions
14
BDM400 Operation Manual issue 10
3.2 C
ONTROLS
& I
NDICATORS
FOR
C
ONFIGURATION
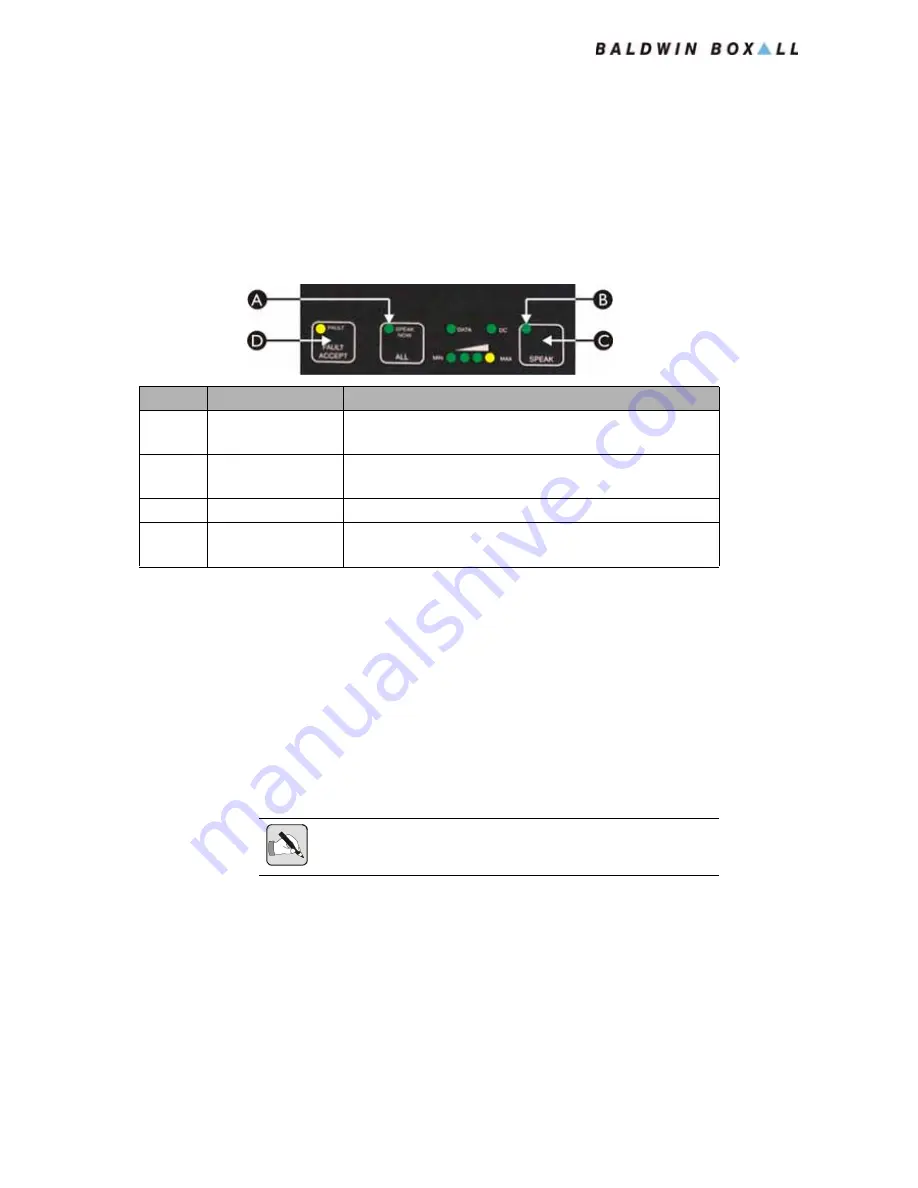
When in Configuration Mode, the functions of the front panel
indicators and controls are as shown in Figure 3.1.
Figure 3.1 — Controls when in Configuration Mode
3.3 E
NTERING
“C
ONFIGURATION
M
ODE
”
1. Disconnect power from the unit by removing the RJ45 cable.
2. Press and hold the “Fault Accept” button (“D” in Figure 3.1).
3. Connect the RJ45 cable.
4. Release the “Fault Accept” button when the “Busy” indicator
(item “B” in Figure 3.1) flashes.
5. The Busy indicator should now flash once.
This indicates the unit is in Position 1 within the
Configuration Table, and the “Speak Now” LED will also flash
to indicate the current setting of the “Speak Now Delay”
(which is position 1 in the configuration table).
6. The unit is now in Configuration Mode.
Original Function Function in "Configuration" Mode
A
"Speak Now" LED
Flashes
to show the
current setting
of the value or
function
B
"Busy" LED
Flashes
to show the
current location
in the
Configuration Table
C
"Speak" Button
Press
to
change the setting
of the value or function
D
"Fault Accept"
Button
Press
to
step on to the next location
in the internal
Configuration Table
N
OTE
: The Busy Indicator is only identified on the BDM401.
On other models the Indicator is present but has no ident on the panel.


