5
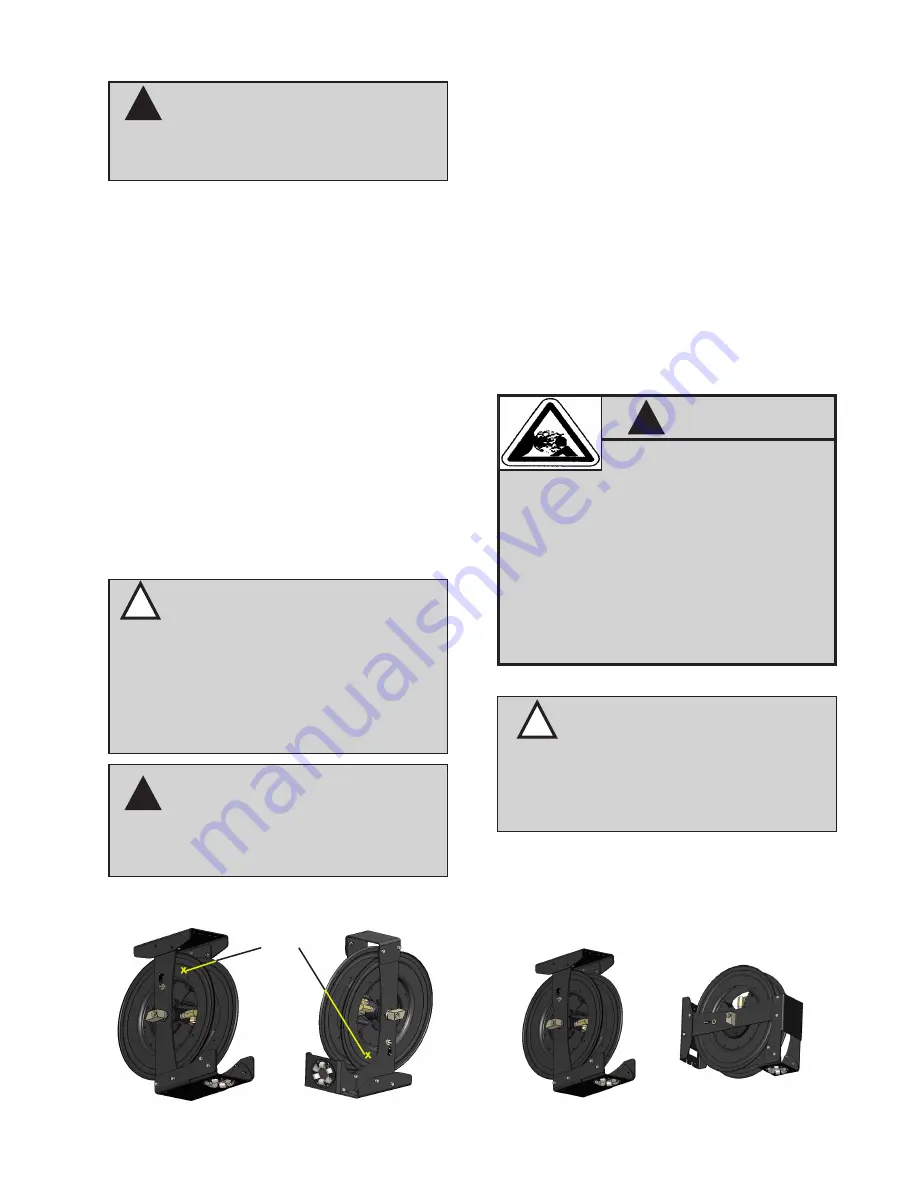
Figure 1
Clamping Spool
Ceiling or Side Mounting Positions:
The hose reel is shipped ready to use. No assembly
is required for basic operation. (See figure 2)
Figure 2
Ceiling/Side Outlet Arm Position
Place
C-Clamp Here
4. Before installing the hose, secure spool from
accidental rotation by placing a clamp on the
spool. See figure 1 for proper placement of
clamp. This will keep the spool from rotating while
installing the hose.
5. Uncoil the hose and attach bumper stop.
Attach the hose to the reel then remove clamp
carefully.
6. Firmly grasp the hose and pull it to release the
stop pawl. Then slowly retract the hose.
NOTE:
Check the power spring tension. The
hose must pull out fully and retract fully. To adjust,
add or remove ONE loop from the spool, extend
the hose, and latch it. Do this as many times as
necessary until the power spring has the desired
tension.
7. Position the bumper stop so the hose extends
far enough for all operators to reach it.
WARNING:
Wear Heavy Leather
Gloves
when replacing service hose and/or
replacing power spring to protect your hands from
injury.
!
CAUTION:
Do Not
put so many loops
onto the reel that the power spring winds tightly
before the hose is fully extended. A power spring
that has been wound too tight stops rotating
before the hose is fully extended. This condition
will wear the hose and power spring prematurely.
To decrease tension, remove one to two loops of
hose from the reel.
Installation
Increasing Power Spring Tension:
1. Pull the hose out fully and engage the stop
pawl.
2. Be sure the system pressure has been relieved.
Follow the pressure relieve procedures
below.
3. Remove the bumper stop and dispensing
valves.
4. Pull the hose back through the roller outlet and
wrap one loop of hose around the spool.
5. Pull the hose back through the roller outlet
assembly and check the spring tension; the hose
must pull out fully and retract fully. Continue to
wrap more loops, one at a time until the power
spring has the desired tension.
CAUTION:
Before removal of the
roller outlet assembly and the top tie bracket,
the power spring tension should be removed
and the uprights should be secured against
accidental separation.
!
Adjusting the Outlet Arm Position:
Pressure Relief Procedure:
Follow this procedure before maintaining and/
or repairing your Premium Hose Reel and/or
any part of system.
1) Disconnect the air to the pump.
2) Point dispensing valve away from
yourself and others.
3) Open dispensing valve until
pressure is relieved.
WARNING
!
WARNING:
Never
allow the reel to
spin freely. Doing so will cause the hose to
spin out of control, which could cause serious
bodily injury.
!
!


