


«SPANISH
SAFE PLAY AREA DIAGRAM
Safe Play Area:
• The safe play area refers to a zone extending 6' beyond the play product on all sides, including the
space above the play product.
• The ground surface
must be level
. Installing your play product on sloping ground can cause it to
lean or "rack". This leaning puts additional stress on all connections and joints and in time will cause
those connections to loosen and fail.
• The safe play area must be free of all structures, landscaping, trees and branches, rocks, wires,
and other obstacles to safe play. Children can be seriously injured running or swinging into these
obstacles.
• Remove all tripping hazards from the safe play area. Tripping hazards include: roots, stumps, rocks,
landscaping, sprinkler heads, railroad ties, plumbing and electrical connections.
• Play product needs to be installed on solid ground.
General Information:
Your set has been designed and engineered for
children only and for residential use only.
A maximum of 150 lbs. per child is recommended for
play activities designed for individual use.
A maximum of 120 lbs. per child is recommended for
play activities designed for multiple child use.
A maximum of 6 children is recommended for this unit.
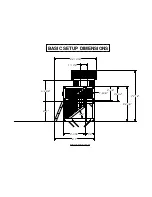
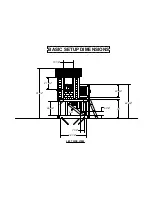
Dimensions:
• The Chalet has one layout option.
Layout Ground Dimension Safe Play Area*
6'-4
7
8
" x 6'-4
3
4
" x 67
1
4
" Tall 18'-4
7
8
" x 18'-4
3
4
"
*Level Ground Surface - See below
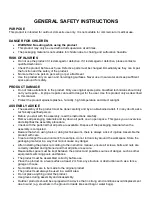
SELECTING THE CORRECT LOCATION FOR YOUR PLAY PRODUCT IS IMPORTANT
FOR YOUR CHILDREN’S SAFETY AND THE PRODUCT’S LONGEVITY
SAFETY AND ASSEMBLY INFORMATION
House
6'-0"
6'-0"
6'-4 7/8"
6'-4 3/4"
18'-4 7/8"
18'-4 3/4"
SAFE PLAY ZONE
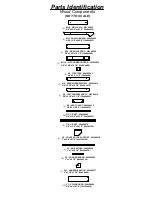
Содержание SCENIC HEIGHTS
Страница 10: ...5 7 8 7 1 2 38 24 3 8 35 62 3 8 19 1 8 21 3 4 91 1 4 48 1 8 26 3 8 BASIC SETUP DIMENSIONS LEFT SIDE VIEW...
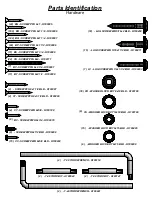
Страница 71: ...STEP 47 1 FAUCET LOCATION SCREW PFH 8x1 1 2 2 PLCS FAUCET KIT 1 PLC SCREW PFH 8x1 1 2 2 FAUCET KIT A6P00024 1...
Страница 73: ...STEP 49 1 1 8 STOVE LOCATION SCREW PFH 8x1 1 8 4 PLCS STOVE KIT 1 PLC SCREW PFH 8x1 1 8 4 STOVE KIT A6P00025 1...
Страница 79: ...BB STEP 55 FRONT PFH SCREW 4 PLCS BOTTOM HINGE BRACKET 2 PLCS NOTE HOLE LOCATION FOR PROPER INSTALLATION...
Страница 86: ...STEP 62 2 TOY BOX ASSEMBLY TOY BOX ASSEMBLY 2 PLCS...
Страница 87: ...E STEP 63 SEAT CUSHION 1 PLC SEAT CUSHION A6P00107 1...


