HGM-MZ Refrigerant Monitor
Quick Start Installation Instructions
Revision
2
- 2 -
P/N: 3015-9003
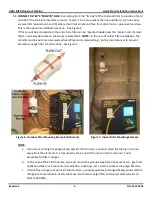
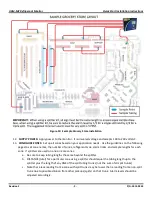
c. If you are placing pickups in a freezer, mount them well away from the door to prevent sensor
freeze up from high humidity near the freezer door. An alternative location is just outside the door
which would pick up refrigerant when the door is opened.
NOTE: Use the worksheet supplied with the monitor to document location and lengths of tubing for later
zone setup information.
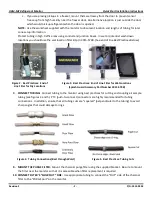
Protect tubing in high traffic areas using conduit and junction boxes. In wet or potential wash down
locations you should use the wet location filter kit p/n 3015-5748. (See end of line Best Practices Below).
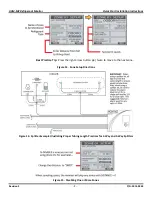
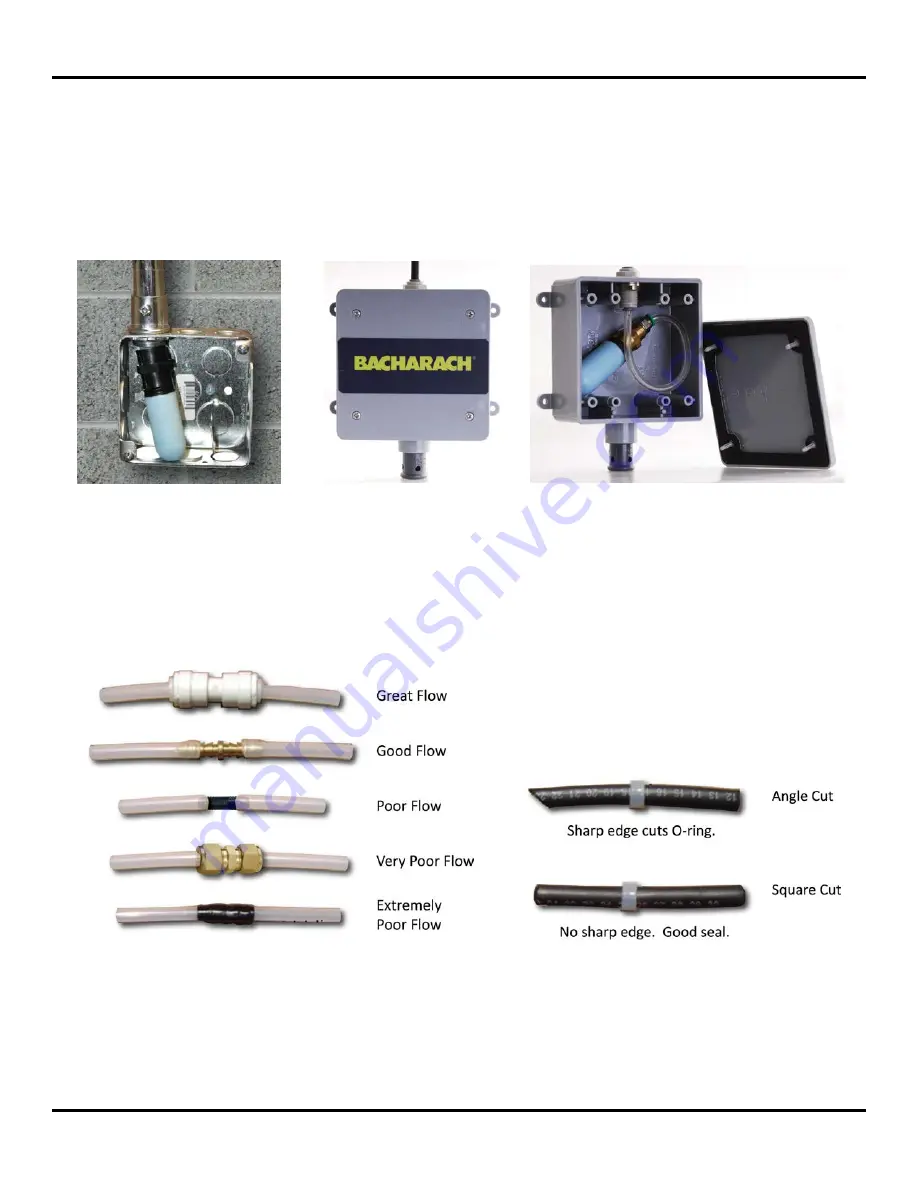
Figure 2. Best Practices: End of
Line Filter for Dry Locations
Figure 3. Best Practices: End of Line Filter for Wet Locations
(Splash Guard Accessory Part Number 3015-5748)
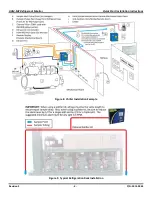
8. CONNECT TUBING: Connect tubing to the monitor using best practices for cutting and coupling air sample
tubing (see figures 4 and 5). PTC (push-to-connect) connectors are highly recommended for tubing
connections. In addition, ensure that all tubing cuts are “squared” (perpendicular to the tubing) to avoid
sharp angles that could damage O-rings.
Figure 4. Tubing Connections (Best through Worst)
Figure 5. Best Practices: Tubing Cuts
9. MOUNT THE PURGE FILTER: Mount the charcoal purge filter using the supplied bracket. Be sure to mount
the filter near the monitor so that it is accessible when filter replacement is required.
10. CONNECT FILTER’S “FLOW OUT” SIDE: Use appropriate tubing to connect the “OUT” side of the charcoal
filter to the “PURGE port” on the monitor.


