background image

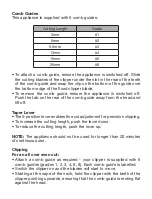
Comb Guides

This appliance is supplied with 6 comb guides:

Cutting Length

Grade

3mm

#1

6mm

#2

9.5mm

#3

13mm

#4

19mm

#6

25mm

#8

•  To attach a comb guide, ensure the appliance is switched off. Slide 

the cutting blades of the clipper under the slot in the rear of the teeth 

of the comb guide and snap the clip on the bottom of the guide over 

the bottom edge of the fixed clipper blade.

•  To remove the comb guide, ensure the appliance is switched off. 

Push the tab on the rear of the comb guide away from the head and 

lift off.

Taper Lever

• The 5-position lever enables fine cut adjustment for precision clipping.
• To increase the cutting length, push the lever down.
• To reduce the cutting length, push the lever up.

NOTE:

 The appliance should not be used for longer than 20 minutes 

of continuous use.

Clipping

For an all over even cut:

•  Attach a comb guide as required - your clipper is supplied with 6 

comb guides (grades 1, 2, 3, 4, 6, 8). Each comb guide is labelled.

• Switch the clipper on and the blades will start to move.
•  Starting at the nape of the neck, hold the clipper with the teeth of the 

clipper pointing upwards, ensuring that the comb guide is resting flat 

against the head.

Содержание POWERBLADE PRO

Страница 1: ...ooling Always take extra care if used on children or near children Do not use on very young children IMPORTANT SAFETY UK Only This appliance must not be used in the bathroom Outside the UK If using th...

Страница 2: ...rmation No repair must be attempted by the consumer Only use the attachments supplied with this appliance Do not leave the appliance unattended when switched on Do not place the appliance on any surfa...

Страница 3: ...product complies fully with all appropriate EU and UK Legislation and the Standards relevant to this type and class of appliance We are an ISO9001 2015 certified company that continually evaluates ou...

Страница 4: ...ipper blades are free from hair debris etc Use on clean dry hair that has been combed until tangle free Oiling Instructions For optimum cutting performance it is highly recommended to oil the blades a...

Страница 5: ...ide away from the head and lift off Taper Lever The 5 position lever enables fine cut adjustment for precision clipping To increase the cutting length push the lever down To reduce the cutting length...

Страница 6: ...pper on and the blades will start to move Hold the clipper to the front of your hair with the teeth pointing towards the back of your head and move the clipper towards your crown Repeat as necessary m...

Страница 7: ...or use the cleaning brush provided Remove the comb guide The comb guide can be rinsed under running water Ensure they are dried thoroughly before storage or further use Do not disassemble the blades O...

Страница 8: ...eassemble the head onto the body align the I mark on the head with the mark on the body and then turn clockwise until the I mark aligns with the circle mark on the body Fig 2 Using the Trimmer Switch...

Страница 9: ...ks into place If the appliance remains unused for a while or if the battery has run down remove it from the appliance UK GUARANTEE This BaBylissMEN appliance is guaranteed for consumer use for 3 years...

Страница 10: ...not cover any cosmetic damage due to misuse of the product nor any damage to persons or property that occurs because of product misuse unauthorised stockists include but are not limited to online auc...

Страница 11: ...or e mail ukinfo conair com UK AFTER SALES SERVICE For further advice on using the appliance contact the Conair Customer Care Line on 03705 133191 09 00 to 17 00 Monday to Friday or email your enquir...

Страница 12: ......

Страница 13: ......

Страница 14: ...IB 19 602A...

Отзывы: