background image

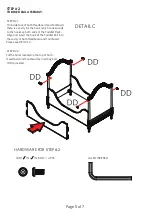
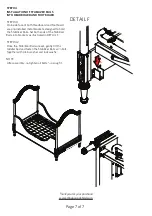
DETAIL B

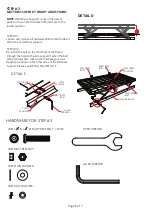
DETAIL A

ASSEMBLY INSTRUCTIONS

STEP #1.

STATIONARY SIDE ASSEMBLY

STEP #1.1:

Remove the Stationary Side Rails  of the Crib by
loosening all the bolts installed as in DETAIL A.

STEP #1.2:
Gently tilt the Crib and release the bolts underneath

the metal brackets holding the Stabilizer Rails as in

DETAIL B.

Page 4 of 7

Содержание BELLINA PANEL CRIB TODDLER BED CONVERSION KIT 105028

Страница 1: ...AND INSTALLATION Tools Necessary Allen Key included NOTE It may be easier to assemble product with two people NOTE When inserting bolts turn clockwise until tight Then loosen 1 2 3 4 of a turn After...

Страница 2: ...nches 1310mm in length 27 1 4 inches 690mm in width and 4 inches 100 mm in thickness not exceeding 6 inches 152 mm in thickness If guardrails are used as the mattress containment means guardrail s pro...

Страница 3: ...51 5 8 IN 1310MM IN LENGTH 27 1 4 IN 690MM IN WIDTH AND 4 IN 100MM IN THICKNESS NOT EXCEEDING 6 IN 152MM IN THICKNESS CARE INSTRUCTIONS Dust often using a clean soft dry lint free cloth Blot spills im...

Страница 4: ...SIDE ASSEMBLY STEP 1 1 Remove the Stationary Side Rails of the Crib by loosening all the bolts installed as in DETAIL A STEP 1 2 Gently tilt the Crib and release the bolts underneath the metal bracket...

Страница 5: ...to the hooks on both ends of the Toddler Rails Align and insert the hook of the Toddler Rail into the cavity of both Headboard and Footboard Please see DETAIL C STEP 2 2 Fill the holes located on the...

Страница 6: ...f the frame through the hole on the arm support Fasten the bolt with plain washers lock washers hexagonal nut Repeat procedure on the other arms of the Mattress Support Please see DETAIL D DETAIL E DE...

Страница 7: ...Stabilizer Rails Set both ends of the Stabilizer Rails into brackets as illustrated in DETAIL F STEP 4 2 Once the Stabilizer Rails are set gently tilt the toddler bed and fasten the Stabilizer Rails w...

Отзывы: