HALF BLIND DOVETAILS
7
Fig 17-18
Fig 19-20
Fig 13
Fig 14-15-16
Fig 11-12
Fig 08-09-10
5)
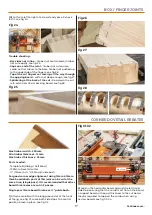
Plunge the cutter down through the fingers in front
of the material so that the tip of the cutter just meets
the marked line, see fig 11. Slide or reattach the
extraction, see fig 12.
6)
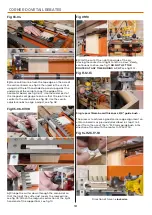
Make a light scribe cut on the front of the board
working from right to left, see fig 13. Then starting at the
left hand side of the comb follow the fingers to make
the dovetail cut working from left to right ensuring that
the router stays flat on the comb at all time, see fig 14-15.
Use the guide lines to help find the fingers, see fig 16.
DO
NOT LIFT THE ROUTER WHILST IT IS RUNNING!
7)
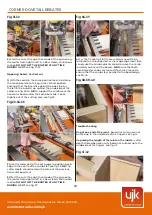
Remove both boards & try for fit. If the joint is too tight
& won’t fit together with a light tap then raise the cutter
very slightly (approx 0.5mm) and recut new boards, see
fig 17.
Trouble shooting -
• Joint too tight -
raise the cutter very slightly
(approx 0.5mm) and recut new boards, see fig 17.
• Joint too loose -
lower the cutter very slightly
(approx 0.5mm) and recut new boards.
• Gaps at one end of the joint -
timber not square,
comb not sat flat on timber, see fig 18
• Gaps in the middle of the joint -
Board cupped
• Box sides not in line -
timber not centralised or
timber not cut equally, see fig 19.
• Too much overhang -
use the comb adjuster
knobs to slightly move comb forwards, see fig 20.
Guide line


