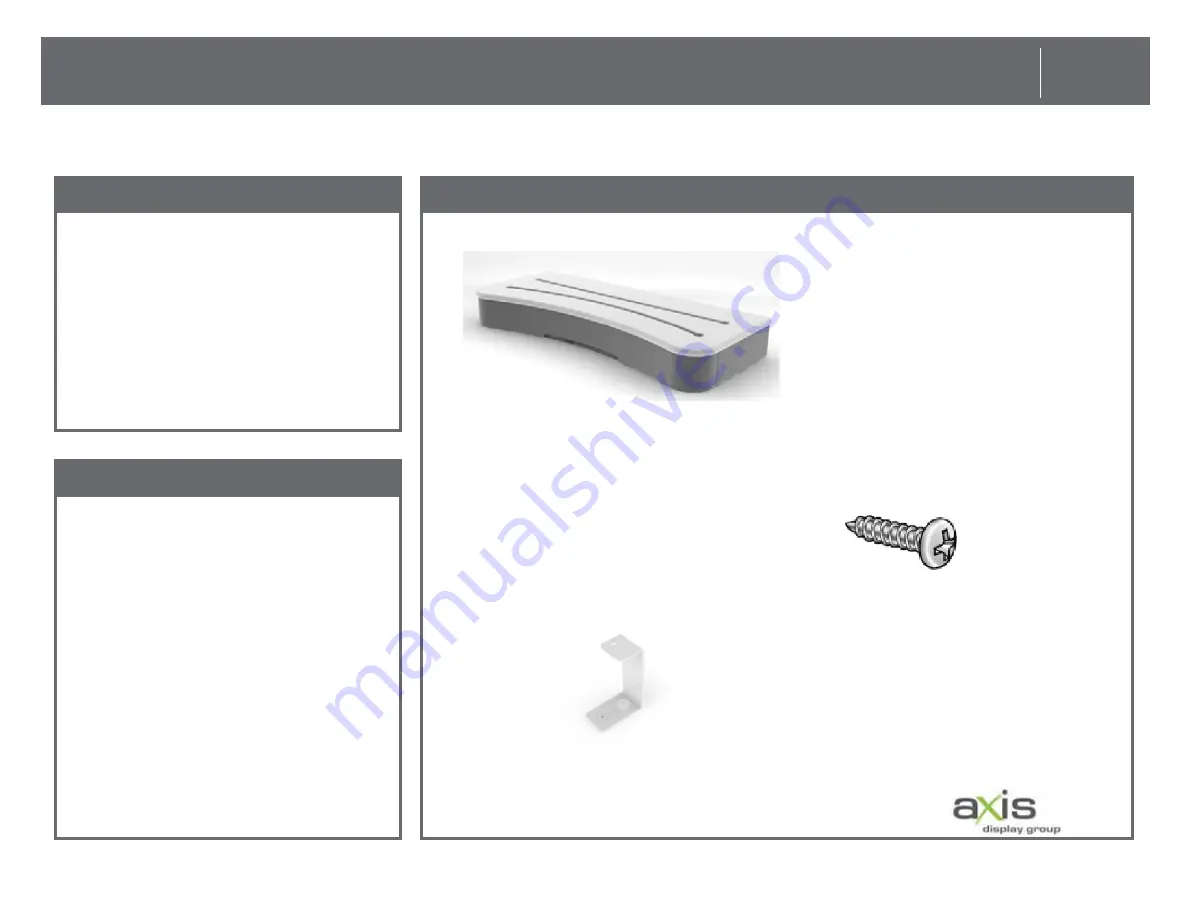
Axis T26B Скачать руководство пользователя страница 15

Riser (1)

No.8 x 1/2” Pan Head Sheet Metal Screw (4)

Riser Clamping Bracket (2)

Cordless Screwdriver with Phillips Bit
or Phillips Screwdriver

Questions: Call 1 (855) ASK - AXIS

Installation Instructions: T26B Display 

15

Tools/Time

Special Instructions

Parts List

Содержание T26B

Страница 1: ...Questions Call 1 855 ASK AXIS T26B Installation Instructions Installation Instructions...

Страница 2: ...ke the image to the left You will be replacing this entire unit You will need Allen Wrench to take phone cradles off of rail mounts Save cradles and place entire table with rail in back room Installat...

Страница 3: ...ver with Phillips Bit or Phillips Screwdriver Place countertop upside down on floor and screw in 6 Male RTA Fittings into pre drilled holes Questions Call 1 855 ASK AXIS Installation Instructions T26B...

Страница 4: ...to pre drilled holes into the underside of countertop 3 Pre drilled holes on each end for a total of 6 Underside of countertop Screw in until tight to top of thread Installation Instructions T26B Disp...

Страница 5: ...e RTA fittings into pre drilled holes 3 at the top of each panel Note When inserting Female RTA fittings turn arrow towards material edge to receive the Male RTA Fitting when assembling Questions Call...

Страница 6: ...f the leg panels 3 each panel Note When inserting Female RTA fittings turn arrow towards material edge to receive the Male RTA Fitting when assembling Turn fitting so that arrow points toward edge of...

Страница 7: ...RTA Fittings into pre drilled holes 2 on each end Note When inserting Female RTA fittings turn arrow towards material edge to receive the Male RTA Fitting when assembling Questions Call 1 855 ASK AXI...

Страница 8: ...nto the larger pre drilled holes at each end of the center panel 4 total display after covers are applied Turn fitting so that arrow points toward edge of material Installation Instructions T26B Displ...

Страница 9: ...ttings into pre drilled holes on leg panels 2 per leg panel Cordless Screwdriver with Phillips Bit or Phillips Screwdriver Questions Call 1 855 ASK AXIS Installation Instructions T26B Display 9 Tools...

Страница 10: ...t Male RTS Fittings into the pre drilled holes towards middle of each leg panel 4 total Leg panel shown mounted to countertop underside here Installation Instructions T26B Display 10 Questions Call 1...

Страница 11: ...ten Fe male RTA Fittings with phillips screwdriver Make sure bullnose on leg panels faces towards front of of countertop curved edge Holes on sides of leg panels face inward toward center There is a L...

Страница 12: ...raphic will be applied to the front You will need to support the center panel while completing the next step Step 6c You will then need to install the second leg panel onto the remaining 2 center pane...

Страница 13: ...leg panels Once levelers are installed flip unit right side up onto it s feet requires 2 people Levelers 4 Questions Call 1 855 ASK AXIS Installation Instructions T26B Display 13 Tools Time Special In...

Страница 14: ...panels 4 total Screw all the way in Flip unit over when complete Screw levelers all the way down flush Once all 4 levelers are installed flip table back over on it s feet This will require 2 people In...

Страница 15: ...ad Sheet Metal Screw 4 Riser Clamping Bracket 2 Cordless Screwdriver with Phillips Bit or Phillips Screwdriver Questions Call 1 855 ASK AXIS Installation Instructions T26B Display 15 Tools Time Specia...

Страница 16: ...ided screws attach Riser Clamping Bracket to Riser from underneath See next page for more details Screw riser clamping bracket to bottom of riser Installation Instructions T26B Display 16 Questions Ca...

Страница 17: ...t holes with pre drilled holes 2 Install with 2 screws for each bracket 3 Note that threaded hole aligns over straight channel 4 Repeat for other bracket Turn right side up and place Riser into positi...

Страница 18: ...2 1 4 20 x 1 1 4 Truss head Screw 2 Phillips head Cordless Screwdriver with Phillips Bit or Phillips Screwdriver Questions Call 1 855 ASK AXIS Installation Instructions T26B Display 18 Tools Time Spec...

Страница 19: ...through bracket Step 9 Attach Riser to Countertop from underneath through bracket with provided screws and washers NOTE Riser is set in proper location when centered left to right and when aligning a...

Страница 20: ...Front Panel Graphic 1 Double sided Tape Tape measure Utility knife Straight edge Questions Call 1 855 ASK AXIS Installation Instructions T26B Display 20 Tools Time Special Instructions Parts List...

Страница 21: ...n position Step 10c Apply graphic in place 1 Locate center panel graphic 2 10 Measure width of center panel approx 32 5 8 across 4 Cut graphic to fit 3 Transfer measurement to back of center panel gra...

Страница 22: ...ith New Adapters Wrench Allen Wrench Hex Bolt Rubber Washer Washer Adapter Adapter Kit provides 5 of each per kit Questions Call 1 855 ASK AXIS Installation Instructions T26B Display 22 Tools Time Spe...

Страница 23: ...sure adapters are spaced evenly and Allen Nut is on the right side of adapter 7 Drop exisitng Cradles removed in step 1 into new adapters and tighten Allen Nut on the side 8 Run wiring down through ba...

Страница 24: ...ition table back against the wall mural Upon successful completion of the T26B fixture the display will look similar to the one shown here Installation Instructions T26B Display 24 Questions Call 1 85...

Отзывы: