


Basic Installation
AXIS OfficeBasic USB & AXIS OfficeBasic Parallel User’s Manual
13
Section 3
Basic Installation
Connecting the Hardware
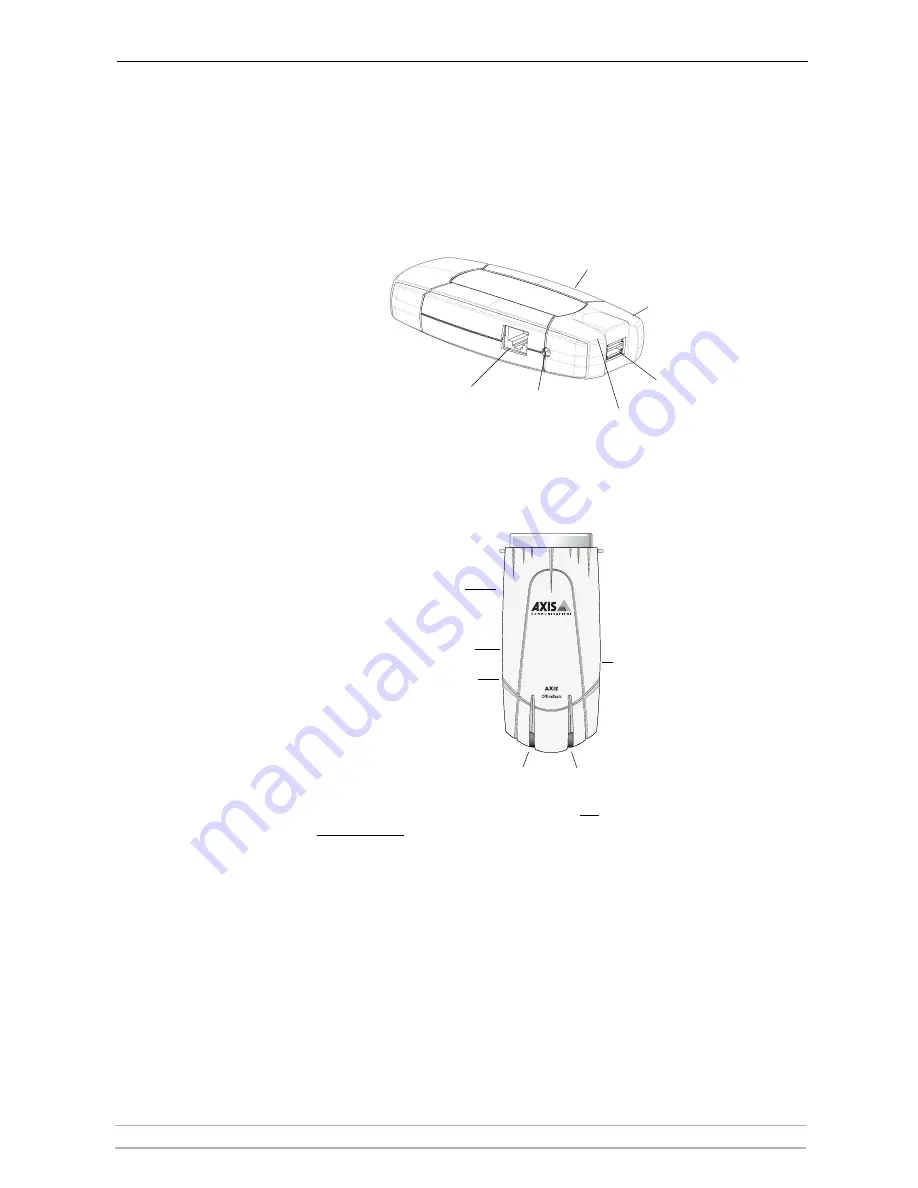
AXIS OfficeBasic USB
AXIS OfficeBasic
Parallel
1. Make sure that your printer is switched off and that the Power Adapter is
disconnected from the print server.
2. Locate the
serial number
, found on the underside label of the print server,
and write it down. You will need this number to configure the print server.
Example
: S/N: 00408c181cf0
AXIS OfficeBasic USB
Connect the printer to the USB port using the USB cable.
AXIS OfficeBasic
Parallel
Connect the printer directly to the LPT port or using a printer cable.
3. Connect the print server to the network using a twisted pair (category 5 or
better) RJ45 cable, 10baseT or 100baseTX.
4. Switch on the printer and make sure it is ready for use.
5. Connect the Power Adapter to the print server. The Power indicator will light
up. When the Network indicator starts to flash, the print server is correctly
connected to the network.
Power Adapter
connector
Ethernet
connector
Network
indicator
Power
indicator
USB printer port (USB1)
Test button
Parallel
Power Adapter
connector
Ethernet
connector
Network
indicator
Power
indicator
Test button
Connector
LPT1


