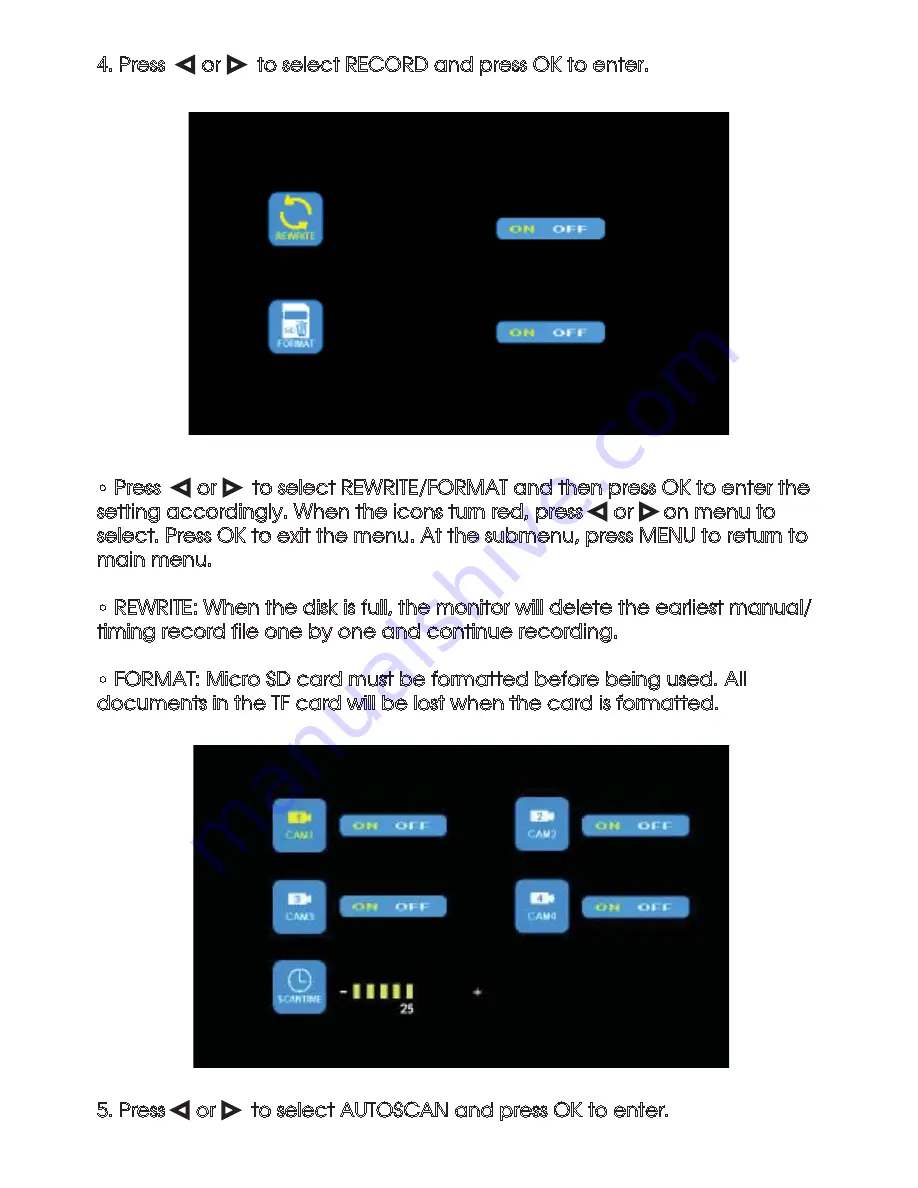
Axis JS007WQK Скачать руководство пользователя страница 11

11

4. Press  

Ż


or


Ź

to select RECORD and press OK to enter.

• Press  

Ż


or


Ź

to select REWRITE/FORMAT and then press OK to enter the 

setting accordingly. When the icons turn red, press 

Ż


or


Ź

on menu to 

select. Press OK to exit the menu. At the submenu, press MENU to return to 

main menu.

• REWRITE: When the disk is full, the monitor will delete the earliest manual/

timing record file one by one and continue recording.

• FORMAT: Micro SD card must be formatted before being used. All  

documents in the TF card will be lost when the card is formatted.

5. Press 

Ż


or


Ź

to select AUTOSCAN and press OK to enter.

Содержание JS007WQK

Страница 1: ...eal for use in heavy duty vehicles It comes with a 7 monitor that can display 1 2 3 or 4 cameras and includes one heavy duty camera that has an ingress protection rating of IP69 It operates wirelessly and can record up to 128G of action JS007WQK HEAVY DUTY WIRELESS REVERSING KIT 7 LCD DIGITAL QUAD RECORDING MONITOR with WATERPROOF CCD CAMERA MULTIVOLT 12 24 CAMERA IP69 WEATHER P R O O F IR CAMERA ...

Страница 2: ...old or moisture 4 Do not watch the video while driving unless you are monitoring the rear view camera display 5 Remove the cable connections from the monitor before cleaning the device 6 Use a mild household detergent and clean the unit with a slightly damp soft cloth Never use strong solvents such as thinner or benzine 7 Changes or modifications not expressly approved in this manual may void your...

Страница 3: ...cording 1 4 channels Signal System PAL NTSC Power Supply DC 10 32V Power Consumption 6W Max 2Q ERDUG RXGVSHDNHU Operating Temperature 20 70 C CAMERA Image Device 1 3 PC1089 Sensor Viewing Angle 120 Signal System PAL Effective Pixels 728 x 488 Sensing Area 4 6228mm x 3 6112mm Scanning System 2 1 Interlace Sync System Internal Horizontal Sync Frequency 15 625 KHz Vertical Sync Frequency 50 Hz S N Ra...

Страница 4: ...4 ACCESSORIES U Support Bracket Center Mount Bracket Power Cable IR Remote Control Sun Shield Angle Adjustment Screws ...

Страница 5: ...K button shortcut for start stop recording Press OK button for 3 seconds shortcut for PAIRING Loudspeaker Menu Digital Color LCD screen Power indicator Remote control sensor Light level sensor Mounting bracket installation Volume decrease Select channels Micro SD TF Card Slot PARTS IDENTIFICATION ...

Страница 6: ... specified by SYSTEM SETUP JUMP KEY PAIR Fast pairing when camera is activated SYS PAL NTSC TV system selector MIR MIR Flip selection Press to select MUTE or enable sound Press OK button to enter menu item or save user settings Press OK button shortcut for start stop recording Volume decrease and menu selection left Jump key selector Fast jump to the display mode specified by SYSTEM Press to turn ...

Страница 7: ...t Bracket Single red wire to positive power supply of DC 10 32V Single black wire to GND Single brown wire to positive wire of back up light Single white wire to positive power wire of keft light Single blue wire to positive power wire of right light Single green or yellow wire to any other trigger control The yellow wire will display 2 4 cameras when triggered Battery Angle adjustment screws Auto...

Страница 8: ...When the brown wire is connected to the positive wire of the back up light the monitor automatically switches to CAM4 back up camera when the back up light is turned on The distance grid will also be displayed 1 3 5 When the yellow wire is connected to the positive wire the monitor automatically switches to quad or split display Connection depends on the application request Cameras displayed are s...

Страница 9: ... MENU to display the following options and settings 1 MODE 2 PICTURE 3 MIR FLIP 4 RECORD 5 AUTOSCAN 6 SYSTEM 7 PLAY 8 PAIRING 1 Press Ż or Ź to select MODE Press OK to enter the submenu and press Ż or Ź to select QUAD H SPLIT SPLIT Press MENU to return to main menu ...

Страница 10: ... to enter the setting accordingly When the icons turn red press Ż or Ź on the menu for selection decreasing or adding Press OK to exit the menu At the submenu press MENU to return to the main menu 3 Press Ż or Ź to select MIR FLIP and press OK to select Press Ż or Ź to select NORMAL MIRROR MIR FLIP FLIP Press MENU to return to the main menu ...

Страница 11: ...to select Press OK to exit the menu At the submenu press MENU to return to main menu REWRITE When the disk is full the monitor will delete the earliest manual timing record file one by one and continue recording FORMAT Micro SD card must be formatted before being used All documents in the TF card will be lost when the card is formatted 5 Press Ż or Ź to select AUTOSCAN and press OK to enter ...

Страница 12: ...to select TIME and press OK to set Press Ż or Ź for selection decreasing or adding Press OK to continue the setting when finishing the previous operation COLOUR SYS Press Ż or Ź to select COLOUR SYS and press OK to enter Press Ż or Ź to select NTSC PAL AUTO DIM Press Ż or Ź to select AUTO DIM and press OK to enter Press Ż or Ź to select ON OFF When it is on the monitor will automatically turn dark...

Страница 13: ...arched under file folder named in format of YYMMDD Each file folder includes the video files which are named in for mat of HHMMSS_Channel Source 1 2 3 4 For example 130905 stands for the year 2015 September 3rd 100953_3 stands for 10 09 53am Cam3 The recording file format is AVI and maximum recording time for every single file will last for 10 minutes ...

Страница 14: ... powered for 5s For successful auto pairing the picture appears If pairing is unsuccessful the monitor displays the message No Signal Repeat the pairing procedure MANUAL PAIRING 1 Choose the channel that needs to be set up The monitor will display the message PAIRING START 50 and a counter that counts down 50s 2 Press the pairing button on the power on camera 3 The monitor and cameras will synchro...

Страница 15: ... QUAD 320x240x4 11h 22h 43h 86h 172h SPLIT 400x480x2 13h 25h 50h 101h 201h Symptoms Possible Causes Solutions No picture no sound No signal Improper connection of automobile adapter Use of un authorized power supply Power switch is in OFF position No sound Check whether the camera has power Pair the monitor and the camera again Check whether the sound volume is turned off or set too low Dark pictu...

Страница 16: ...16 JS007WQK ...

Отзывы: